The Support Crew: Is Sony’s a7S II Fit for Full-Time Video Production?
Will using the Sony a7S II for full-time video production be a breeze or will it end up being a battle?
In the last post, we looked at the a7S II’s big-ticket features such as internal 4K recording, 5-axis sensor stabilization, 120fps slow motion, and of course, insane low-light sensitivity.
Now it’s time to dig deeper and look at whether the a7S II has the supporting features it needs to be effective in day to day production work. These features may not garner the same attention as the more exciting features, but they can mean the difference between a camera takes care of business and one that fights against you at every turn.
Electronic Viewfinder
For shooters coming from traditional DSLRs, the a7S II’s electronic viewfinder (EVF) is a revelation. Simply being able to put your eye up to the camera when shooting video is much easier than holding your camera out at arms-length to use the screen on the back of the camera.
The Good
- Large — with a magnification of 0.78x, the a7S II technically has the largest EVF of any camera.
- Sharp — the EVF’s 2359K dot resolution provides good detail (though you’ll still want to use the camera’s other aids– such as focus peaking– for critical focus).
- Smooth — a fast refresh rate delivers smooth motion without stuttering or lag.
The Bad
- Could be sharper — with the same resolution as the a7S II’s EVF, the Panasonic GH4’s slightly smaller EVF (0.67x magnification) delivers greater details.
- Reduced information — the EVF does not display the same information as the a7S II’s rear screen meaning you cannot confirm important details such as the current picture profile or white balance while shooting.
Bottom line: The a7S II’s EVF is big, bright, and smooth. A solid EVF for shooting video, but it loses a few points for lacking detail and failing to display important details while shooting.
User Customization
No matter how good a camera’s menus are, customizable hardware controls are essential to shooting efficiently and avoiding downtime.
With the a7S II’s menus as disjointed as they are, user-assignable hardware controls are even more important. Thankfully, the a7S II has a good amount of customizability to help you stay out of the menus.
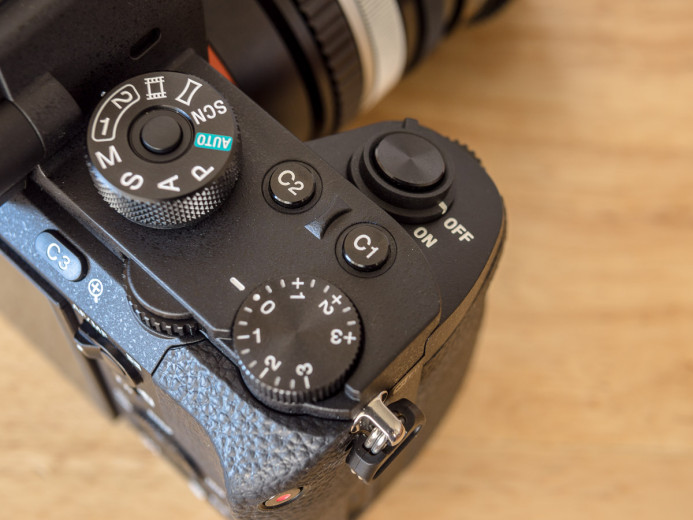
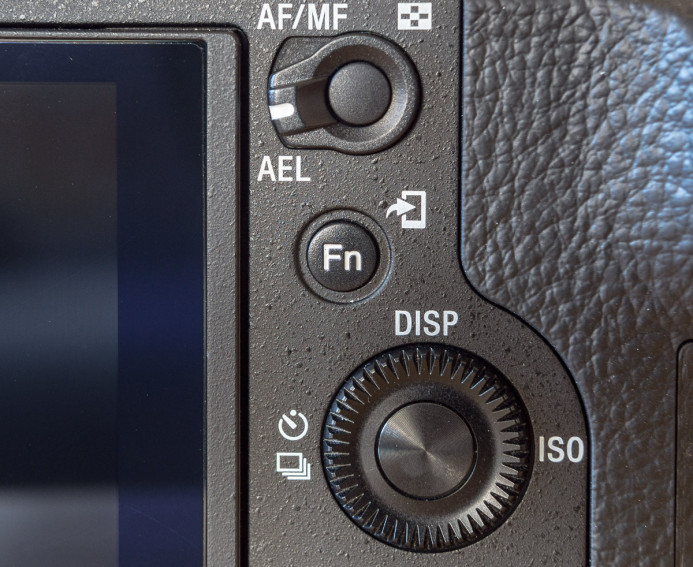
- 9 User-assignable buttons — each button can be assigned one of 63 different functions for instant access to that setting.
- Quick-access function menu — a pop-up menu (launched by a dedicated hardware button) with 12 customizable slots, each of which can be assigned one of 35 different functions.
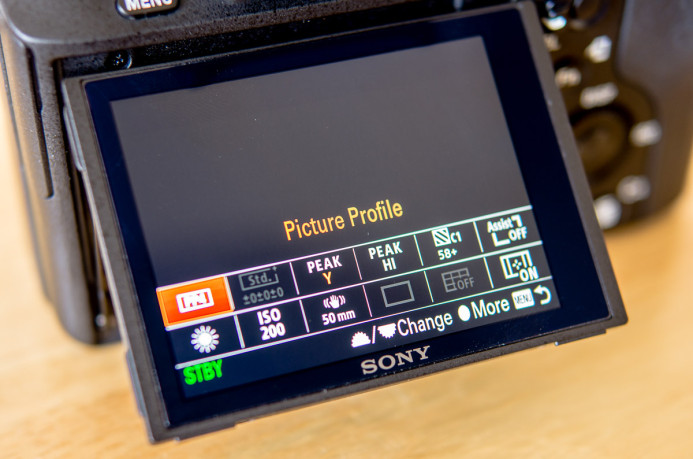
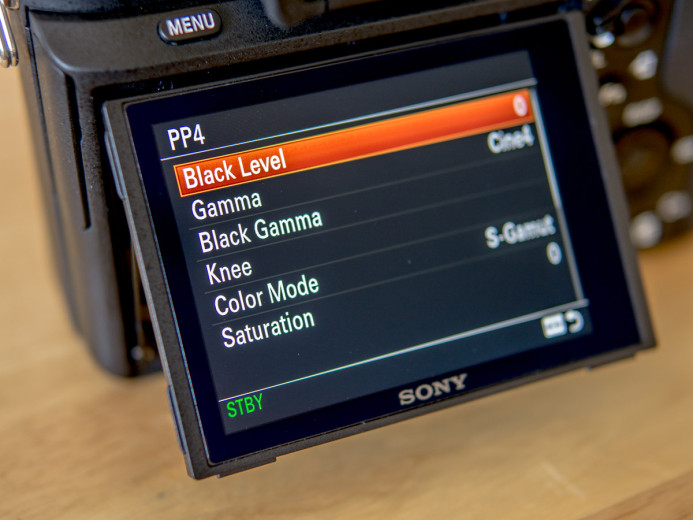
- 9 Picture Profiles — each profile can be fully customized with everything from the gamma profile (e.g. Cine4, S-Log 3, etc.) and the gamut, to image parameters such as sharpening and saturation.
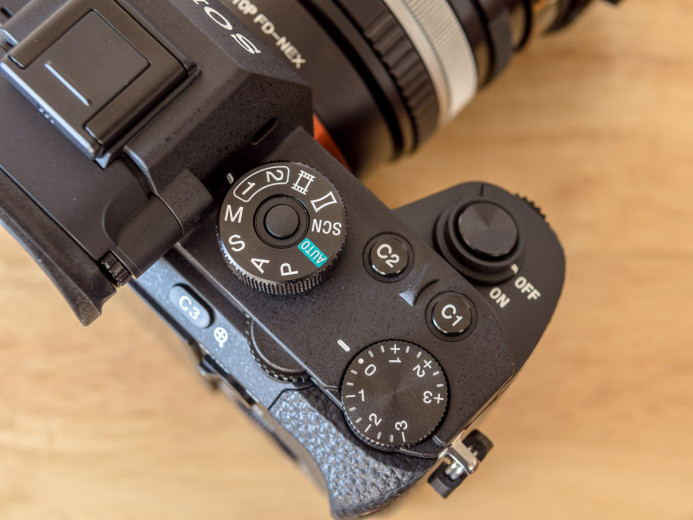
- 6 Custom Presets — transform the a7S II with a twist of the mode dial. Create presets for different shooting situations and be ready to shoot in an instant.
The Good
- Highly customizable — numerous hardware buttons, a quick-access menu, picture profiles, and user presets can all be customized for your specific needs.
- Quick access to most settings — hardware buttons and a quick-access function menu provides access to most of the settings you need while shooting such as focus peaking, zebras, picture profiles, ISO, and white balance.
- Good button placement — most buttons are easily accessible without having to change your grip.
- Deep control over picture profiles — each picture profile has a lot of parameters that can be customized to your specifications.
- Quick setup for different situations — custom presets allow you to do things like quickly switching from shooting in 4K at 24fps to HD at 120fps, along with the necessary changes to shutter speed, ISO, etc.
The Bad
- No access to key video settings — neither the hardware buttons nor the function menu have access to important video-specific settings, such as recording mode or frame rates. This means you’ll need to dig through the menus just to switch from 4K to HD or to grab a shot in slow-motion.
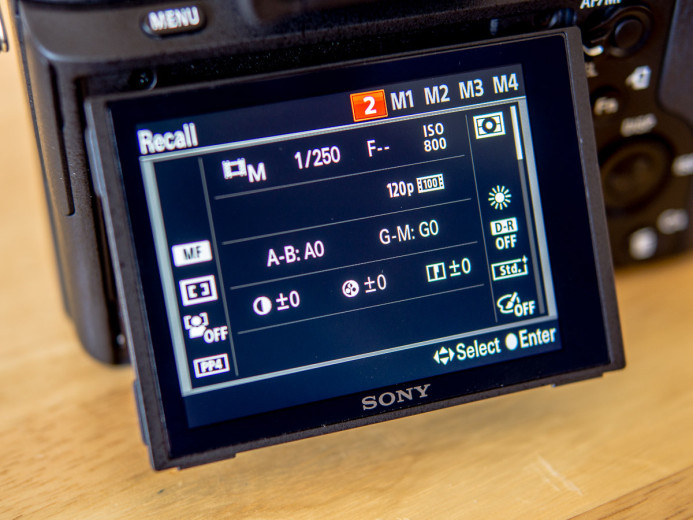
- Custom Presets are a bit buggy — settings saved to a preset (e.g. shutter speed, ISO, etc.) have spontaneously changed on a couple occasions. So far, turning off the camera has restored the saved preset, but it definitely poses a problem when you’re switching between presets in the middle of a shoot, where you need them to function properly.
- Only 2 Custom Presets stored in-camera — you have access to 6 custom presets (1,2,M1,M2,M3, and M4), but only presets 1 and 2 are stored in-camera. M1 through M4 are stored on the memory card, which means you’ll lose access to those presets when you switch to a fresh card.
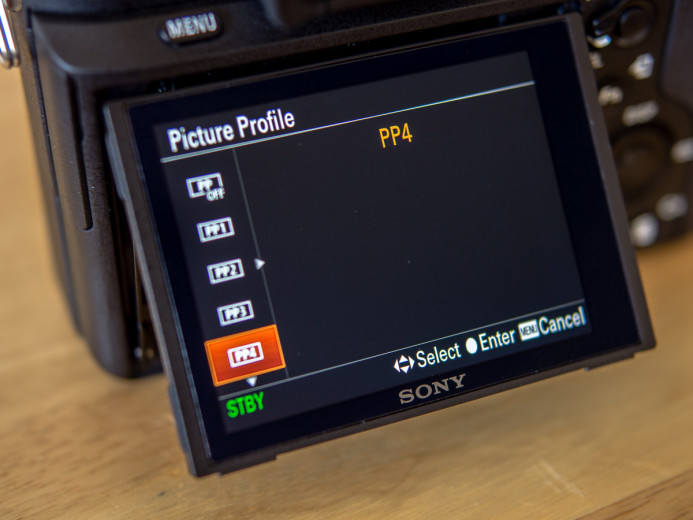
- Wasted space on Picture Profile selection screen — this space could be used to display a profile’s settings, but instead you’re totally in the dark. You have to dive into the profile’s settings if you want to see how it is set up.
Bottom line: The a7S II has a lot of options for customization, but lacks access to key video production settings and can be a bit buggy at times.
Evaluating Exposure
The a7S II has a trio of tools to help you nail exposure.
- Histogram — displays the distribution and intensity of luminance values in the image to help you see how your image is being exposed.
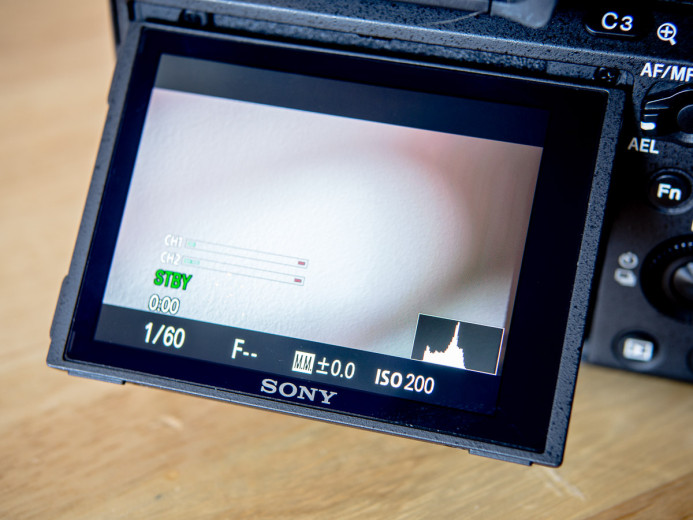
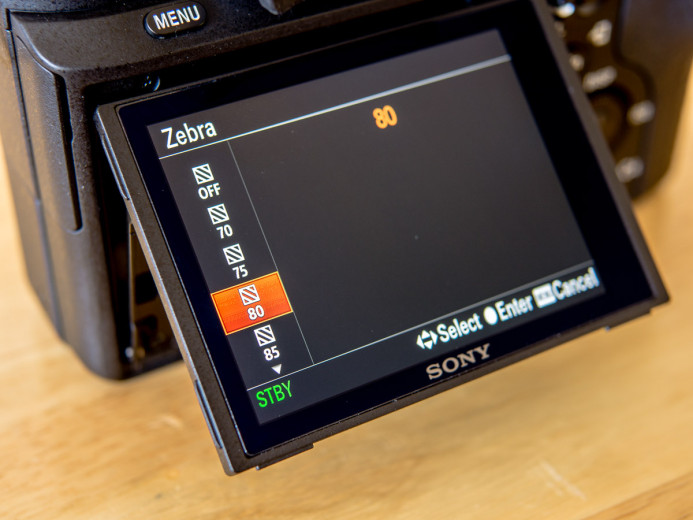
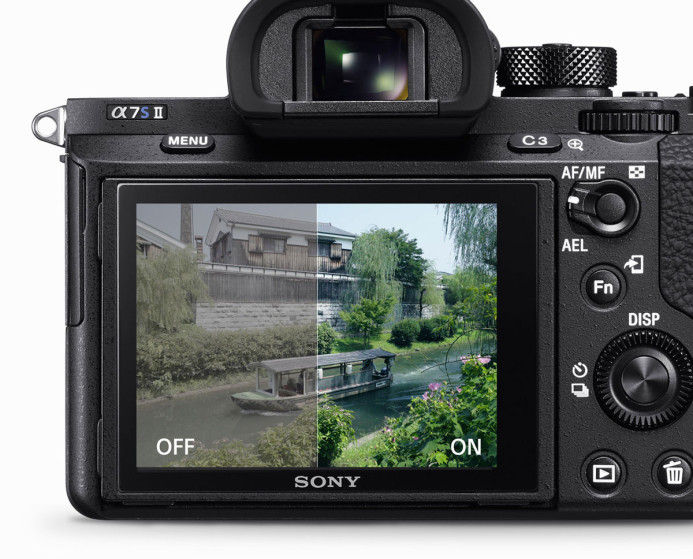
- Zebras — highlights parts of the scene that exceed the level of brightness you select.
- Gamma Assist — previews the image with a Rec. 709 gamma when shooting in a flat log profile, making it easier to judge exposure.
The Good
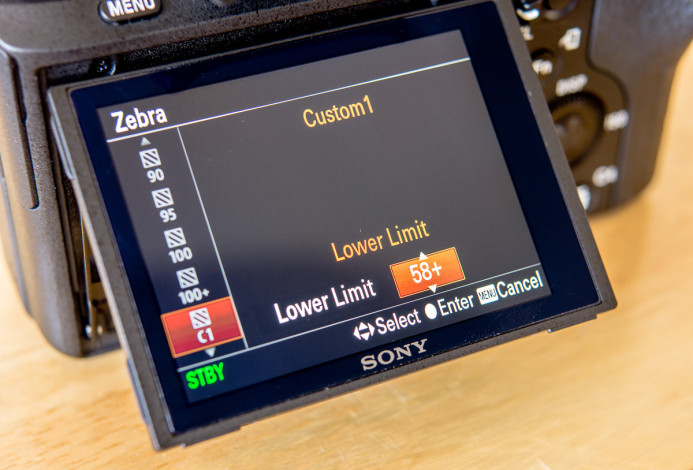
- Zebras have full access to IRE values — the are IRE presets from 70 to 100+ (in 5-step increments), and also two user presets that can be set to any IRE value from 0-100+.
- Manage clipping — zebras clearly indicate what parts of the frame are overexposed, allowing you to prioritize exposure for specific elements in the scene or protect the highlights from losing detail.
- Monitor in Rec. 709 while recording in log — Gamma Assist gives you a more familiar preview of what you’re shooting, while saving the flat log-encoded footage for more flexibility in post.
- Gamma Assist can be activated automatically — turns on the appropriate Rec. 709 preview only when shooting in S-Log 2 or S-Log 3.
The Bad
- Small histogram — good enough for gauging overall exposure, but too small for precise evaluation.
- Truncated histogram readout when shooting in S-Log — a log gamma does not cover the entire luminance range, so you could actually be clipping even if the histogram doesn’t display anything at its edges. As a result, it can be harder to use the histogram to evaluate exposure because the clipping points are not clearly marked.
- Gamma Assist can be misleading — the preview can make your image look overexposed with clipped highlights even though the log footage is actually well within range. Trying to protect these highlights as seen through the Gamma Assist preview can lead to underexposed log footage.
Bottom line: While a waveform monitor would be nice, the a7S II has the essential tools for properly exposing your footage.
Staying Focused
The a7S II’s EVF and rear screen are not bad, but you’ll definitely want to use the camera’s additional tools for maintaining critical focus.
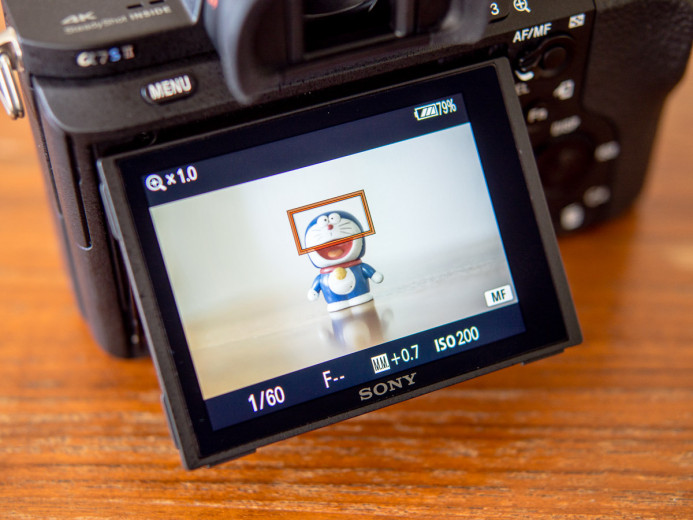
- Focus peaking — highlights in-focus edges to help you see where the plane of focus is in the frame.

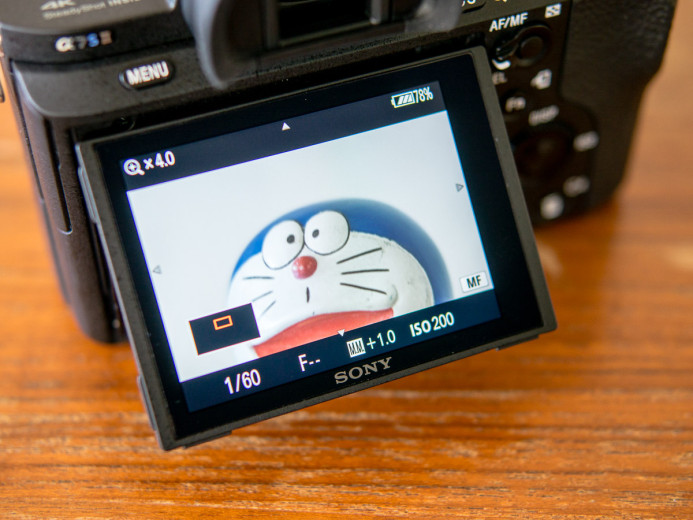
- Punch-in Magnification — enlarge a portion of the frame for more detail when checking focus.
The Good
- Focus peaking works relatively well — provides a good guide of what is in focus.
- Customizable focus peaking color — you can choose from 3 different colors (white, yellow, and red) for using focus peaking in different environments.
- Punch-in magnification works during recording — confirm focus in the middle of the shot so you can keep shooting without wondering whether you’re buzzing focus or not.
The Bad
- Focus peaking is unrefined — peaking is rather blocky and does not smoothly highlight in-focus areas. Peaking can also be overbearing even at the lowest sensitivity setting in some environments, which makes it less useful.
- Magnified image is a bit soft — this can make it difficult to gauge focus. By comparison, the Panasonic GH4’s punch-in magnification maintains a noticeably sharper image.
- Only one magnification option — the a7S II’s 4x magnification may not be enough when focusing on objects with fine detail. By comparison, the Panasonic GH4 provides multiple levels of magnification (3x to 10x in 0.1x increments).
Bottom line: The a7S II’s focus aids lack refinement, but they are usable as guides to help you keep your subjects in focus. Punch-in magnification while recording is also very helpful.
Aspect Ratio Guides
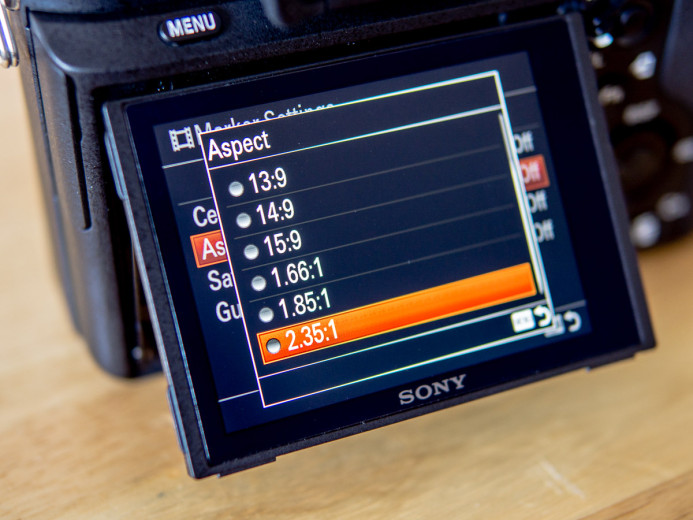
The a7S II provides a variety of on-screen guides, including guides for different aspect ratios. This allows you to maintain proper framing when delivering to different formats such as 4:3 or 2.35:1.
The Good
- Good selection of aspect ratios — guides for most of the common aspect ratios are present and accounted for.
- Multiple guides can be enabled simultaneously — display a grid and aspect ratio crop marks at the same time.
The Bad
- Cannot display multiple aspect ratio guides simultaneously — would be useful if you need to deliver the finished video in both 4:3 and widescreen formats.
Bottom line: The a7S II’s customizable on-screen guides help you frame your shot for a variety of common aspect ratios.
Built-in HDMI Port Protection
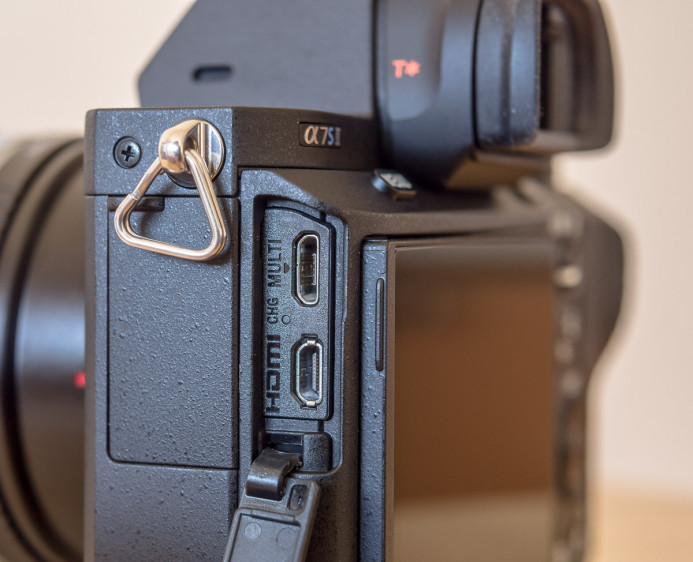
The micro HDMI port gives you access to a high quality video signal from the camera, but it’s also one of the main points of failure on these compact cameras. These ports are generally not robust enough to stand up to heavy use and stress on the plugs.
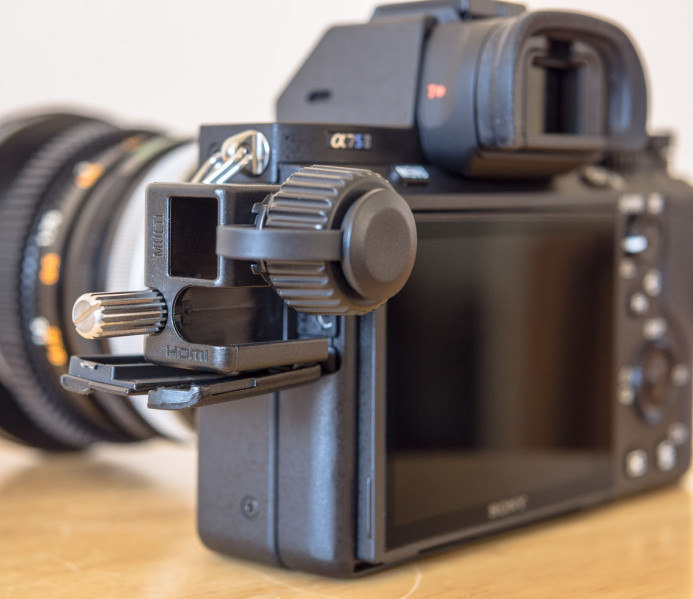
Repairing a broken HDMI port can be expensive, so it’s great to see that Sony has designed a custom solution to protect the a7S II’s HDMI port. The a7S II comes with a small plastic housing that attaches to multiple points on the camera’s body for a secure hold around the HDMI port.
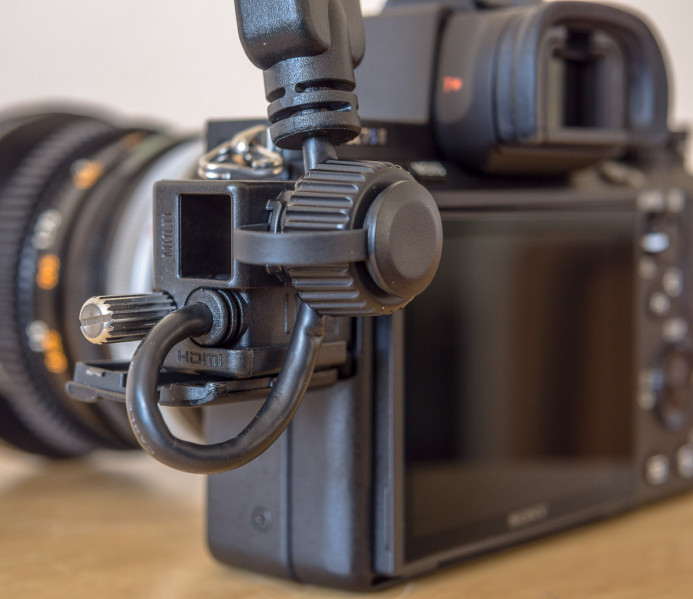
This housing protects the HDMI cable from bumps, and it also features a cable pinch to keep the cable from being pulled out of the port.
The Good
- Custom-fit HDMI protection — the housing locks into grooves in the camera body and also uses a thumbscrew to maintain a secure hold around the HDMI port.
- Good protection from bumps — protects the HDMI port from damage if the cable is bumped or snagged on something.
- Cable pinch works well — the pinch’s “teeth” keep the cable from slipping.
The Bad
- Not bomb-proof — the HDMI protector is made out of plastic, so it can still flex under heavy stress.
- Large HDMI plugs may not fit — you may not be able to use certain cables with the a7S II’s HDMI protector if the plug is too large.
Bottom line: It’s refreshing to see a camera manufacturer include a solution for protecting the HDMI port, let alone one that is well-designed and quite effective in reasonable conditions.
Is the a7S II Fit for Video Production?
The a7S II has a lot going for it when it comes to using the camera for video production.
Following the action is easy with the large EVF and almost every button is customizable for quick access to frequently-used features and settings. The camera’s focus and exposure tools are also helpful, as are the on-screen guides for various aspect ratios.
That said, there are also a few issues knock the a7S II down a peg or two, such as no access to key video-specific settings via the function buttons and only two in-camera slots for user presets.
The unrefined focus peaking and limited punch-in magnification could also be better considering cameras with better performance like the Panasonic GH4 were released over a year before the a7S II.
Overall the camera’s support features are usable, so whether the a7S II is a good fit really comes down to whether you’re willing to work around these inconveniences.
For users who need faster access to frame rates and recording modes, these omissions could be deal breakers. However, features like punch-in magnification during recording and aspect ratio guides may be more important to other shooters.
Personally, I’m sure I’ll never enjoy having to trudge through the menus just to switch from 4K to HD, but I’m hoping I’ll at least get used to it after shooting more with the camera.
Ideally, Sony would include access to these strangely-missing settings in a future firmware update. This would make the a7S II much more usable, but setting up different custom presets for switching between 4K and slow-motion recording also help to ease the pain a bit in the meantime.
Now that we’ve covered the pros and cons of the a7S II’s big and small features, the next post in this series will dig into the a7S II’s real issues, which could knock this camera out of the running for many shooters. Sign up below for automatic updates find out when the next installment in this series is released.

