Varavon Birdycam 2 Review
Balance is essential when choosing a 3-axis gimbal.
Not only does a gimbal need to balance the camera, but it also needs to provide the right balance of features and functionality you need, while still staying within your budget.
This means that a gimbal’s capacity is just as important as the gimbal’s own weight— if it’s too heavy to shoot with, it doesn’t matter how much camera it can handle.
In the same way, it’s also important to recognize that build quality may suffer if your budget is too low.
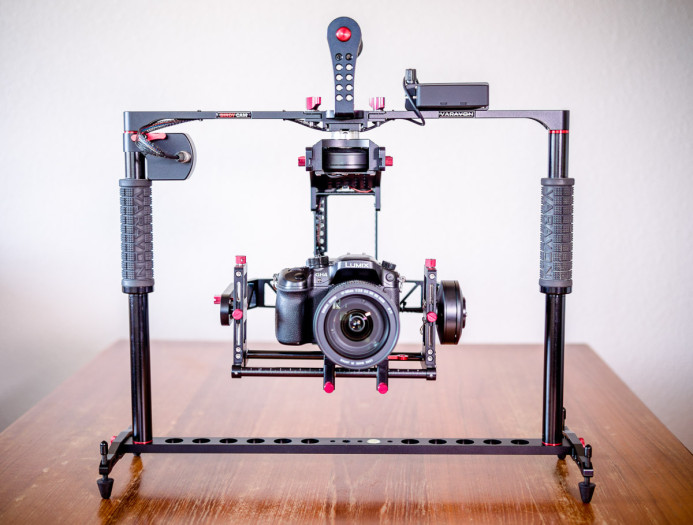
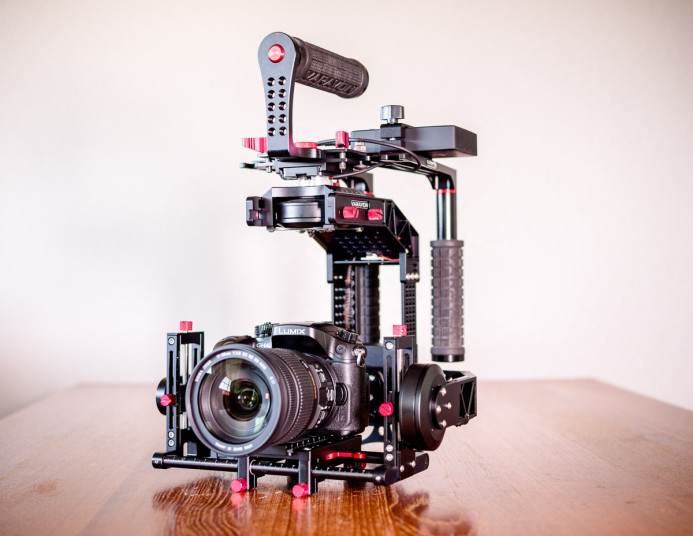
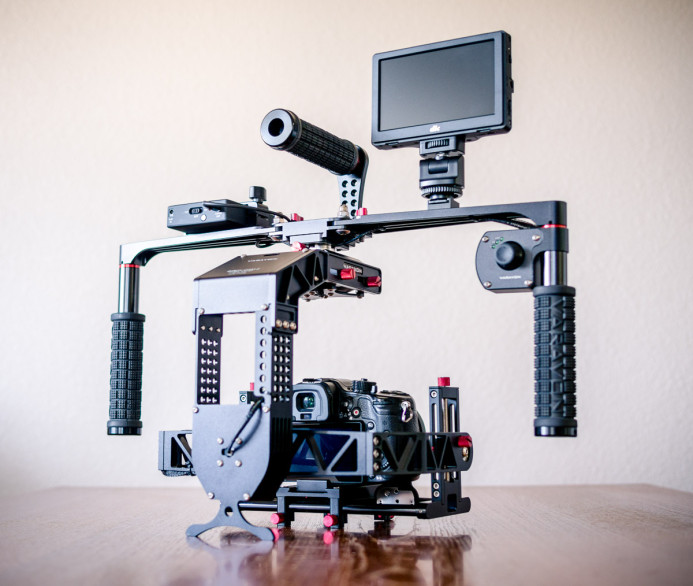
Varavon’s Birdycam 2 is a 3-axis gimbal designed for compact cameras like the Panasonic GH4, Sony a7S, and Canon 5D MKIII, that aims to strike the perfect balance for shooters needing robust stabilization without breaking the bank.
Does the Birdycam 2 hit the target and deliver the right balance of features, functionality, and value? B&H sent over the Birdycam 2 for us to test and we put it into the field to find out.
This is the first part of a two-part review, where we dig into the Birdycam 2’s features and functionality.
Just the Stats Ma’am
- Weight: 6.2lb
- Weight Capacity: 5.5lb
Setup
- Tool-less balancing: Yes
- Quick-Release: Yes
- Stand required: No
Control/Connectivity
- Joystick: Yes
- Bluetooth: Yes
- Remote Control: No
Operation
- Handheld: Yes
- Inverted: Maybe
- Top Handle: Yes
Power
- Battery: External
- Run time: 2hr
Support
- Warranty: 1 year
- Location: USA (California) / Korea (International)
- Price (street): $1999
Overview
The Birdycam 2 does a good job of covering the fundamentals with solid build quality and weight capacity. Accessibility is generally good, but there could be some issues in certain situations.
Solid Build Quality
The Birdycam 2 is very sturdy. The gimbal’s full-metal structure is strong and rigid throughout without any signs of flexing or instability.
The gimbal’s components are all well-machined. Everything fits together well and all corners and edges are smooth, making the Birdycam 2 comfortable to handle. The Birdycam 2’s frame is anodized with a smooth black finish that resists scratches quite well.
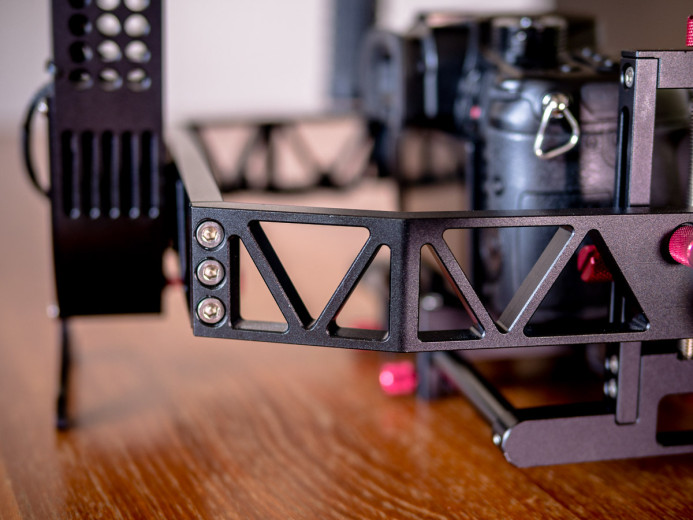
Additionally, Varavon have removed a good amount of metal from the Birdycam 2’s frame. This results in a lightweight, yet solid gimbal.
Bottom line: The Birdycam 2 is solid and polished. No issues with build quality.
Accessibility
The Birdycam 2 is designed for smaller cameras like the Panasonic GH4, Sony a7S, and Canon 5D MKIII. This allows the gimbal to remain compact, but its small size may also introduce some accessibility issues depending on your setup.
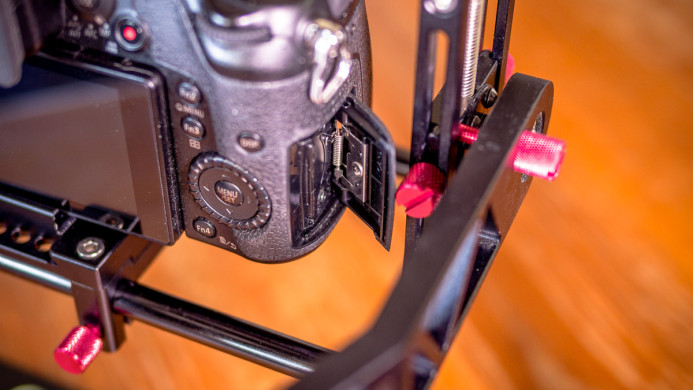
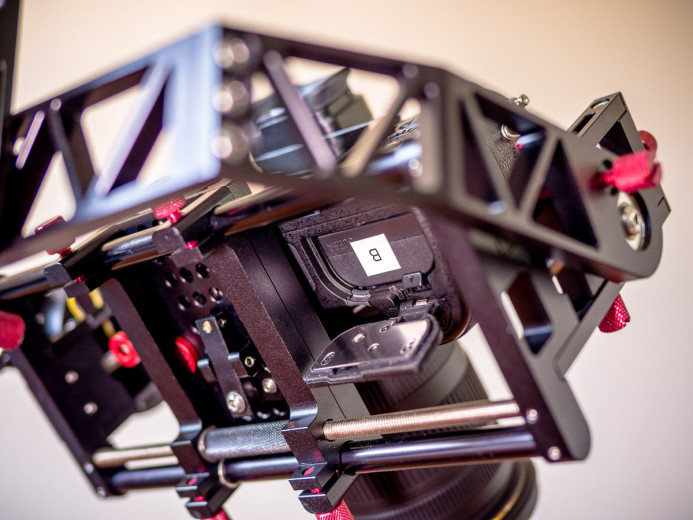
For example, the GH4’s memory card slot was blocked by the Birdycam 2’s frame when used with some lenses.
The camera will move more forward or backward depending on the body and lens you’re using, so this is not always an issue, but the Birdycam 2’s camera platform is narrow enough that there’s a good chance that the camera’s memory card slot will be blocked if it lines up with the gimbal’s pitch adjustment column.
When the memory cards slot is blocked, you will need to release the camera from the gimbal to swap memory cards, and then rebalance the camera before you can begin shooting again. This additional step only adds about a minute of downtime as long as you mark the camera’s position before removing it, but a slightly wider frame would have avoided this issue altogether.
Thankfully, the GH4’s battery is fully accessible when mounted on the Birdycam 2. Battery access should not be an issue for most cameras on this gimbal.
Bottom line: No problems with battery access, but the memory card slot may be blocked depending on your camera/lens setup due to the narrow camera platform.
Good Weight Capacity
Supporting larger and heavier cameras requires a bigger gimbal and more powerful motors, resulting in a heavier gimbal that can be uncomfortable to use for long durations.
As the Birdycam 2 is designed for smaller cameras, it is relatively lightweight, tipping the scales at a manageable 6.2lb. This allows you to shoot for a good amount of time without becoming fatigued too quickly.
At the same time, the Birdycam 2 supports loads up to 5.5lbs, which is pretty good for such a lightweight gimbal. With this capacity, the Birdycam 2 can handle a good range of setups based around smaller cameras like the Panasonic GH4 or Sony a7S.
Bottom line: The Birdycam 2 is compact and lightweight, but it can still handle most setups when shooting with smaller cameras.
Design
The Birdycam 2 incorporates several innovative features into its design that set it apart from other 3-axis gimbals.
Leave the Stand at Home
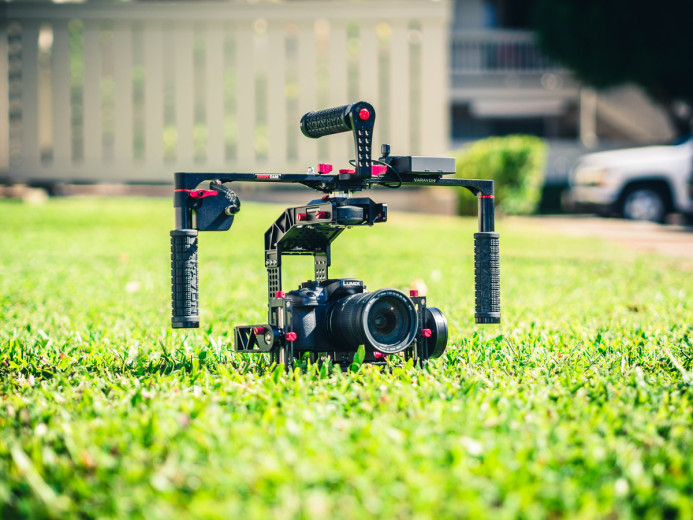
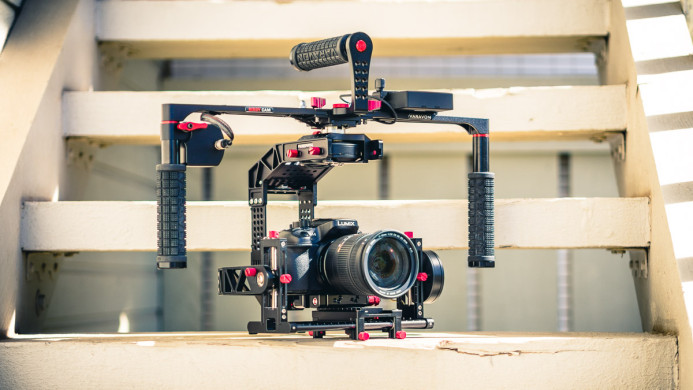
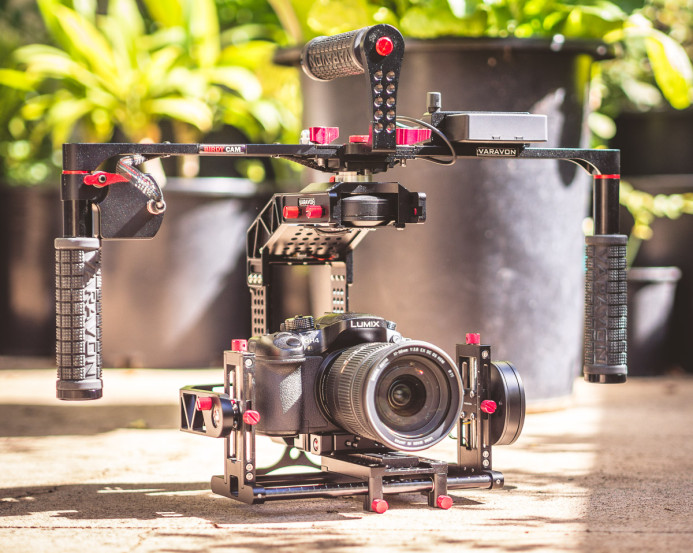
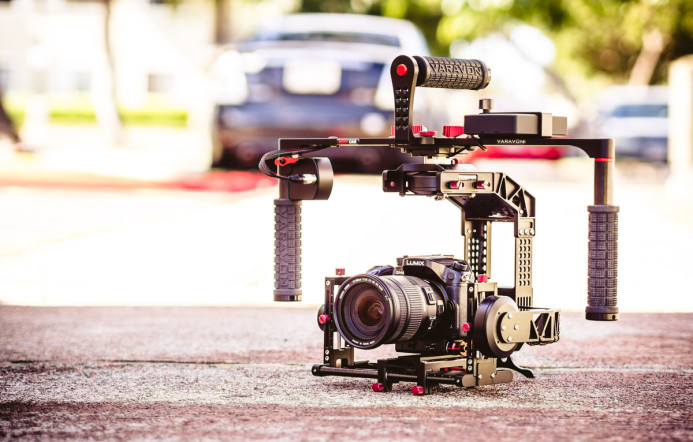
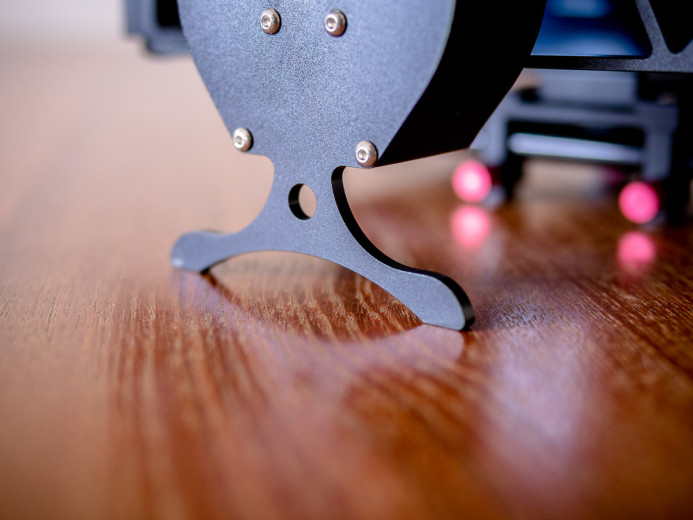
One of the Birdycam 2’s most unique features is its built-in stand. Most gimbals require you to carry around a separate stand in order to set the gimbal down even for just a moment, but the Birdycam 2 can be put down on any flat surface without missing a beat thanks to its built-in stand.
Carrying a separate stand for the gimbal everywhere you go is inconvenient at best, and if you’re a solo shooter, it might not even be an option. As lightweight as these smaller gimbals are, you’ll still need to take a break from time to time, so the ability to easily set the Birdycam 2 down whenever you need to catch your breath is huge.
The Birdycam 2’s built-in stand is at the same level as the camera platform, so that the gimbal’s weight is distributed across the stand and the platform when you set it on the ground.
Of course, the Birdycam 2’s full stand is required to balance the gimbal when changing cameras and/or lenses, but at least you can leave this at home base, where you’ll need to return to in order to swap camera bodies or lenses anyway.
Bottom line: The Birdycam 2’s built-in stand is perfect for setting the camera down when shooting in the field without requiring a separate stand.
Folding Arms
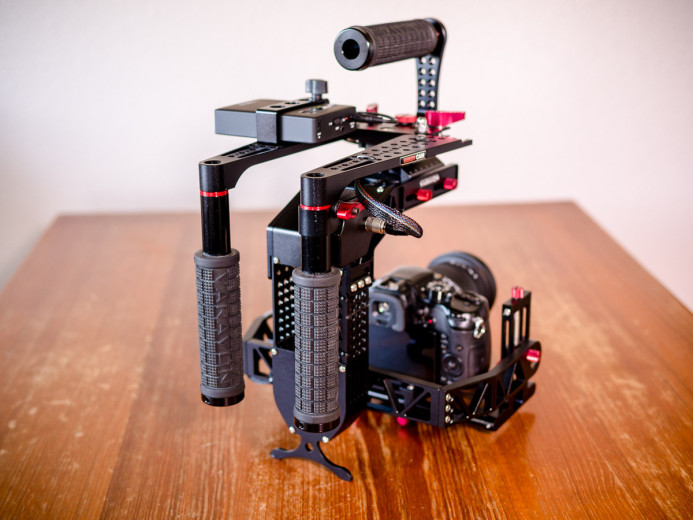
Like most gimbals, the Birdycam 2 is usually operated by gripping handles on arms extending outward to the left and right of the gimbal. However, the Birdycam 2’s arms have a secret— they can also be folded back, which is especially handy when shooting in tight spaces.
When the Birdycam 2’s arms are folded back, you operate the gimbal with the top handle. Moving the arms out of the way also allows you to bring the gimbal closer to your body, which is useful when shooting low to the ground as it keeps the gimbal from being inadvertently knocked by your legs.
As a bonus, folding the arms back also allows the Birdycam 2 to be packed up into a small space for storage and transportation.
Bottom line: The Birdycam 2’s arms fold back, making it easier to shoot in tight spaces.
Top Handle: Solid & Functional
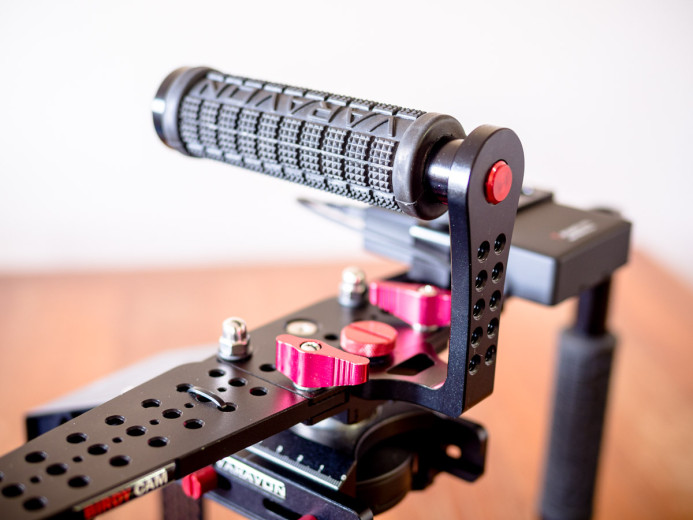
The Birdycam 2 features a solid top handle with a comfortable rubber grip. The handle is securely attached to the gimbal, allowing you to operate the gimbal at any angle with confidence.
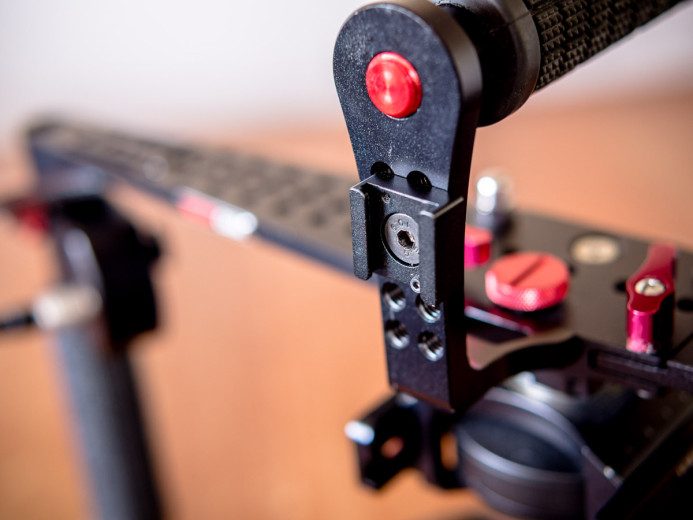
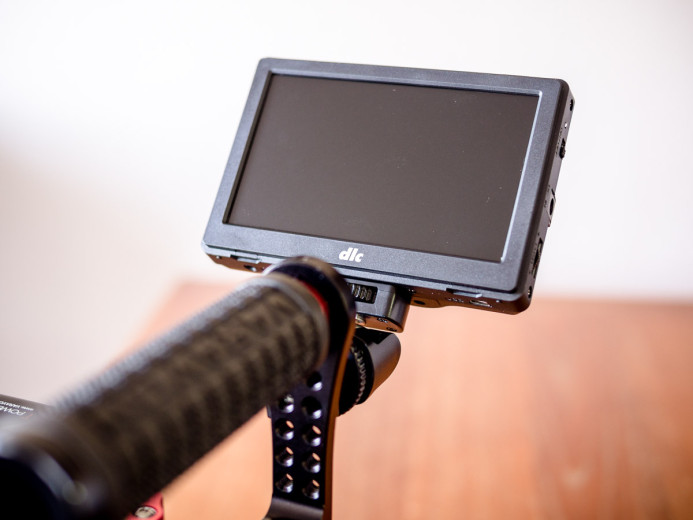
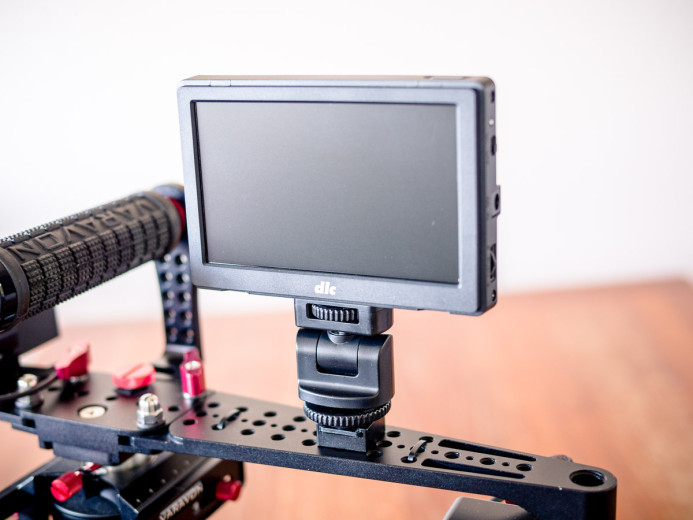
Varavon also makes good use of the top handle’s vertical stem by adding 2 columns of 1/4-20 threaded holes that you can use to mount accessories like external monitors.
Bottom line: The Birdycam 2’s top handle is solid, comfortable, and has industry-standard mounting points for adding accessories.
Multi-Functional Joystick
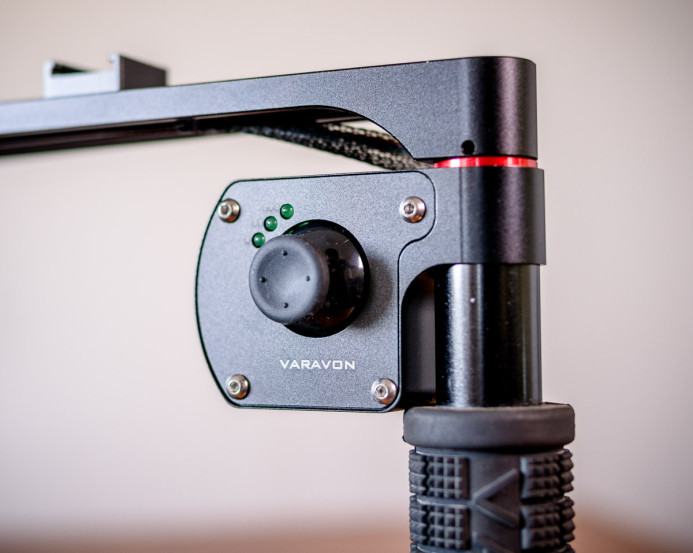
The Birdycam 2 also features a joystick for controlling various aspects of the gimbal.
Camera Orientation
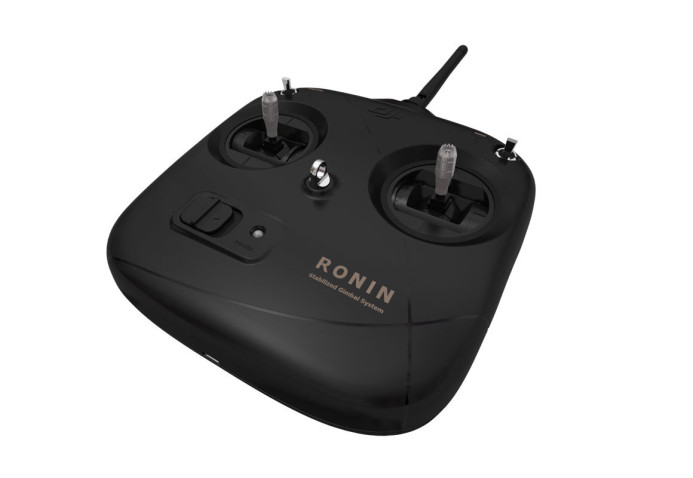
Some gimbals– such as DJI’s Ronin— allow a 2nd operator to control the camera’s orientation using a wireless controller. This can be useful as it allows one person to concentrate on operating the gimbal, while another person focuses on framing and composition.
That said, this kind of setup requires a larger crew and a more involved setup, such as extra equipment to wirelessly transmit the camera’s video feed to the the 2nd operator.
If you’re a solo shooter or want to shoot as minimally as possible, the Birdycam 2’s joystick allows you to operate the gimbal and control the camera’s orientation simultaneously. There is definitely a learning curve to doing both of these things at the same time, but with practice it becomes more natural.
Profile Selection
Most 3-axis gimbals allow you to switch between 3 different profiles, but the Birdycam 2 features a total of 5 different profiles that you can use for shooting in different situations.
When you want to switch to a different profile, you simply press the joystick like a button multiple times to match the profile that you want to use. For example, press the joystick once to switch to Profile 1, and press it three times to switch to Profile 3.
Strangely, the Birdycam 2 does not include any documentation regarding what each profile does. Here is a description of each profile for your reference:
- Follow Yaw
- Follow Yaw + Joystick Pitch/Yaw
- Follow Pitch/Roll/Yaw
- Follow Yaw + Joystick Pitch/Yaw (Fast)
- Follow Yaw (Slow)
You also have full control over customizing these profiles or loading completely new profiles using software like SimpleBGC. We’ll cover customizing the Birdycam 2’s profiles in part two of this review.
Intuitive Mode Indicator
With so many profiles to choose from, the Birdycam 2 has a simple, yet intuitive way to determine which profile is currently active at a glance.
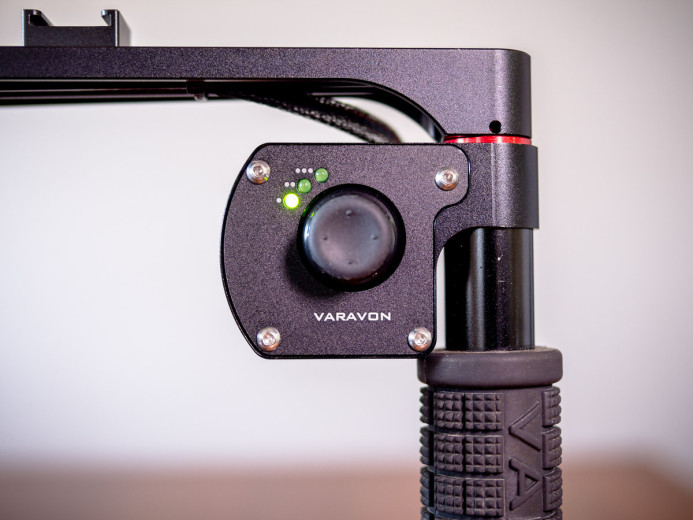
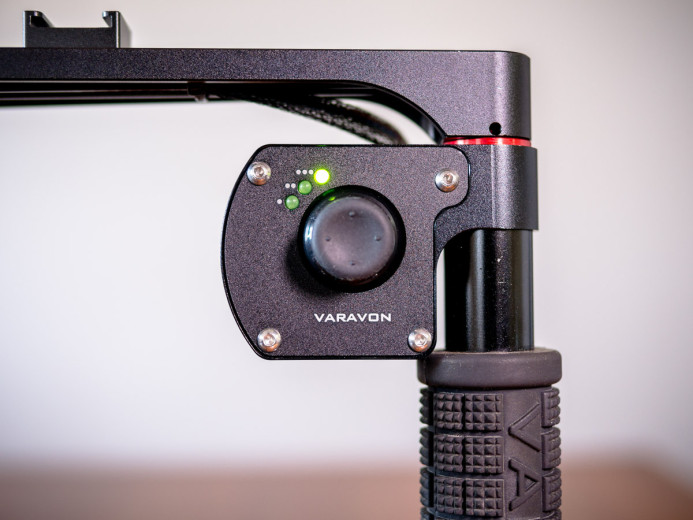
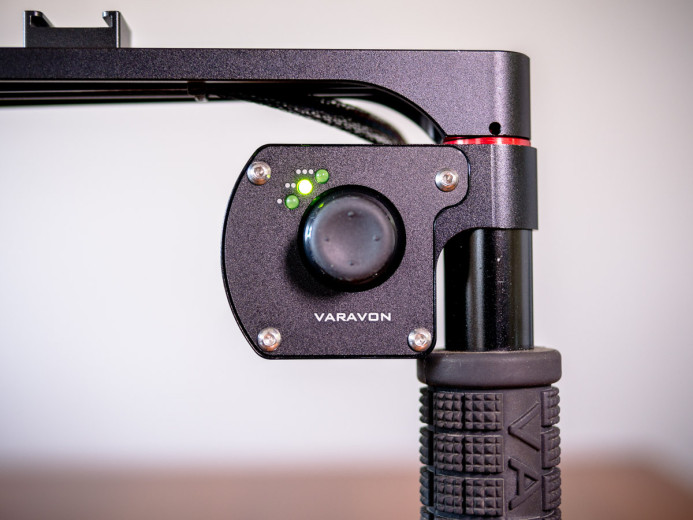
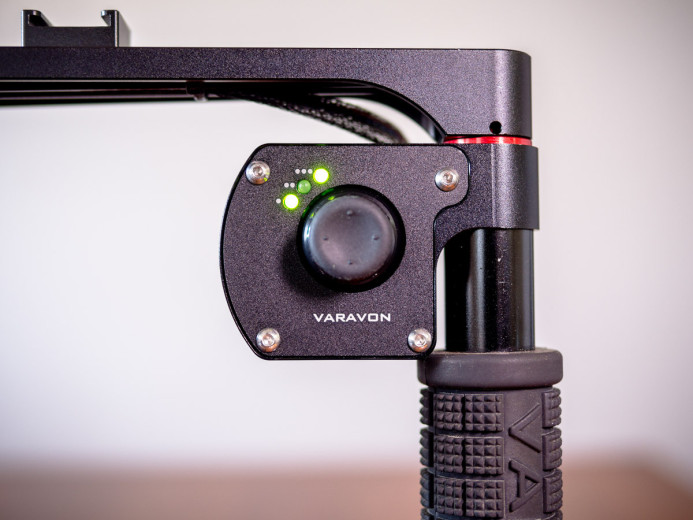
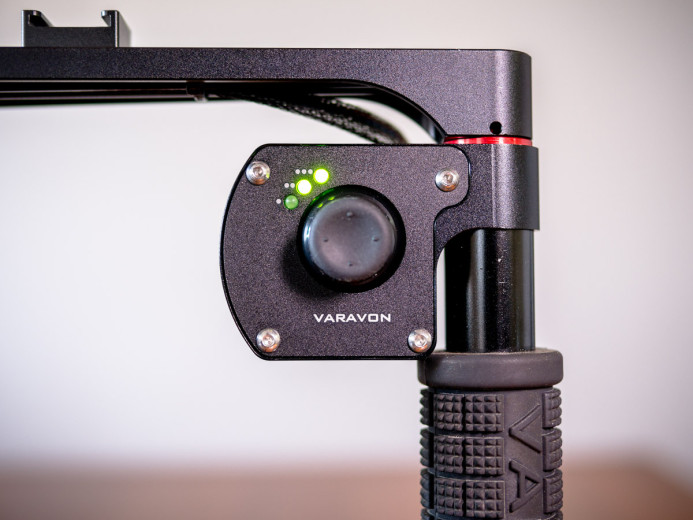
The Birdycam 2 has 3 green LEDs next to the joystick. One or more of these LEDs light up depending on the currently-selected profile.
The Birdycam 2 has 3 green LEDs next to the joystick. One or more of these LEDs light up depending on the currently-selected profile.
A single LED is activated for the first 3 profiles:
For the 4th profile, the 1st and 3rd LEDs are activated (1+3 = 4):
Similarly, the 2nd and 3rd LEDs are activated for the 5th profile (2+3 = 5):
Bottom line: The Birdycam 2’s joystick gives you full control over framing and makes it quick and simple to switch between profiles for shooting in different situations.
Enhanced Visibility
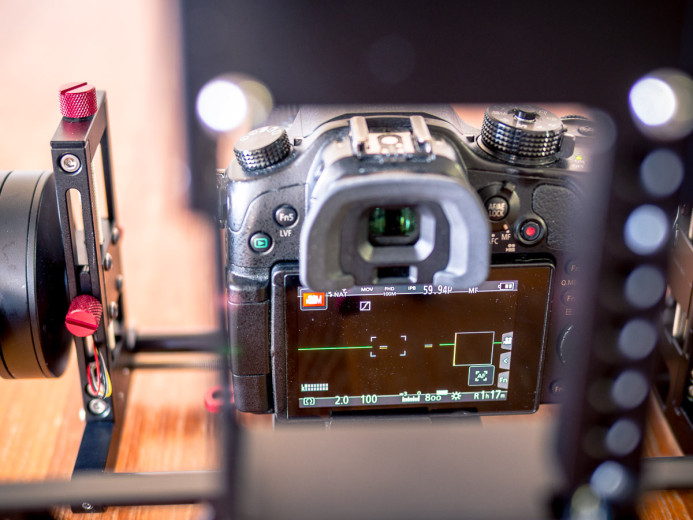
While the aforementioned cutouts in the Birdycam 2’s frame help to reduce its weight, it also has another benefit– you can see the camera’s screen when you’re shooting.
Most gimbals have a solid column that blocks your view of the camera’s screen, which essentially forces you to use an external monitor. The wide opening in the Birdycam 2’s rear column provides good visibility of the camera’s screen, giving you the option to choose whether you want to use an external monitor or not.
For example, the GH4’s screen is more than sufficient for framing when holding the Birdycam 2 at eye-level.
Using an external monitor may be ideal when shooting at high or low angles, but I would use the camera’s own screen whenever possible because it is stabilized along with the camera, making it easier to judge shot composition.
Bottom line: Use an external monitor or the camera’s own screen– it’s your choice thanks to the Birdycam 2’s increased visibility.
Ample Mounting Options
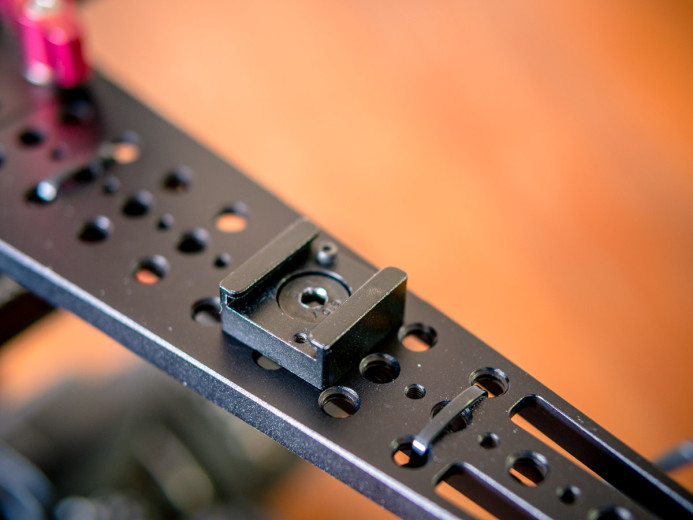
One of the first things you’ll notice about the Birdycam 2 is that it doesn’t use the same tubular arm design as most other gimbals. Instead, the Birdycam 2’s arms are flat, which provides a lot more surface area for mounting points.
The Birdycam 2’s flat arms are covered with 1/4-20 threaded holes, giving you a lot of flexibility for mounting additional accessories using rigging gear you probably already have. The best thing about this is that you aren’t forced to buy expensive custom monitor clamps just to mount accessories to this gimbal.
For example, you can attach an inexpensive cold shoe to the arm to use as a quick-release mount for an external monitor, LED light, or microphone. In fact, because the Birdycam 2 has so many mounting points, you can easily mount all three on the gimbal.
Bottom line: The Birdycam 2’s arms are plastered with industry-standard mounting points for mounting additional accessories like monitors, microphones, and LED lights on the gimbal.
Birdycam 2: Small Gimbal, Big Value
Varavon sure packed a lot of features and functionality into the Birdycam 2. For about $2K, you get a well-built 3-axis gimbal with a smart design and a weight capacity that can handle most setups when shooting with cameras like the Panasonic GH4, Sony a7S, and Canon 5D MKIII.
On top of that, the Birdycam 2 also includes ample mounting points for your accessories, Bluetooth connectivity, and a joystick. These are often add-ons for other gimbals that can quickly inflate a gimbal’s total cost, so it’s nice to see Varavon make the Birdycam 2 all-inclusive.
In terms of features and functionality, the Birdycam 2 packs quite a punch.
Nonetheless, smooth footage is what matters most at the end of the day, so part two of this review will cover the Birdycam 2’s usability and performance. Sign up below to be notified automatically when the next part of this review is released.
Related
- Varavon Birdycam 2
- Varavon Birdycam 2 with Remote Controller — Allows a 2nd operator to control framing and composition.
- Spare Birdycam 2 Battery Pack (also includes a coupler for powering the Panasonic GH4)
- SimpleBGC GUI Software — Software for tuning the Birdycam 2’s profiles.
- Panasonic GH4
- Sony a7S
Stabilizing the Panasonic GH4
3-Axis Gimbals
- 3-Axis Brushless Gimbals: The Definitive Guide
- Five 3-Axis Brushless Gimbals for the Panasonic GH4
- Review: Varavon Birdycam 2
Sliders
- Stay on Track: Using Sliders with the Panasonic GH4
- 10 Things You Should Know Before Buying a Slider for the Panasonic GH4
- 6 Purpose-Built Sliders for the Panasonic GH4
- Cinevate Duzi Slider Review: Solid, Compact, Smooth
More Panasonic GH4 Guides
- Why You Should Be Excited About the Panasonic GH4
- Lenses for the Panasonic GH4 — Awesome glass for an awesome camera.
- Memory Cards for the Panasonic GH4 — Get the right memory cards for HD and 4K.
- Configuring the Panasonic GH4 for Video Production — Set the GH4 up for filmmaking.
- Rigging the Panasonic GH4 — Cages, Rigs, Components, Gear, and Reviews.
- Stabilizing the Panasonic GH4 — Tripods, Monopods, Sliders, 3-Axis Gimbals, etc.
- Maximizing the Panasonic GH4’s Audio Performance — Sound matters.
- Powering the Panasonic GH4 — Keep the GH4 shooting all day.
- Should you buy the YAGH for the Panasonic GH4?
- 6 Reasons Why DSLR Shooters Love the Panasonic GH4
