4 Unique Ways to Use Magic Bullet Looks to Load LUTs in Sony Vegas Pro
LUTs can serve as a useful starting point in your color grading process or they can be used to apply a final look to your finished video.
In very basic terms, a LUT (“Look Up Table”) is a preset “look” that you apply to your footage. These presets can be used to give your footage a unique style, but it can also be used to make baseline adjustments as a starting point before you dive into color grading.
It’s clear that LUTs can drastically streamline your post-production workflow, but how do you use LUTs in Sony Vegas Pro?
Vegas Pro does not currently offer any built-in way to apply LUTs to your footage, but that doesn’t mean you have to be left out in the cold. Red Giant sent over Magic Bullet Looks and I found that working with LUTs was easy with this software.
Here’s a step-by-step guide on the various ways you can use Magic Bullet Looks to apply LUTs to your footage in Sony Vegas Pro.
Download: Magic Bullet Looks — If you don’t already have Magic Bullet Looks, you can download a free trial to follow along with this tutorial.
LUT Downloads
Here are some LUTs you can use with your footage.
Free
Paid
Quick Reference: Vegas Pro Video FX Pipeline
There are several different points in Vegas where you can add effects to your footage, each of which is suited for a particular need. Here’s a quick reference Vegas’ video FX pipeline:
- Source FX — Apply effects to the source media. Effects added to the source media will affect all instances of the media project-wide.
- Event FX — Apply effects to a single event (e.g. a video clip) on the timeline. These effects will only affect the specific clip on the timeline.
- Track FX — Apply effects to a video track on the timeline. These effects will affect all clips on the track.
- Video Output FX — Apply effects to the entire project. These effects will affect all clips on the timeline.
The Baseline: Apply a LUT to Project Media
Some footage may need to have a baseline LUT applied to make working with your footage easier during editing (e.g. raw or log footage). This is simple to do using Vegas Pro’s Media FX:
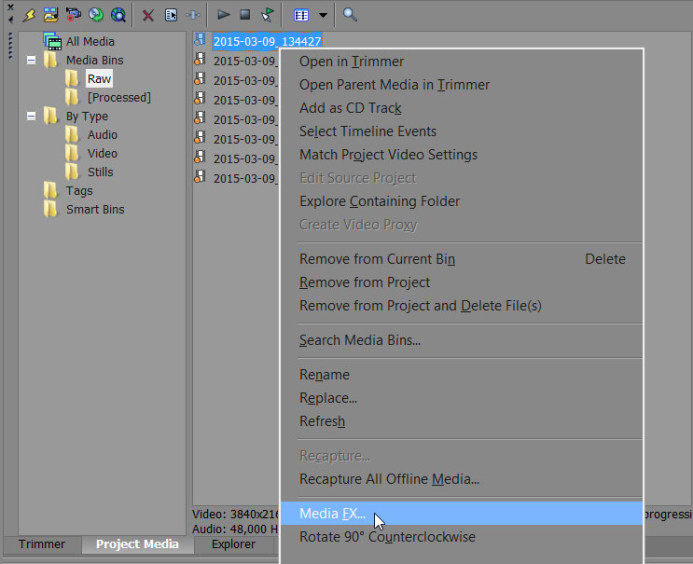
- Right-click the clip(s) in Vegas Pro’s Project Media panel and select Media FX. You can select multiple clips to apply a LUT to all of them at once.
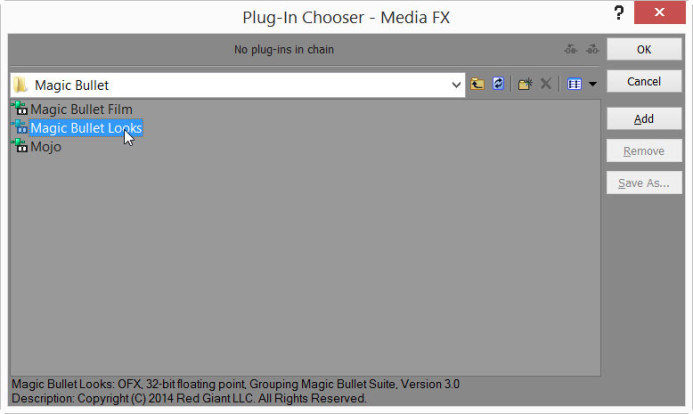
- Add Magic Bullet Looks to the FX chain and click OK.
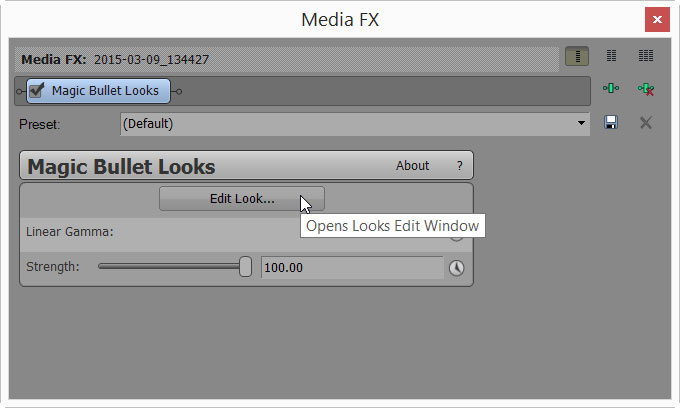
- Select Magic Bullet Looks in the Media FX dialog and click Edit Look… to launch Magic Bullet Looks’ interface.
- In the Looks interface, expand the Tools panel and select the LUT tool.
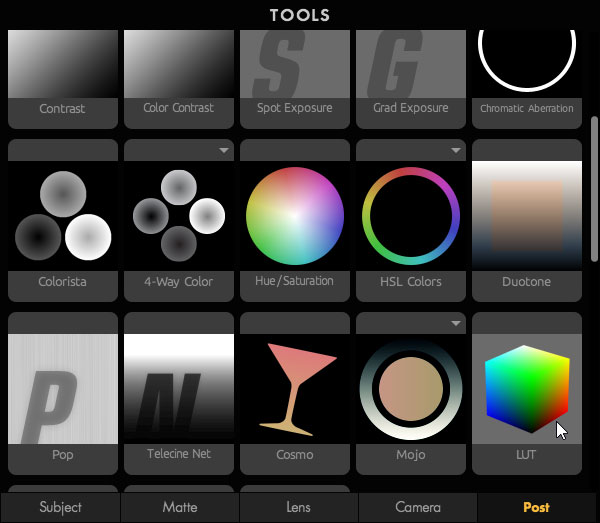
- Add the LUT tool to the Subject category of the Tool Chain.

- Collapse the Tools panel and select the LUT tool you just added to the Tool Chain.
- Select the desired LUT to apply from the dropdown list in the Controls panel. Use the Choose a LUT… option to select a custom LUT from your hard drive.
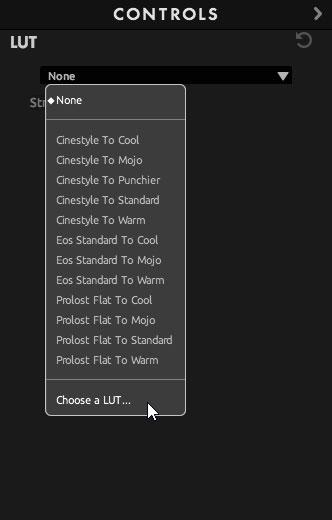
- Click the checkbox button in the bottom right of the window to save your settings.
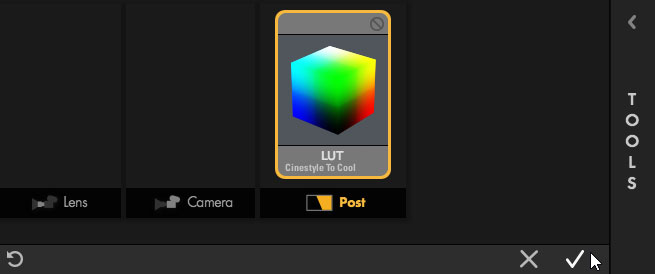
The LUT has now been applied to your footage at the project-level. This can be a big time-saver over having to apply an initial LUT separately to each clip on the timeline.
Note: The LUT added to the media will not be visible when viewing the clip in Vegas’ Trimmer panel, but it will be visible when previewing clips on the timeline.
Surgical Strike: Apply a LUT to a Clip on the Timeline
If you only want to adjust a single clip on the timeline, you can apply a LUT to that clip directly:
- On the timeline, click on the event’s FX button to open the effects selection dialog.
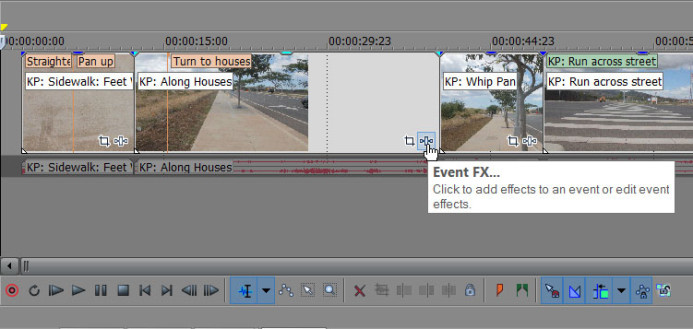
- Add Magic Bullet Looks to the FX chain and click OK.
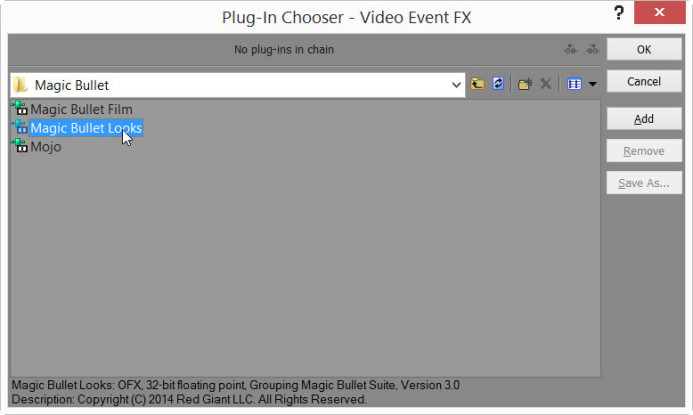
- Select Magic Bullet Looks in the Media FX dialog and click Edit Look… to launch Magic Bullet Looks’ interface.
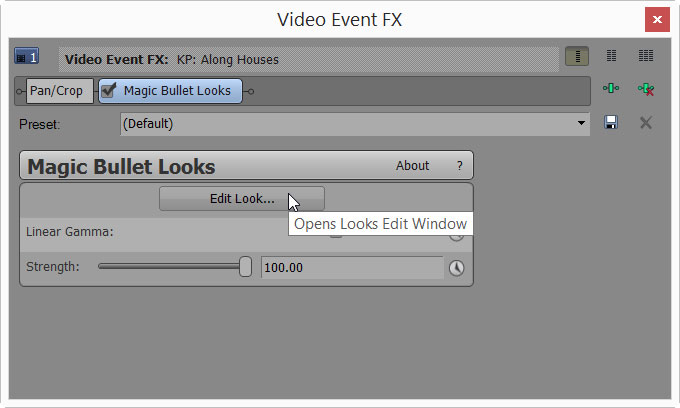
- In the Looks interface, expand the Tools panel and select the LUT tool.

- Add the LUT tool to the appropriate category in the Looks Tool Chain.
- Add it to the Subject category if you are performing an initial transform (e.g. converting Log footage).
- Add it to the Post category if you are adding a final look to the footage.
- Collapse the Tools panel and select the LUT tool you just added to the Tool Chain.
- Select the desired LUT to apply from the dropdown list in the Controls panel. Use the Choose a LUT… option to select a custom LUT from your hard drive.

- Click the checkbox button in the bottom right of the window to save your settings.

Down the Line: Apply a LUT to a Timeline Track
You can also apply a LUT to a track on the timeline, which is useful when there are similar clips are on a single track. Applying the LUT to a track allows you to affect all clips on the track at once.
- Click the Track FX button in the track you want to apply the LUT to.
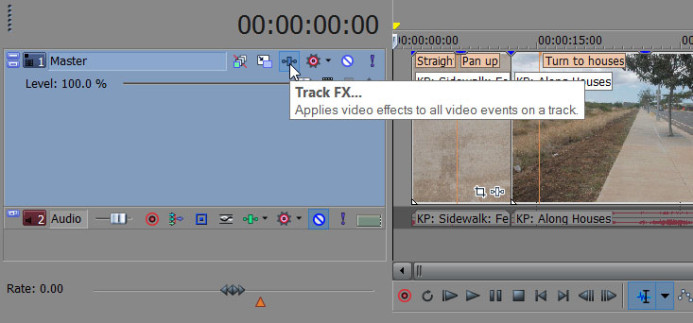
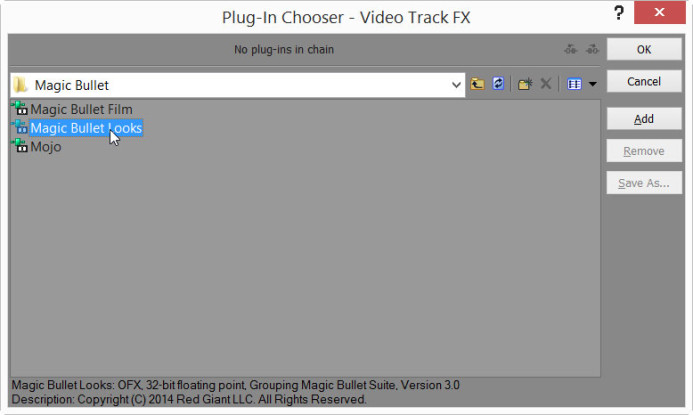
- Add Magic Bullet Looks to the FX chain and click OK.
- Select Magic Bullet Looks in the Track FX dialog and click Edit Look… to launch Magic Bullet Looks’ interface.
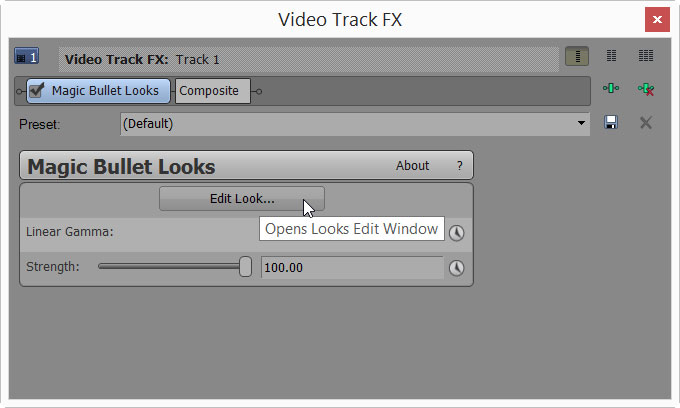
- In the Looks interface, expand the Tools panel and select the LUT tool.

- Add the LUT tool to the Subject category of the Tool Chain.

- Collapse the Tools panel and select the LUT tool you just added to the Tool Chain.
- Select the desired LUT to apply from the dropdown list in the Controls panel. Use the Choose a LUT… option to select a custom LUT from your hard drive.

- Click the checkbox button in the bottom right of the window to save your settings.

The Final Pass: Apply a LUT to the Entire Timeline
Finally, you can apply a LUT to the entire timeline at once. This is great when you’ve finished editing and want to add a LUT to give the entire project a consistent look.
- Click the Video Output FX button above the timeline preview window.
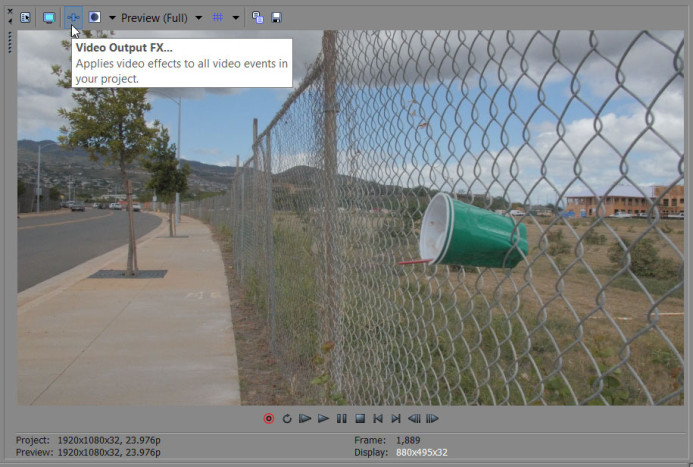
- Add Magic Bullet Looks to the FX chain and click OK.
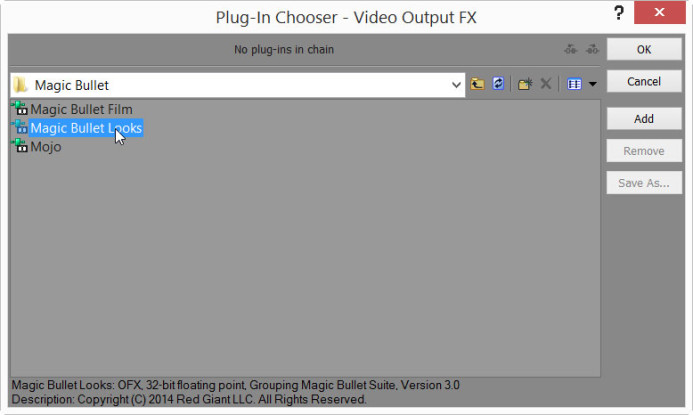
- Select Magic Bullet Looks in the Video Output FX dialog and click Edit Look… to launch Magic Bullet Looks’ interface.

- In the Looks interface, expand the Tools panel and select the LUT tool.

- Add the LUT tool to the Subject category of the Tool Chain.

- Collapse the Tools panel and select the LUT tool you just added to the Tool Chain.
- Select the desired LUT to apply from the dropdown list in the Controls panel. Use the Choose a LUT… option to select a custom LUT from your hard drive.

- Click the checkbox button in the bottom right of the window to save your settings.

Multiple Ways to Work with LUTs with Magic Bullet Looks
As you can see, there are several ways to apply LUTs to your footage in Vegas Pro using Magic Bullet Looks. Each approach has a different purpose, from applying a baseline LUT to the raw media, to applying a final look across your entire project.
Of course, Magic Bullet Looks is a full-fledged color-grading tool, so you can use it for a whole lot more that just applying LUTs to your footage. We’ll be digging deeper into how Magic Bullet Looks can simplify your color grading process in future guides. Sign up for updates below to be the first to find out when those tutorials are available.
Related
- Magic Bullet Looks
- Magic Bullet Suite — A collection of color grading tools that includes Magic Bullet Looks.
- Sony Vegas Pro 13
Post-Production Resources
- 10 Ways Frame.io Helps You Manage Your Production Like a Boss
- 5 Feature Requests for Frame.io: Project Management Edition
- How to Work with Panasonic GH4 Footage in Sony Vegas Pro
- 4 Unique Ways to Use LUTs in Sony Vegas Pro with Magic Bullet Looks
More Resources
- Why You Should Be Excited About the Panasonic GH4
- Lens Options for the Panasonic GH4
- Memory Cards for the Panasonic GH4
- Rigging the Panasonic GH4
- Stabilizing the Panasonic GH4
- Getting the Best Audio from the Panasonic GH4
- Should you buy the YAGH for the Panasonic GH4?
- 6 Reasons Why DSLR Shooters Love the Panasonic GH4
