Build a Rock-Solid Memory Card Setup for Video Production
Memory cards are an essential part of modern video production, so they’re last thing you want to be worrying about in the middle of a shoot. Use this guide to get your memory card situation sorted once and for all.
Data corruption, unreadable cards, write-speed errors, and dropped frames are just some of the risks of shooting without the proper memory card setup.
Build a rock-solid memory card setup for stress-free video production by following these 3 simple steps:
- Choose quality cards — only use memory cards that can handle full-time video production.
- Label your cards — keep your memory cards organized and accounted for to avoid downtime in the middle of a shoot.
- Protect your cards — shield your cards from danger and keep them ready for action.
Choose Quality Cards
Starting with high-quality memory cards is the most important step to having a good setup for video production. If you skimp this step and go with cheap low-quality cards, you’re supporting your entire project with a weak foundation.
Quality memory cards from a respected manufacturer have a lower rate of failure and perform more consistently. Low quality cards are more prone to data corruption and may not be able to sustain the necessary write speeds for your camera, which can result in lost footage and wasted time.
I primarily use Transcend memory cards as they deliver solid performance without costing an arm and a leg. They also come with a lifetime warranty.

SanDisk is another well-regarded memory card manufacturer. Their cards cost about 50% more than Transcend’s cards for similar performance, but they also offer cards with faster write speeds for cameras that shoot at higher bitrates.

Rule #1: They All Fall Down
Whether you’re talking about memory cards or hard drives, the first thing you have to accept is that all storage will fail. It’s not a matter of if a memory cards will fail, but when it will fail– that’s just a fact of working with storage media.
Even high-quality memory cards from a good manufacturer will fail eventually. The reason to choose quality cards is that your chances of getting cards with consistent performance and good reliability is much higher compared to cheap cards.
A card failure always happens at the worst possible time, so one thing you can do to mitigate this is to cycle through multiple cards to spread out the wear and tear. Also, replacing old cards with new ones on a regular schedule is a good way to take them out of service before they fail.
Card Ratings vs Minimum Speed
Many manufacturers will advertise a memory card’s maximum write speed in big bold letters, but maximum write speed is worthless to you. The only number that matters is the card’s minimum write speed.
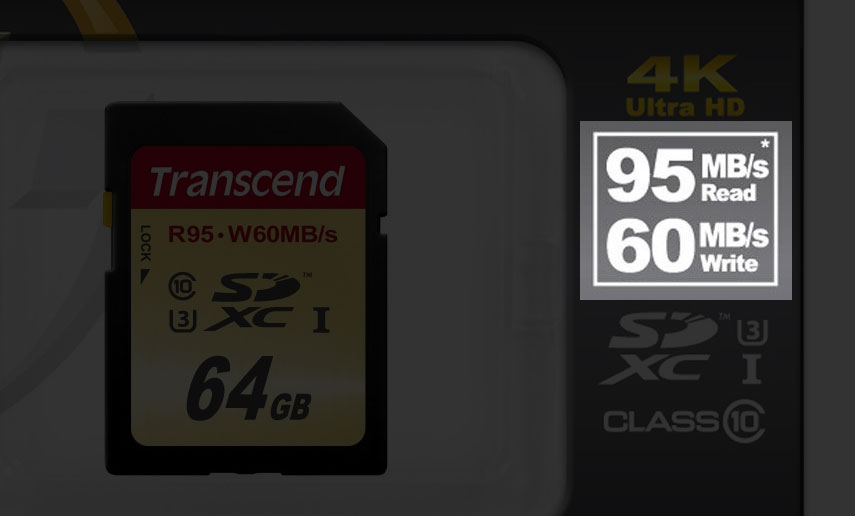
If card’s write speed dips below camera’s bitrate even for just a moment, you lose the shot forever, so knowing a card’s minimum sustained write speed is essential. As long as this number is higher than the camera’s bitrate, the card will do the job.
The simple way to determine a card’s minimum write speed is to completely ignore the fat numbers on the packaging and instead look at the card’s certifications. These certifications represent standardized minimum write speeds that the card meets.
For example, here are a couple important certifications for SD cards:
- Class 10 — the memory card can sustain a minimum write speed of at least 10MB/s.
- UHS Speed Class 3 (U3) — the card can sustain a minimum write speed of at least 30MB/s.


A World Divided: Bits & Bytes
To make things more interesting, video bitrates are often described in Mbps— megabits per second– while memory cards are rated in MB/s— megabytes per second. This small difference in capitalization is the source of much confusion when searching for an appropriate memory card for your camera.
Thankfully, converting between bits and bytes is pretty simple:
1 Byte = 8 bits.
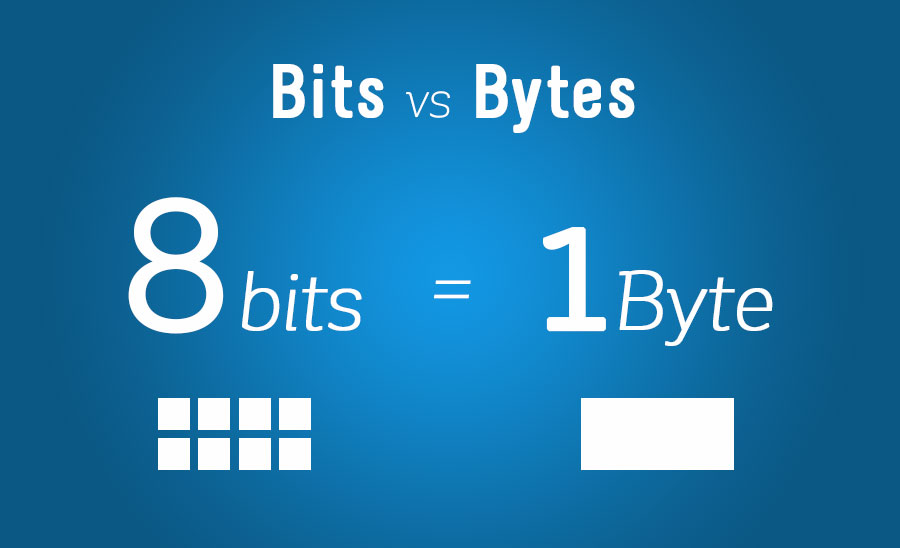
Therefore, a camera such as the Panasonic GH4 or Sony a7S II that shoot 4K video at a bitrate of 100Mbps (megabits per second) needs a card with minimum sustained write speed of 12.5MB/s (megabytes per second).
Simple.

Most Class 10 cards can handle a write speed of 12.5MB/s without trouble, but their certification only guarantees a 10MB/s (80Mbps) write speed. As a result, using U3 certified cards is recommended, as they are guaranteed to sustain a write speed of at least 30MB/s (240Mbps).
Fortunately, U3 cards are widely available and are only slightly more expensive than standard Class 10 cards.
Here are a couple high-quality U3 cards that are perfect for shooting 4K video with cameras like the GH4 or a7S II:
How Many Cards Do You Really Need?
SD cards are pretty affordable, meaning you can pick up multiple cards without breaking the bank. Multiple cards allow you to shoot more footage before having to offload, and you’ll also have backup cards in case a card happens to fail in the middle of a shoot (see rule #1 above).
But how many cards do you actually need?
The answer depends on the camera you’re using. For example, a 64GB SD card (~$30) stores about 1.5 hours of 4K footage from cameras like Panasonic GH4 and Sony a7S II (both shoot 4K at 100Mbps). As such, I recommend picking up at least 4 64GB cards per camera to get you through a normal day of shooting.
If your budget allows, 8-10 64GB SD cards per camera would be even better. This would give you ample storage to shoot throughout the day without having to worry about freeing up space on your cards. You’ll also have enough backup cards to keep you rolling through a card failure (or two).
Pro tip: Unless your camera shoots at a higher bitrate, sticking with 64GB cards is recommended. Higher-capacity cards (e.g. 128GB) have not been on the market as long and may have some compatibility issues with some cameras (for example, the GH4 does not officially support memory cards larger than 64GB).
A 64GB card also limits the amount of footage you can lose in the event of a card failure. Losing footage is never good, but a larger card means you stand to lose even more footage if it fails. Spreading out your footage over more cards prevents you from putting all of your eggs in one basket.
Label Your Cards
Now that you have some high-quality memory cards, the next step is to label them.
Labeling keeps your memory cards organized and accounted for. You can quickly see whether you’re missing any cards and you can cycle through the cards in an orderly fashion to distribute wear and tear evenly across all cards.
Let’s Get Physical
First, you’ll want to add physical labels to all of your memory cards. Without labels, every SD card basically looks identical, so this allows you to identify each card at a glance.
The best way I’ve found to label memory cards is with an inexpensive digital label maker. These little devices create clean labels for each memory card and are great for labeling other pieces of production gear as well (hard drives, lens caps, cables, etc.).
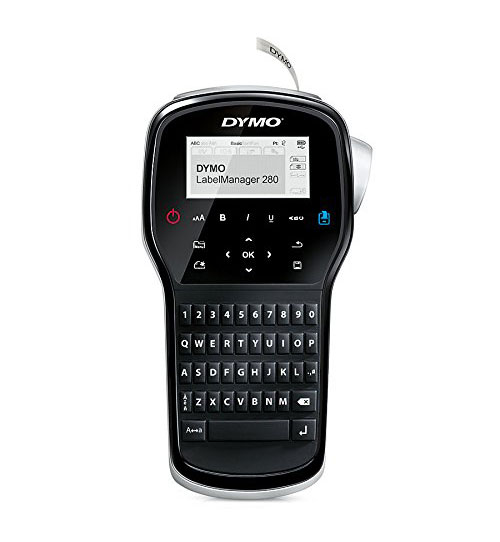


I’ve used my trusty Brother PT-80 label maker for years, but here are some current models to choose from:
- DYMO LabelManager 280 — can even be connected to your computer for printing labels in bulk. I’ll definitely check this one out if I ever need a new label maker.
- Brother P-Touch PT-D200 — updated version of my current label maker.
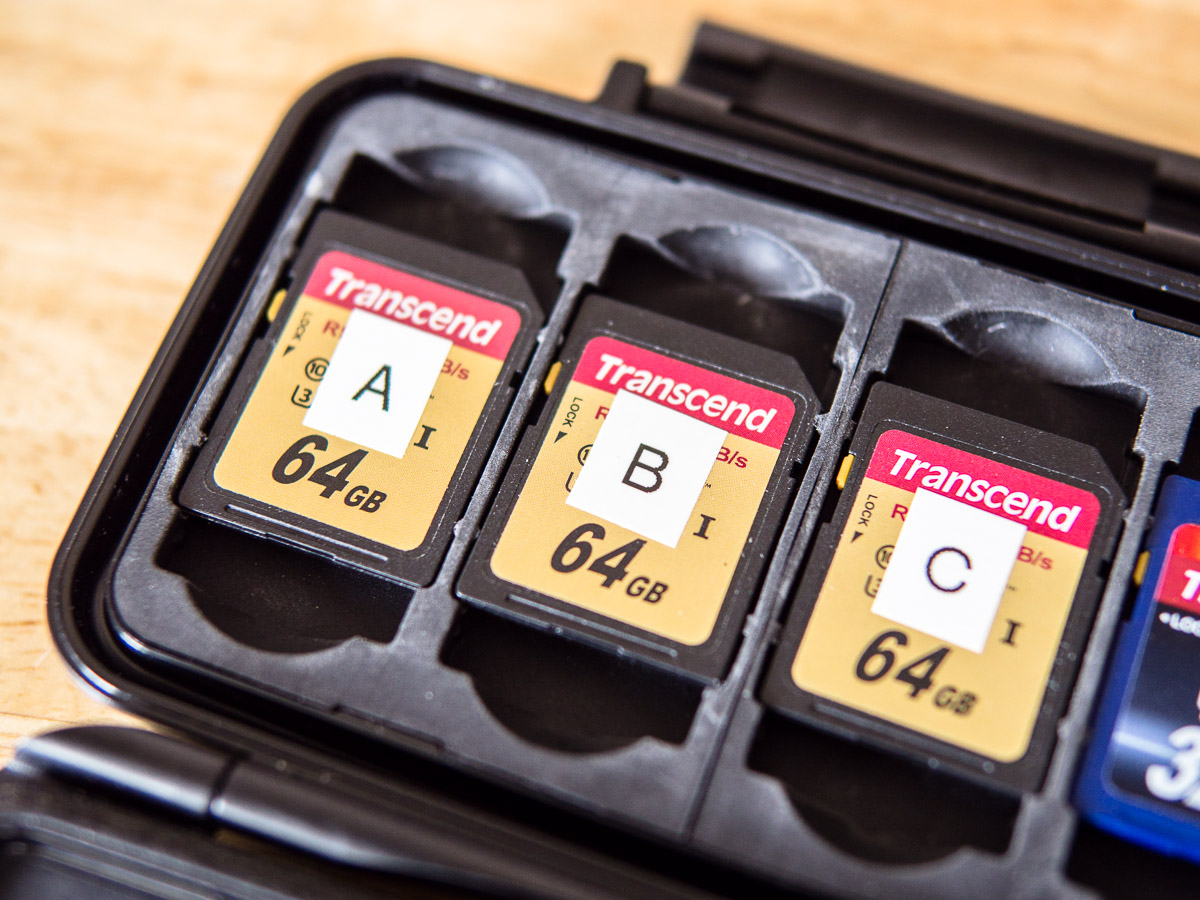
You can name your cards however you like. Just make sure that the system you choose is consistent and can scale from one card to many, so that new cards can be easily integrated into the system without naming conflicts.
For example, using letters of the alphabet is a great way to label your memory cards for several reasons:
- Simple — only a single character is required to name each card (A, B, C, etc.)
- Distinct — letters are not easily confused with one another.
- Ordered — letters are in a familiar sequence (A, B, C, etc.)
- Scalable — up to 26 cards can be managed with just a single character, and it can scale exponentially just by adding a 2nd character (AA, AB, AC, etc.).
Look Inside
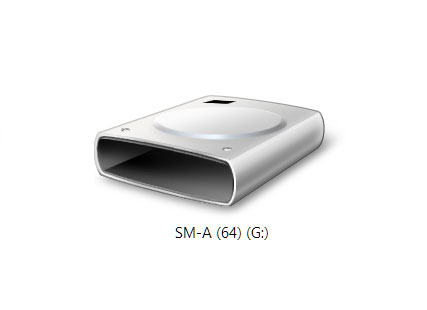
Memory cards should also be labeled internally on the computer to so that you can easily determine which card is in the card reader. This is especially useful when working with multiple cards on the computer at once.
A card’s internal label should match it’s external label, though you can also add some additional text to help you identify the card when it is mounted in a computer.
For example, this is how I label my cards: SM-[Letter] ([Capacity]).
So a 64GB card with the label “A” will be SM-A (64).
Protect Your Cards
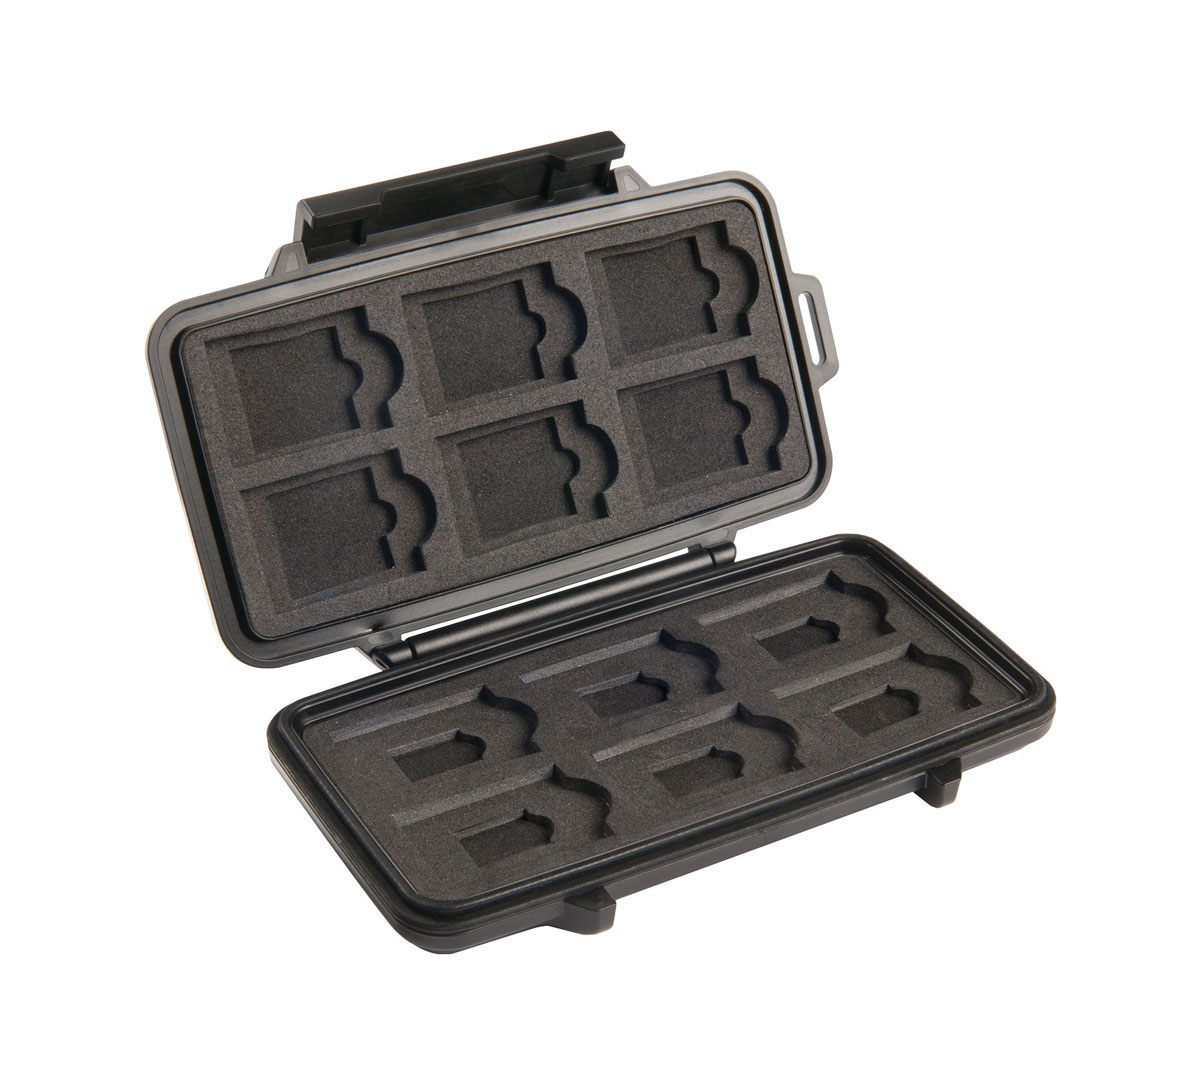
You’ve picked up some quality memory cards and you’ve lovingly labeled them. The final step is to keep them safe in a protective hard case.
I highly recommend Pelican’s line of memory card cases. These cases are shock-resistant, water-resistant, and come with a lifetime warranty just like Pelican’s full size equipment cases.
Pelican’s 915 SD Card Case is great for protecting your SD cards. It features form-fitting cutouts to hold up to 12 full-size SD cards to keep them undisturbed even when the case is knocked around.

Keep the Camera Rolling with a Rock-Solid Memory Card Setup
A solid memory card setup for video production is pretty straightforward: start with good quality cards, label them to keep them organized, and protect the cards with a strong hard case to keep them safe.
Now you can shoot all day with the confidence that your memory cards will be there when you need them.

The next guide in this series lays out a simple workflow for managing your memory cards while shooting to ensure that your footage makes it safely from the field to the edit bay. Sign up for free updates below to receive automatic notifications on new guides, resources, and more.
Related
- Memory Cards
- Digital Label Makers
- DYMO LabelManager 280 — can even be connected to your computer for printing labels in bulk. I’ll definitely check this one out if I ever need a new label maker.
- Brother P-Touch PT-D200 — updated version of my current label maker.
- Pelican 915 SD Card Case
- Panasonic GH4
- Sony a7S II
Data Management for Video Production
- Build a Rock-Solid Memory Card Setup for Video Production
- SPIR: Protect Your Footage with this Simple Workflow
- Offload Footage Fast with these Memory Card Readers
More Resources
- Why You Should Be Excited About the Panasonic GH4
- Lens Options for the Panasonic GH4
- Memory Cards for the Panasonic GH4
- Rigging the Panasonic GH4
- Stabilizing the Panasonic GH4
- Getting the Best Audio from the Panasonic GH4
- Should you buy the YAGH for the Panasonic GH4?
- 6 Reasons Why DSLR Shooters Love the Panasonic GH4