Quick Tip: Instantly Improve the Panasonic GH4’s Audio Quality
It might come as a surprise, but the secret to capturing the highest audio quality with the Panasonic GH4 may actually be to lower your audio levels.
The GH4 may deliver some of the best in-camera audio performance of today’s hybrid cameras, but even this camera has it’s limits when subjected to overloaded audio levels.
Simply put, the wrong levels can ruin the quality of your audio.
Improperly-set levels can lead to increased noise, hiss, and strange fluctuations in volume (pumping) that can be distracting to viewers and difficult to diagnose. With this guide, you will learn how to properly setup your GH4’s levels to capture high quality audio in just 4 simple steps.
Step 1: Lower the GH4’s Mic Input Levels
Do this: Go to Menu/Motion (5)/Mic Level Adjust and set it to -12dB.
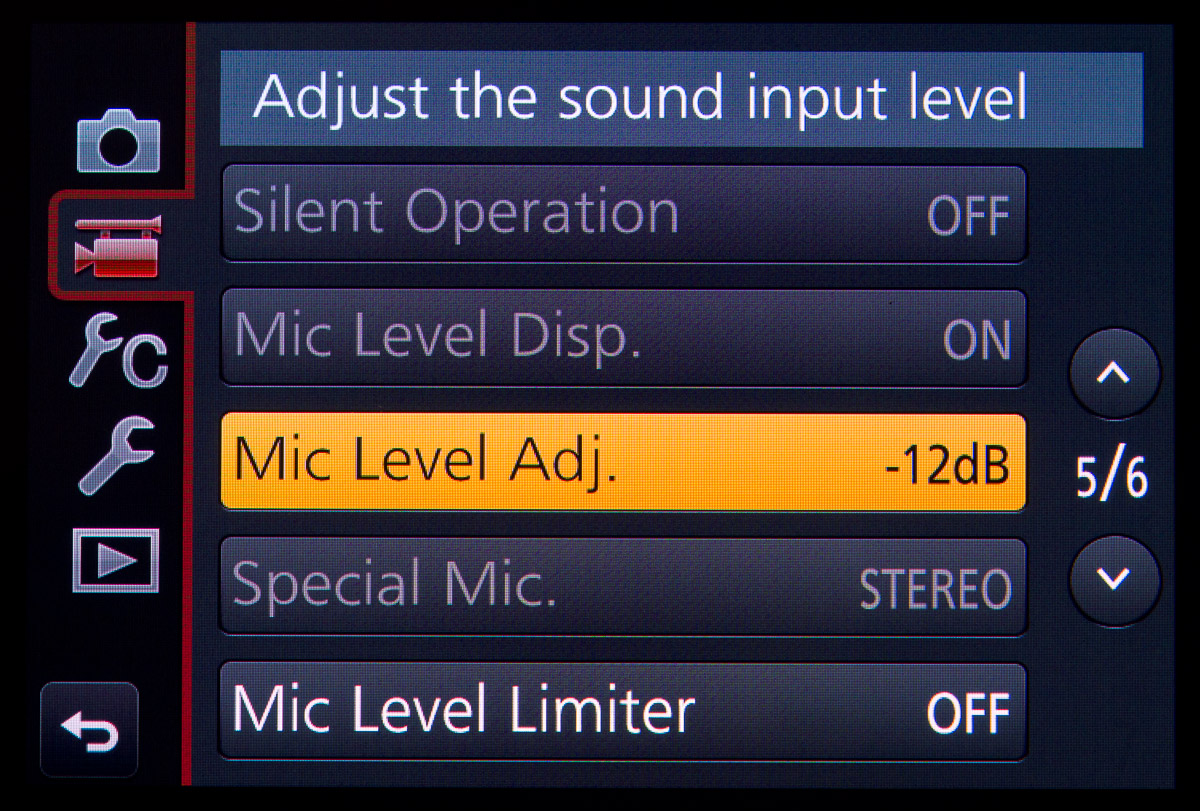
The GH4’s internal preamps have quite a bit of range, but given the option, you want to keep the camera from doing as much of the heavy lifting as possible when it comes to audio processing.
Why? The GH4 is a camera, not a dedicated audio device.
Like most hybrid cameras, the GH4 can record audio from external devices (e.g. microphones, mixers, etc.), but it is not equipped with professional-grade preamps. As such, increasing audio levels using the GH4’s internal preamps will result in increased noise and hiss compared to using a dedicated audio device with a high-quality preamp.
Therefore, lowering the GH4’s internal preamps to their minimum setting keeps the audio as unprocessed as possible. Instead, you should feed the camera with a strong audio signal using a dedicated audio device.
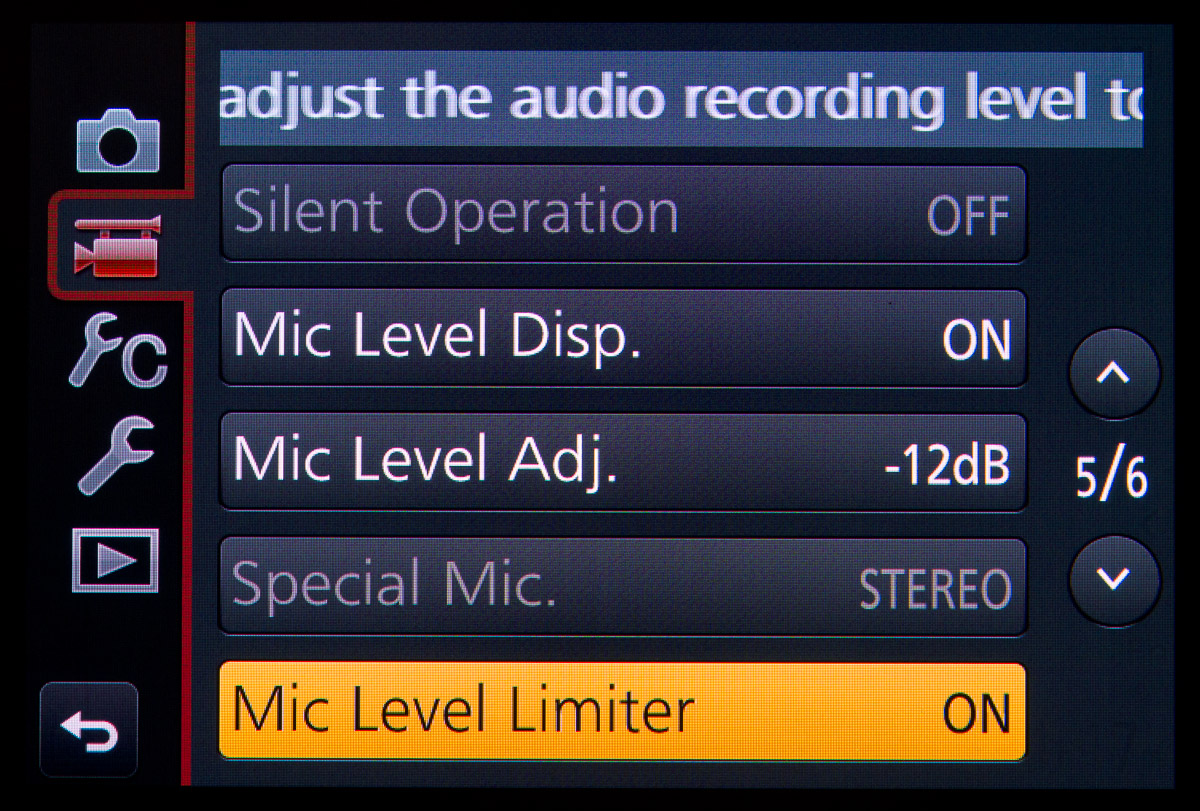
Step 2: Disable the Limiter to Reveal the GH4’s True Levels
Do this: Go to Menu/Motion (5)/Mic Level Limiter and set it to Off.

The GH4’s limiter does such a good job of protecting your audio from overloading and clipping that it might actually be hiding the actual audio levels being sent to the camera.
Everything might sound great and the GH4’s on-screen audio meters might appear to be within range, but if you’re sending the camera a signal that’s too hot, the limiter may be working overtime to keep things in check.
However, once things quiet down a bit, the limiter will deactivate and the true levels will be restored, causing a noticeable rise in background noise. Then, when the more prominent sounds return, the limiter kicks in once again and pulls the audio levels down to prevent clipping.
This cycle of lowering and raising of levels is called pumping, and it’s very distracting to viewers.
A limiter’s primary purpose is to catch momentary peaks in audio levels– it should not be working to full-time keep your levels in check. By temporarily disabling the GH4’s limiter, you can see what levels are actually being fed to the GH4’s mic input and dial the levels back if necessary.
Step 3: Dial Audio Levels in to the GH4’s Sweet Spot
Do this:
- Go to Menu/Motion (5)/Mic Level Display and set it to On
- Feed a -12dB test tone from the device connected to the GH4’s mic input and adjust its levels to target block 5 on the GH4’s audio meters.

Using an external device such as a preamp, mixer, or passive attenuator is the key to sending the GH4 an audio signal with the optimal levels. Ideally, the device should be capable of outputting a -12dB test tone to calibrate its levels with the GH4, but you can download the GH4 Audio Test Kit to get a 30 second -12dB test tone audio file that you can use.
Even if your audio setup does not allow you to use a test tone to calibrate your audio levels, it’s still a good idea to adjust the audio levels being sent to the GH4 so that your primary sound (dialog, environment sound, etc.) is peaking at block 5 on the GH4’s on-screen audio meters for the best audio performance.
Further reading
Step 4: Enable the GH4’s Limiter to Prevent Clipping
Do this: Go to Menu/Motion (5)/Mic Level Limiter and set to On.
With your input levels properly set, you can now reactivate the limiter to prevent clipping during unexpected audio peaks. When it is used as designed, the limiter can be a very effective tool that will have your back by catching abrupt surges in audio levels.
Make Sure You’re Capturing the Best Audio Possible
While there are situations where using an external audio recorder is necessary, I recommend capturing audio in-camera whenever possible.
In-camera audio removes extraneous distractions when you’re shooting by simplifying your setup and allowing you to monitor audio directly from the camera. Capturing audio in-camera also saves you time and headaches in post-production by obviating the need to sync audio tracks between multiple devices.
Solid in-camera audio quality is within your reach with the Panasonic GH4. Use this guide to improve your audio in a matter of minutes and free yourself from unnecessary noise, hiss, and pumping forever.
Related
- Panasonic GH4 — High quality in-camera audio, but you still need to have things set up properly.
- Beachtek MCC-2 Audio Adapter — A compact passive attenuator that’s perfect for dialing in the right audio levels for the GH4 from on-camera mics and wireless receivers.
Panasonic GH4 Audio Resources
Setup Guides
- Cracking the Code: Panasonic GH4’s Audio Meters Explained
- It’s All About the Levels: How to Set up the GH4 for the Best Audio
Gear
- The Definitive Guide to Audio Input Options
- Zoom H5: Run & Gun Audio Recorder
- Review: Beachtek MCC-2 Audio Adapter
Issues
- Panasonic GH4 Audio Buzz
- How to Fix the Panasonic GH4’s Audio Buzz
- Panasonic GH4 Audio Buzz Fix: The Good, the Bad, & the Strange
More Panasonic GH4 Guides
- Why You Should Be Excited About the Panasonic GH4
- Lenses for the Panasonic GH4 — Awesome glass for an awesome camera.
- Memory Cards for the Panasonic GH4 — Get the right memory cards for HD and 4K.
- Configuring the Panasonic GH4 for Video Production — Set the GH4 up for filmmaking.
- Rigging the Panasonic GH4 — Cages, Rigs, Components, Gear, and Reviews.
- Stabilizing the Panasonic GH4 — Tripods, Monopods, Sliders, 3-Axis Gimbals, etc.
- Maximizing the Panasonic GH4’s Audio Performance — Sound matters.
- Powering the Panasonic GH4 — Keep the GH4 shooting all day.
- Should you buy the YAGH for the Panasonic GH4?
- 6 Reasons Why DSLR Shooters Love the Panasonic GH4