The Definitive Guide to Audio Input Options for the Panasonic GH4
There are several ways to send audio to the Panasonic GH4. The real challenge is choosing the option that takes care of business without hindering your productivity on set.
Every project has different audio requirements. This guide lays out the pros and cons of each audio input option so that you can quickly choose the best option for your project.
Why Choose? The Hidden Cost of Complexity
Why is it important to familiarize yourself with different audio input options before selecting what to use for your project? Why not just get a device that does it all and call it a day?
One word: Complexity.
Complexity will slow down your production– it may even kill it. Time is something most productions cannot afford to waste, and using an audio input option that is more complex than you need is a sure way to burn precious rocket fuel.
What does complexity mean for your production?
- Longer and more involved setup process
- Increased level of expertise required to operate
- More controls and settings that can be inadvertently changed
- Additional power requirements
Some productions need a more complex solution, and these are some of the costs that they have to accept. If a simpler solution does the job, use it.
Bottom line: An all-in-one device sounds nice, but sometimes a simpler audio input option will meet your project’s audio requirements just as well, without adding unnecessary complexity. Choosing the right input option saves you time and makes you more productive.
Starting Point: The GH4’s Audio Input
Small DSLR/hybrid cameras like the Panasonic GH4 are not blessed with professional XLR audio inputs. Instead, like most small cameras, the Panasonic GH4 has a 3.5mm stereo jack for sending external audio into the camera.
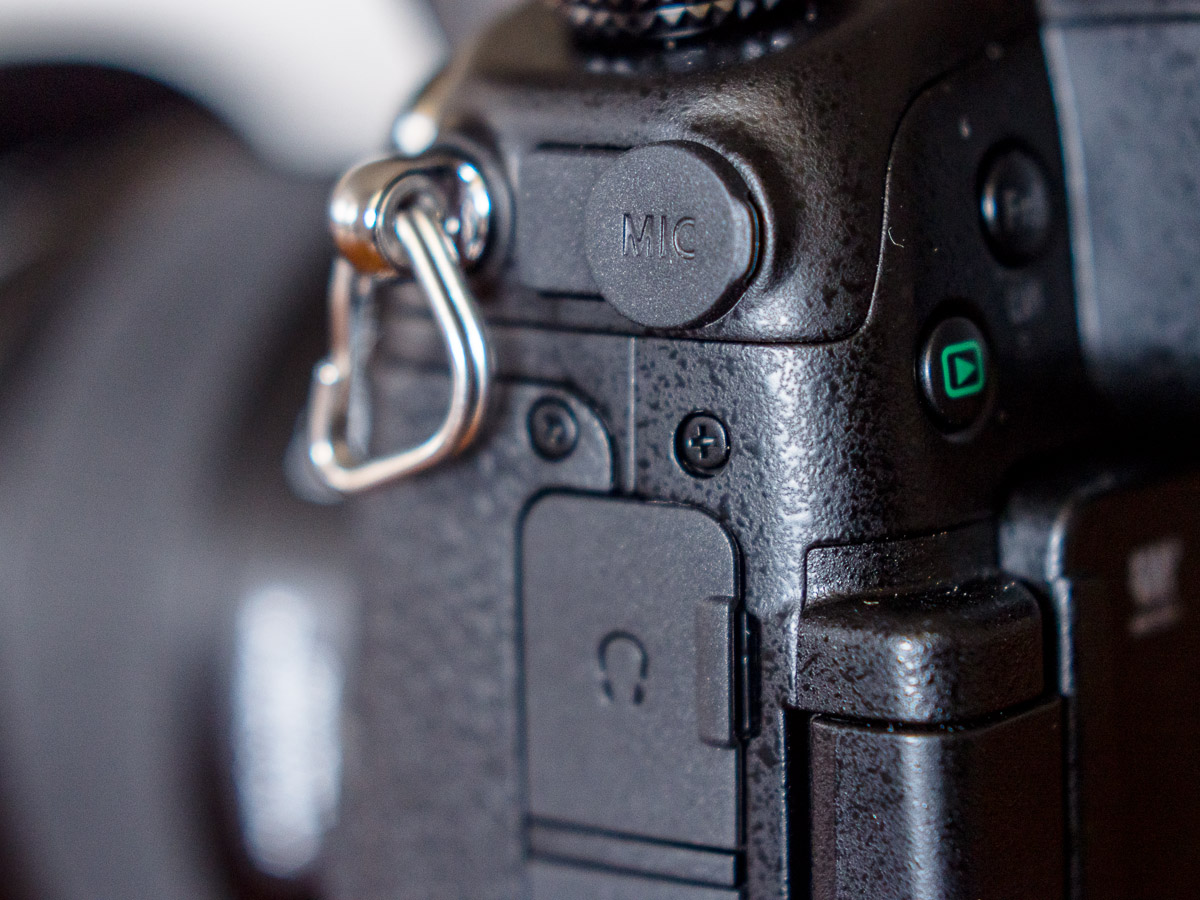
A 3.5mm plug is easily unplugged, is prone to RF interference (unbalanced), and is not particularly robust.
In short, the GH4’s audio input is not the ideal starting point for solid audio. That said, this is part of the deal when you’re working with any DSLR/hybrid camera. It’s what we have to work with, and for the most part, it does the job.
Note: The GH4 is unique in that there is a custom-built accessory that provides more robust audio input options (locking, balanced, etc.). We’ll cover this accessory later in this guide.
Bottom line: Any audio input device you use will need to output to a 3.5mm stereo plug to work with the GH4. You can use adapter cables, but just remember that every connection in your audio chain adds another potential point of failure.
Here are the different audio input options, starting with the simplest option:
Keep it Simple: Direct Input
At a Glance
- Power: Self-powered or plugin-in power (provided by the GH4’s audio input)
- Output: 3.5mm TRS (adapter may be required)
- Level Control: None/Basic
- Signal Strength: Strong signal required
Direct input simply means you plug the microphone directly into the GH4’s audio input. As no additional equipment is required, this is the simplest input option of all.
Pros
- Simple — A single connection means quick setup and simple operation.
- Plug-in power — Some mics can be powered by the GH4’s audio input, meaning that you don’t have to worry about having extra batteries on hand.
Cons
- No control over levels — Most mics do not provide any control over levels, so you risk ending up with audio that is too quiet or too loud. Note: Some mics provide basic level settings (see examples below).
- Self-powered — Some mics are self powered, so you’ll have to remember to pack extra batteries specifically for the mic. Thankfully, batteries for mics usually last a long time.
Examples
Here are some examples of mics that can be directly connected to the GH4:
Rode Videomic Pro

- Type: Camera-mounted shotgun
- Directionality: Directional
- Power: 9V
- Level Control: Basic presets (-10db/0dB/+20dB)
- Price (street): $229
- More information/Check current price
Rode’s Videomic Pro is a standard fixture on my GH4, especially for documentary/run & gun work. It does a good job of picking up natural environmental sound, but it is also directional enough for fairly clear outdoor interviews (use Micover’s windscreen to block wind noise).
Rode Videomic Go
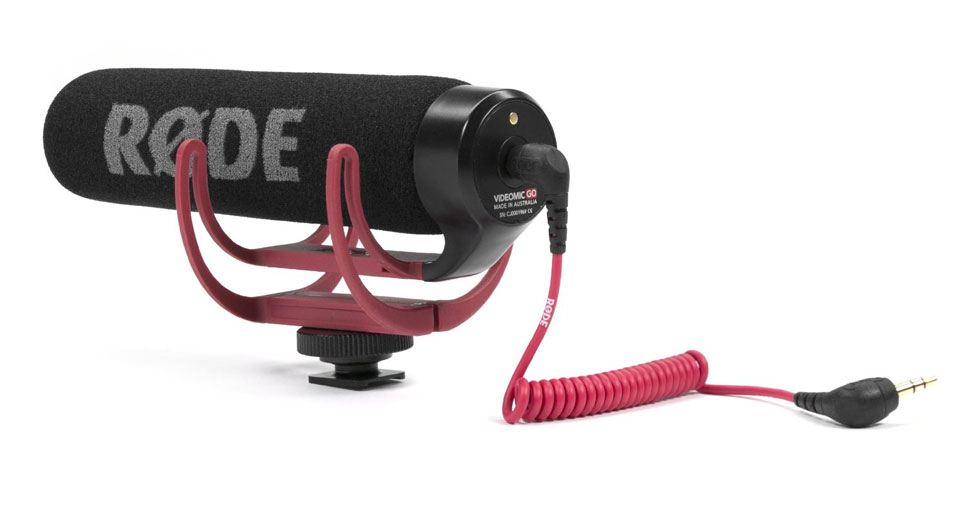
- Type: Camera-mounted shotgun
- Directionality: Directional
- Power: Plug-in power
- Level Control: None
- Price (street): $99
- More information/Check current price
Rode’s Videomic Go is a simplified version of the Videomic Pro. While it lacks the Pro’s gain presets, it is also fully powered by the GH4’s audio input and does not require any batteries.
Rode Lavalier

- Type: Lavalier
- Directionality: Omnidirectional
- Power: Plug-in power
- Level Control: None
- Price (street): $249
- More information/Check current price
A lavalier mic like the Rode Lavalier is ideal when you need to get the mic as close to the speaker as possible (e.g. interviews). These small mics clip to a person’s shirt or tie, allowing you position the mic closer to the mouth for optimal clarity.
Bottom line: Directly connecting microphones to the GH4 keeps things simple, but the lack of control over audio levels can be limiting in many situations.
A Dash of Control: Passive Attenuator
At a Glance
- Power: None required
- Output: 3.5mm TRS
- Level Control: Yes (decrease only)
- Signal Strength: Strong signal preferred
A passive attenuator adds some much needed control over audio levels compared to directly connecting a mic to the GH4. With an attenuator, you can lower a strong signal into optimal range for the GH4’s audio input.
For example, the Rode Videomic Pro’s +20dB gain setting provides nice clean audio, but it is way too strong for the GH4. An attenuator allows you to take control over this strong signal, and dial it down to the proper level.
Pros
- Control levels — A strong audio signal gives you flexibility to set your audio levels anywhere along the GH4’s range.
- No power required — Passive attenuators do not require any power, which means one less set of batteries to manage.
- Compact — Provides control over your audio without adding a lot of bulk.
Cons
- No gain — Audio levels can only be decreased, not increased. A passive attenuator cannot make a mic louder than it is by default.
Examples
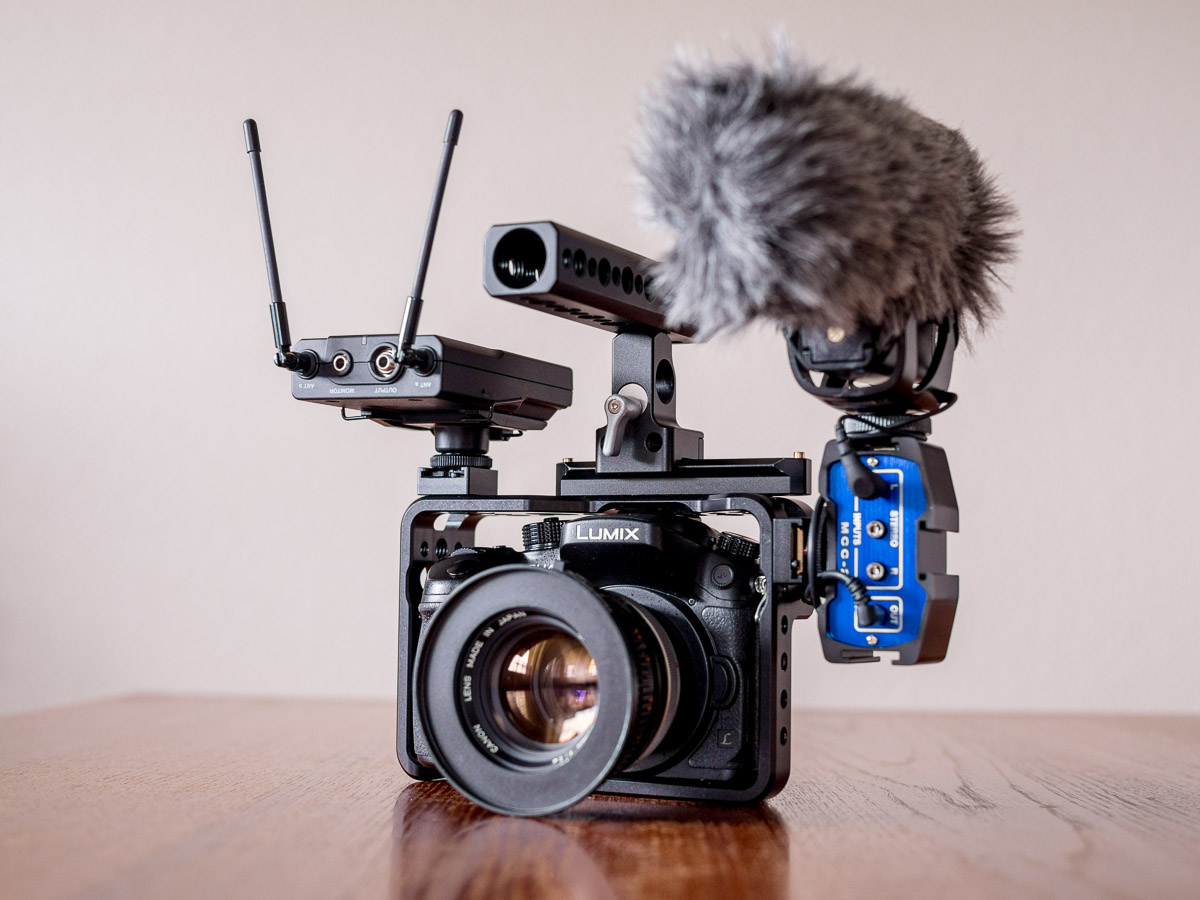
Beachtek MCC-2 Audio Adapter
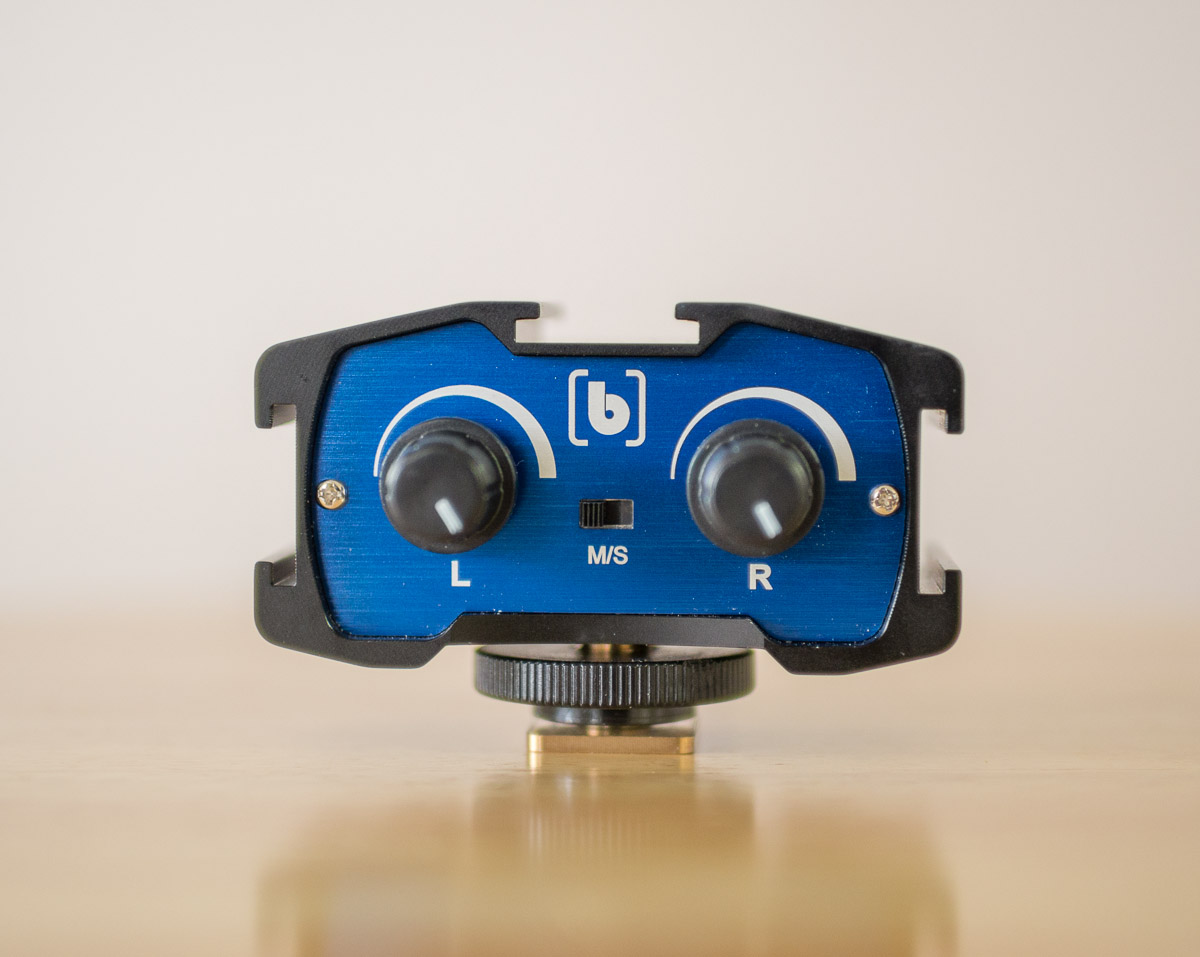
- Power: None required
- Level Control: Yes
- Price (street): $89
- More information/Check current price
Beachtek’s adapter is a regular part of my camera setup when I’m using self-powered mics like the Rode Videomic Pro or a wireless system like the Sennheiser G3. With this adapter, you can fully dial in the levels for these mics, providing you with very nice in-camera audio.
As a bonus, the MCC-2 also combines two mono audio inputs into a single stereo output, allowing you to connect two mics to the GH4 simultaneously.
Further Reading: Beachtek MCC-2 Review
Bottom line: Passive attenuators provide you with control over audio levels when working with strong audio signals. A simple option that delivers solid results, as long as you don’t need to increase levels beyond a mic’s native output.
Going Up: Preamp
At a Glance
- Power: Self-powered
- Output: 3.5mm TRS (adapter may be required)
- Level Control: Yes (increase & decrease levels)
- Signal Strength: Works with a range of signal strengths
If you want to increase audio levels beyond a mic’s native output, you need a preamplifier. A preamp adds gain to boost an existing audio signal, and like a passive attenuator, it can also lower audio levels if necessary.
Pros
- Control levels — Full flexibility to increase or decrease audio levels sent to the camera.
- Robust connections — High-quality preamps have XLR inputs that are more robust than consumer-grade 3.5mm inputs.
- Mic selection — High-quality preamps provide phantom power to mics that need it for operation. In addition to XLR inputs, this gives you access to a wide variety of professional mics.
Cons
- Requires power — A preamplifier adds another battery to your setup that you need to keep track of.
- Bulky — Most preamps will add a fair amount of bulk to your setup because they must accommodate batteries, larger XLR inputs, and more complex circuitry.
Examples
Preamps come in a variety of shapes and sizes, but it’s important to choose a high-quality preamp, as a low-quality preamp will introduce more noise into your audio.
Here are some examples of preamps for various needs and budget levels:
Budget: IK Multimedia iRig Pre

- Input: XLR x 1
- Output: 3.5mm TRRS (adapter required)
- Power: 9V
- Level Control: Yes
- Price (street): $39.99
- More information/Check current price
The iRig Pre is actually intended for using professional XLR mics with smartphones, but with the right adapter cable, it’s actually a decent preamp for the price.
As it wasn’t built for use with cameras, the iRig Pre’s gain adjustment knob is small and recessed. Furthermore, the iRig Pre does not have any built-in mounting points, so you’ll need to figure out a way to attach it to your camera rig (cable ties?).
That said, if you need to use XLR mics with the GH4 and your budget it extremely limited, the iRig Pre might be a good fit.
If you don’t like the idea of using an adapter cable, here’s Deejay Scharton explaining how to hack the iRig Pre so that it can be directly connected to the GH4:
Compact Quality: JuicedLink Riggy Micro (RM222)

- Input: XLR x 2 (locking)
- Output: 3.5mm TRS
- Power: 9V
- Level Control: Yes
- Price (street): $329
- More information/Check current price
JuicedLink is a well-regarded manufacturer of audio preamps for video production and the RM222 is one of their most compact models, making it a good fit for the GH4.
The RM222 is purpose-built for DSLR/hybrid video production– dual locking XLR inputs, a 3.5mm TRS output, and a 1/4″-20 thread for mounting under the camera.
Kitchen Sink: Panasonic YAGH I/O Unit

- Input: XLR x 2 (locking)
- Output: Digital connection to the GH4
- Power: 12V (via 4-pin XLR)
- Level Control: Yes
- Price (street): $1999
- More information/Check current price
The YAGH was custom-built to expand the GH4’s input/output options for use in professional production environments. As such, it has 2 locking XLR inputs with phantom power, but it also has so much more.
Unless you need the other functionality as well, the YAGH I/O unit is probably overkill for your needs. If you need SDI output, timecode synchronization, and full-size HDMI output, then the YAGH provides it all in a single integrated unit.
Further Reading: Should You Buy the Panasonic YAGH for the Panasonic GH4?
Bottom line: A preamp provides full control over audio levels (increase & decrease) and allows you to use professional XLR mics that require phantom power. This increased control also brings additional power requirements and bulk.
Outsource It: External Audio Recorder
At a Glance
- Power: Self-powered
- Output: 3.5mm TRS
- Level Control: Yes (increase & decrease)
- Signal Strength: Works with a range of signal strengths
An external audio recorder is similar to a preamp (XLR inputs, gain control, etc.), but with a twist– it also records the audio independently of the camera.
As such, while you can use an audio recorder exactly like a preamp to pass audio to the GH4’s audio input, a recorder really makes sense in a couple situations:
- You need the highest quality audio possible — a dedicated audio recorder is purpose-built for capturing audio, thus it provides more options and controls than a DSLR/hybrid camera.
- The mics cannot reach the camera — an audio recorder allows you to record sound in situations where the mics cannot be directly connected to a camera, such as when the subject is too far from the camera.
Pros
- High-quality sound — Designed specifically for audio recording.
- Get close to the action — Bring the mic as close to the subject as possible, independently of the camera’s position.
- Backup audio recording — Safeguard against corrupted in-camera audio.
- Control levels — Full flexibility to increase or decrease audio levels sent to the camera.
- Robust connections — High-quality preamps have XLR inputs that are more robust than consumer-grade 3.5mm inputs.
- Mic selection — High-quality preamps provide phantom power to mics that need it for operation. In addition to XLR inputs, this gives you access to a wide variety of professional mics.
Cons
- Requires synchronization — You can output a recorder’s signal into the GH4 while shooting, but if you want to use the recorder’s higher-quality audio tracks, you’ll need to sync them with the camera’s video files.
- Form factor — Most audio recorders are not intended for mounting directly to a camera, so additional rigging (e.g. a cage) is often required.
- Requires power — A recorder adds another battery to your setup that you need to keep track of.
- Bulky — Most recorders will add a fair amount of bulk to your setup because they must accommodate batteries, larger XLR inputs, and more complex circuitry.
Pro tip: Red Giant’s PluralEyes software makes short work of synchronizing separate audio and video files in most cases. If you’re using an external recorder, PluralEyes can save you hours of tedious work.
Examples
Tascam DR-60DMKII
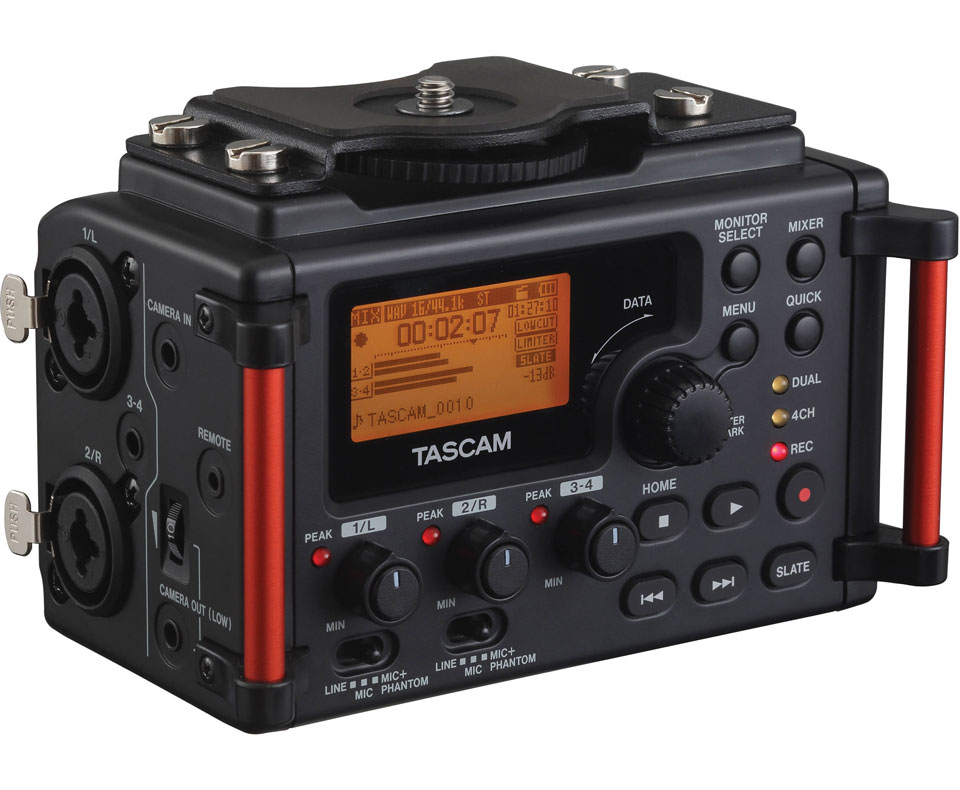
- Input: XLR x 2
- Output: 3.5mm TRS
- Power: AA x 4
- Level Control: Yes
- Price (street): $199
- More information/Check current price
Tascam’s DR-60DMKII is one of the few external audio recorders designed to mount directly under the camera. This makes it easy to integrate a recorder into your setup, though it does make things a bit top-heavy.
The DR-60DMKII has good preamps and has several independent outputs for connecting to various devices (headphones, camera, line-out).
Aside from being a bit bulky, the main issue with the DR-60DMKII is its short battery life. With phantom power turned on, you’ll be lucky to get more than 3 hours of use from a set of batteries. Bring multiple sets of batteries if you plan to shoot for a full day.
Zoom H5

- Input: XLR x 2
- Output: 3.5mm TRS
- Power: AA x 2
- Level Control: Yes
- Price (street): $269.99
- More information/Check current price
The Zoom H5 is thinner and lighter than the Tascam DR-60DMKII, but it’s not as easy to mount directly to the camera. Instead, you’ll probably need a hot-shoe adapter to attach it to the camera, or a monitor arm to mount the H5 on a cage.
Once you get the H5 mounted though, it’s pretty great. The preamps are clean, and it can run for up to 15 hours on just 2 AA batteries (with phantom power turned off).
Bottom line: External audio recorders provide the ability to record high-quality audio in addition to the features of a standard preamp. However, they can be even bulkier than preamps and require synchronization in post to fully take advantage of the better audio quality.
Choose the Right Input Option
You have a wide range of options for getting audio into your GH4. Here’s a quick recap:
- Direct Input — Simplest option, but lacks control
- Passive Attenuator — Dial in levels when working with strong audio signals. Batteries not included (nor required).
- Preamp — Use professional XLR mics and add gain to bring a quiet mic to life.
- Audio Recorder — Record high-quality audio independently of the camera.
My Setup
I aim to keep things simple, so I prefer to use a passive attenuator with a couple mics whenever possible.
This simple setup delivers the control I need and then stays out of the way so that I can fully focus on the shot.
Bottom line: More complex options bring greater flexibility and control, but at the cost of bulk, power requirements, and setup time.
While certain projects may call for more complex audio setups, choosing the audio input option that provides exactly what you need (and nothing more) will keep things as simple as possible, so you can make the biggest impact with the time you have.
Future guides will cover how to effectively use each audio input option for your projects. Sign up below to receive updates when these guides are available.
Panasonic GH4 Audio Resources
Setup Guides
- Cracking the Code: Panasonic GH4’s Audio Meters Explained
- It’s All About the Levels: How to Set up the GH4 for the Best Audio
Gear
- The Definitive Guide to Audio Input Options
- Zoom H5: Run & Gun Audio Recorder
- Review: Beachtek MCC-2 Audio Adapter
Issues
- Panasonic GH4 Audio Buzz
- How to Fix the Panasonic GH4’s Audio Buzz
- Panasonic GH4 Audio Buzz Fix: The Good, the Bad, & the Strange
More Panasonic GH4 Guides
- Why You Should Be Excited About the Panasonic GH4
- Lenses for the Panasonic GH4 — Awesome glass for an awesome camera.
- Memory Cards for the Panasonic GH4 — Get the right memory cards for HD and 4K.
- Configuring the Panasonic GH4 for Video Production — Set the GH4 up for filmmaking.
- Rigging the Panasonic GH4 — Cages, Rigs, Components, Gear, and Reviews.
- Stabilizing the Panasonic GH4 — Tripods, Monopods, Sliders, 3-Axis Gimbals, etc.
- Maximizing the Panasonic GH4’s Audio Performance — Sound matters.
- Powering the Panasonic GH4 — Keep the GH4 shooting all day.
- Should you buy the YAGH for the Panasonic GH4?
- 6 Reasons Why DSLR Shooters Love the Panasonic GH4