Review: Beachtek MCC-2 Audio Adapter
Is it possible to record high quality in-camera audio with a DSLR? Beachtek aims to do just that with the MCC-2– an audio adapter that provides flexibility and control in a compact package.
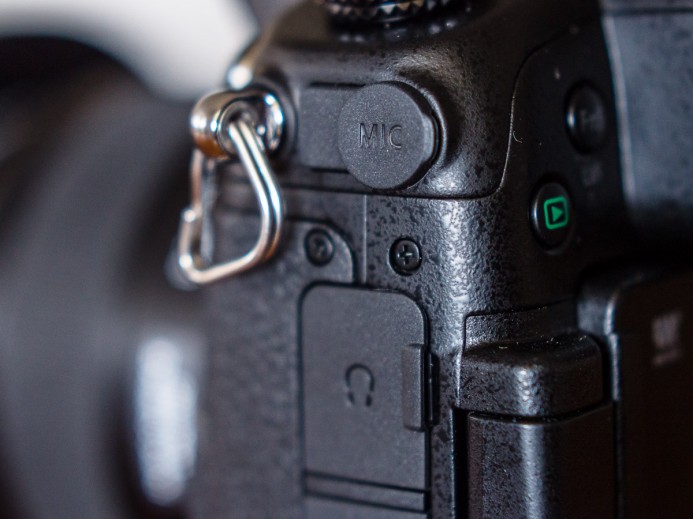
DSLRs and hybrid cameras like the Panasonic GH4 have many benefits for video production, but robust audio functionality is not one of them. While these cameras can technically record two separate channels of audio, both channels are bound to a single stereo microphone input.
Worse yet, even if you use a cable to split the channels into 2 separate mono inputs, recording levels for both channels are bound to a single camera setting.
The lack of flexibility and control is why many of us have turned to dual-system sound, where we record audio separately using cumbersome external audio recorders and sync it with the video in post. If you want quality audio, this is your only option.
Until now.
Beachtek sent over their compact MCC-2 audio adapter and we immediately put to work to see if it can overcome the audio limitations of DSLRs and allow you to capture high quality audio directly in-camera.
Just the Stats Ma’am
- Manufacturer: Beachtek
- Category: Audio adapter
- Type: Passive (non-powered)
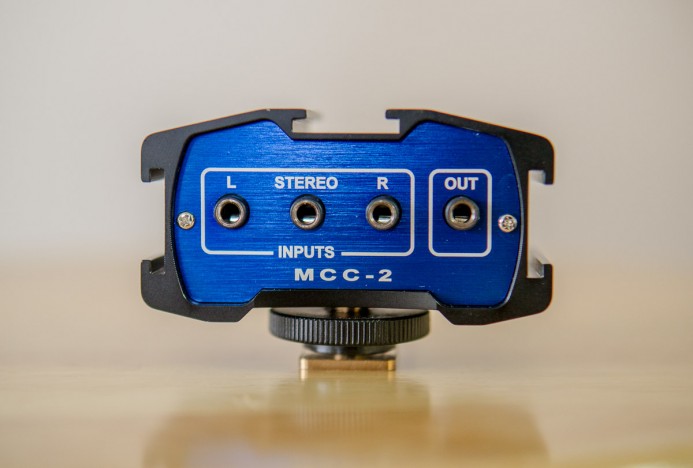
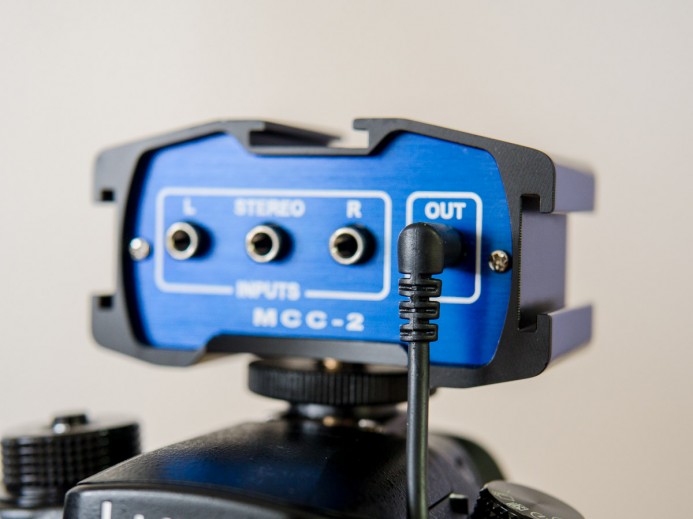
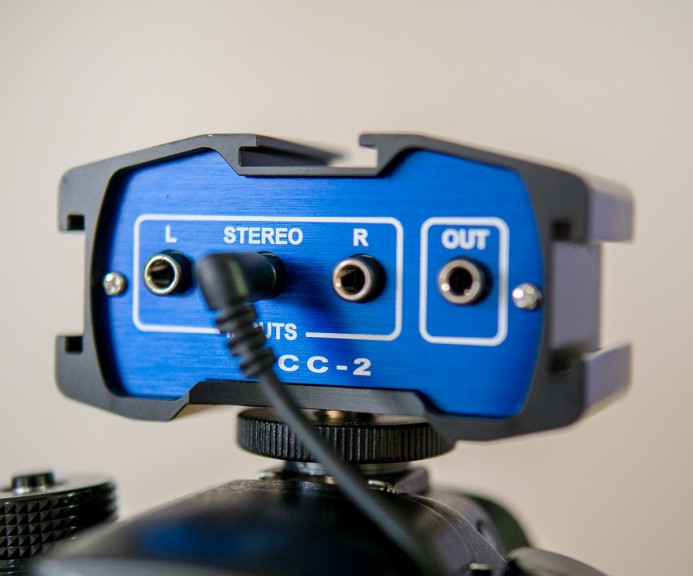
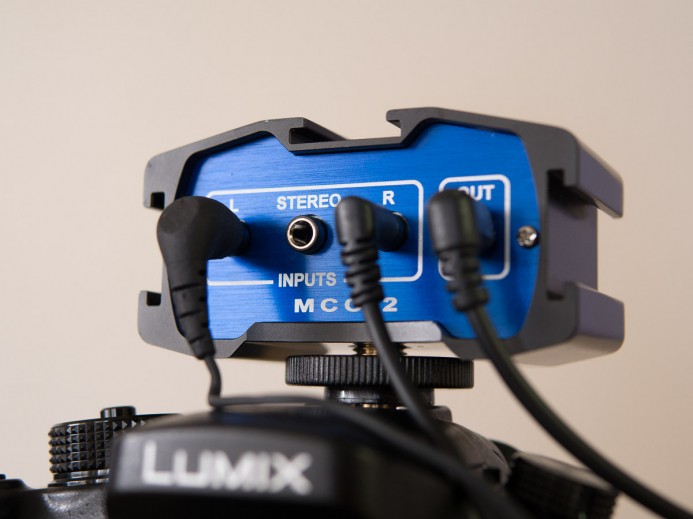
- Inputs: 3 (2 mono/1 stereo) 3.5mm
- Outputs: 1 TRS 3.5mm plug
- Mounting: Camera hot shoe
- Special Sauce: Independent level controls & 3 additional cold-shoe mounts
- Price: $89
Overview
The MCC-2 exists to solve 2 problems with DSLR audio:
1. Split the Channels
First, it allows you to make the most of the 2 audio channels that the camera is capable of recording by splitting them into separate inputs.
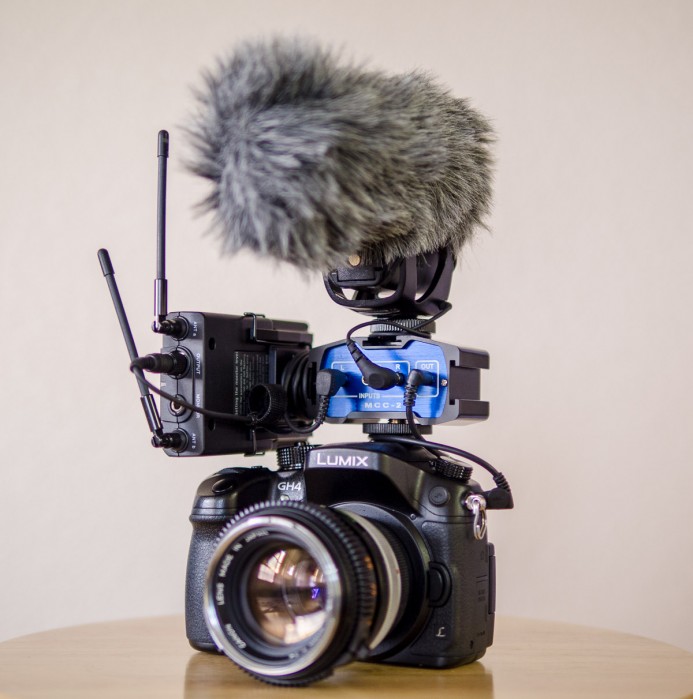
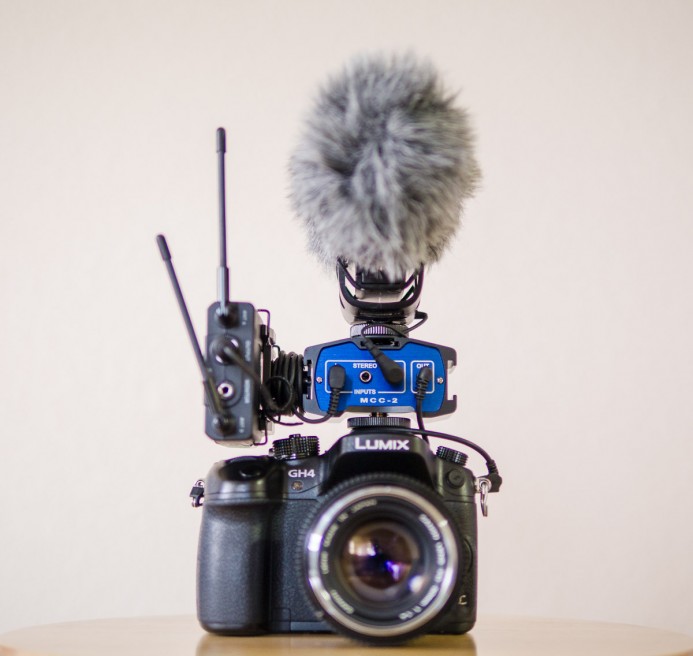
This allows you to attach up to 2 different audio sources, such as a shotgun mic and a wireless lav.
2. Control All the Levels
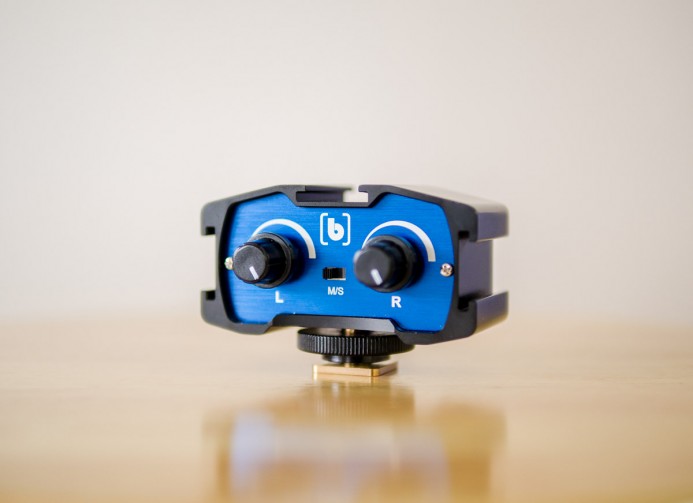
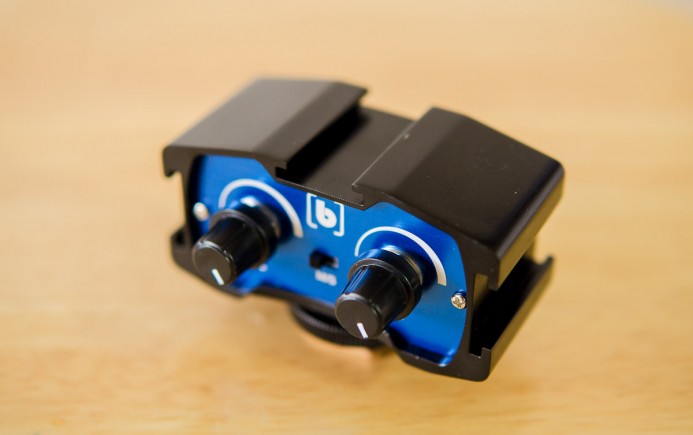
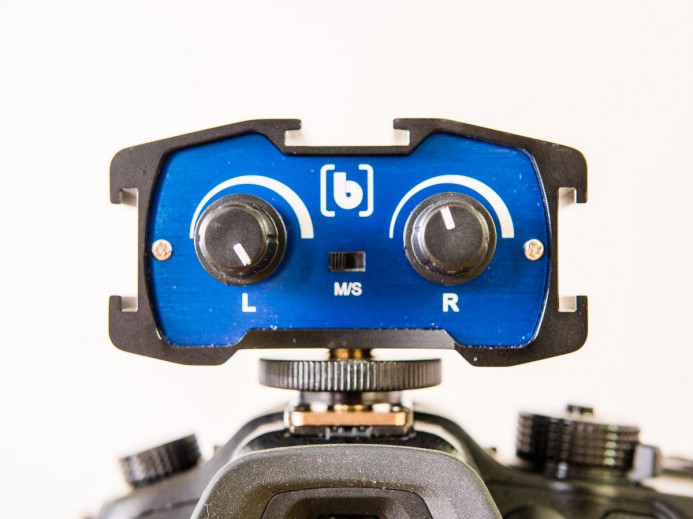
Second, the MCC-2 has a knob to adjust the level of each audio channel independently.
A wireless lav may require a different level of attenuation than a camera-mounted shotgun mic, so being able to control the levels of each input independently is huge.
Once you’ve set the levels of each audio source, the MCC-2’s output combines the 2 channels into a single 3.5mm stereo (TRS) plug for feeding into a DSLR’s mic input.
Bonus: Mounting Points
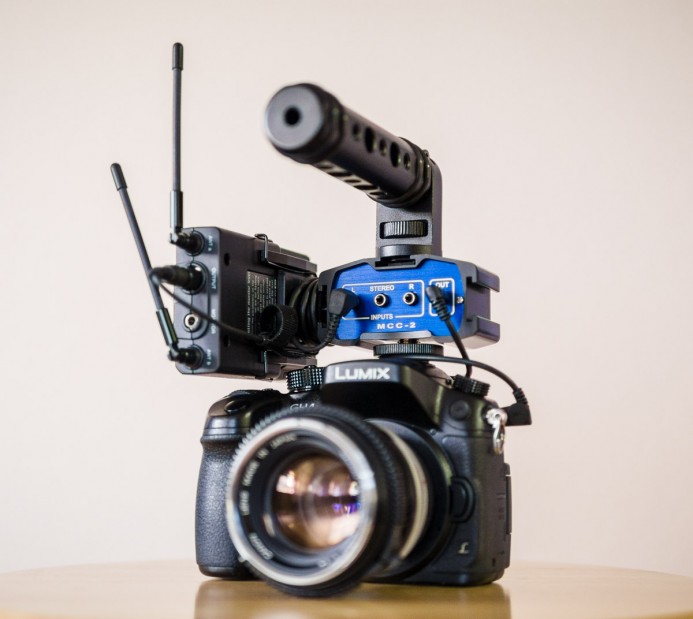
Splitting the audio channels and being able to control them independently may have been enough, but Beachtek took things a step further with the MCC-2 and provides mounting points for attaching those shotgun mics and wireless receivers.
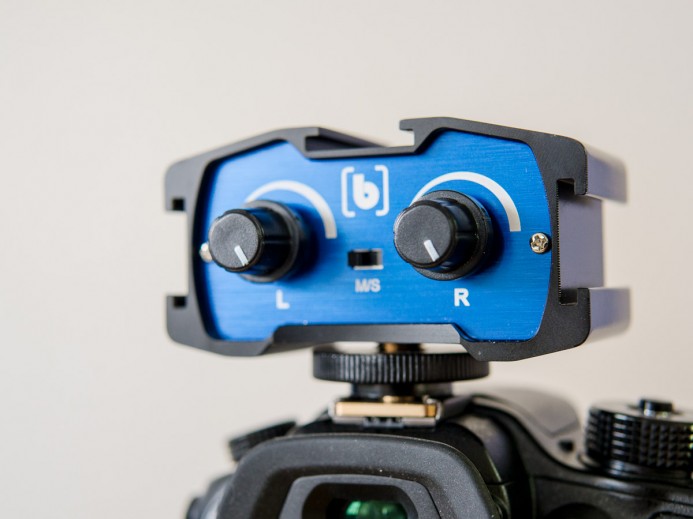
All of this is wrapped up in a compact unit that mounts on the hot shoe of any DSLR. You get the flexibility to use each audio channel for a separate source, the control needed to make sure each channel is at the optimal level, and the mounting points to keep you from having to build up your rig even more just to mount everything.
Compact Form-Factor
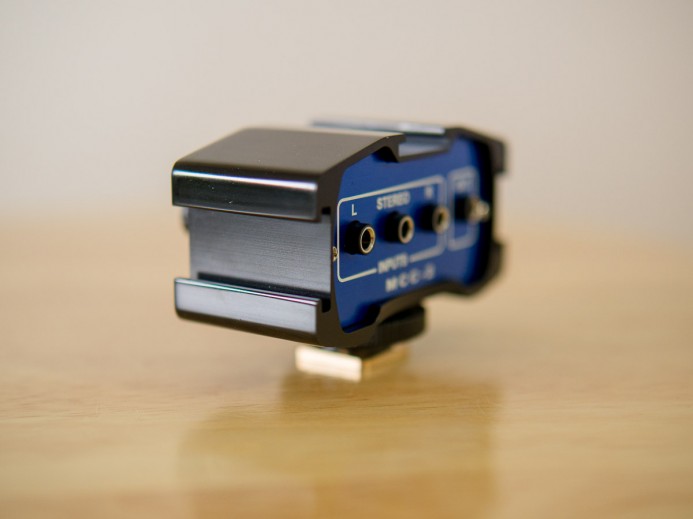
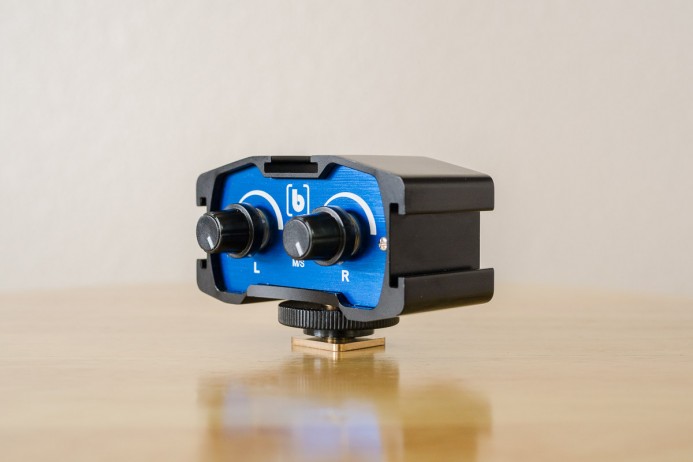
One of the first things you’ll notice about the MCC-2 is how compact it is.
The adapter fits in the palm of your hand and barely adds any weight when mounted on the camera.
Bottom line: The MCC-2 won’t weigh you down.
Integrated Cold Shoe Mounts
It’s clear that Beachtek were thinking about the needs of run & gun shooters when they designed the MCC-2.
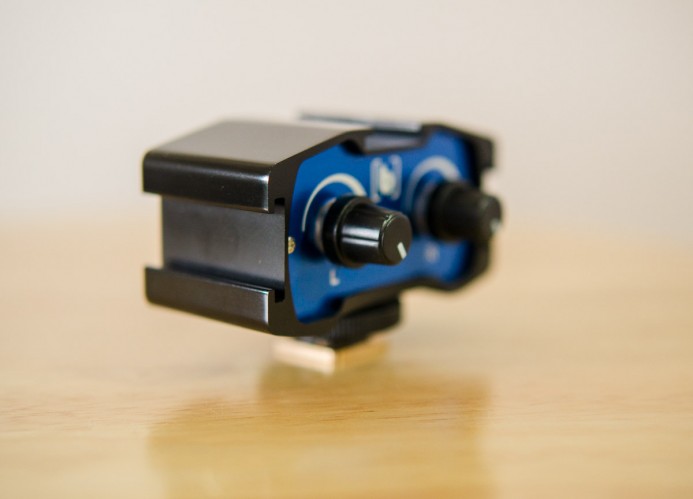
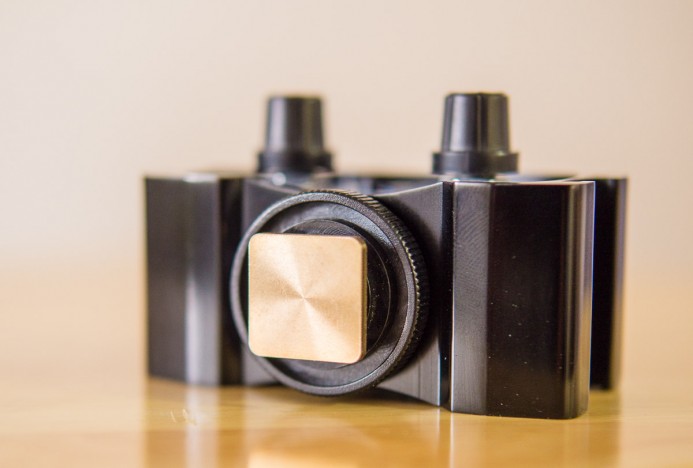
The MCC-2 features 3 built-in cold shoe mounts for attaching the audio devices that will be controlled by the adapter. There’s a cold shoe on the top, left, and right of the adapter.
If you’re counting, you’ve realized that the MCC-2 actually has more mounting points than inputs. This allows you to mount 2 audio devices, and still have room for another useful accessory like a top handle.
While compact, the football-shaped MCC-2 spaces the 3 cold shoe mounts far enough apart from each other and the camera, so that even wireless receivers can be mounted without interfering with the camera’s controls.
Bottom line: Keep your camera setup light and mobile with the mounting options provided by the MCC-2’s cold shoes.
Batteries not Included (or Necessary)
The MCC-2 is a passive adapter that does not require any batteries or external power source.
Essentially, the MCC-2 is a pass-through adapter that provides attenuation but not gain– you start with the levels provided by the devices attached to the unit, which you can lower as needed.
As such, you want to supply the MCC-2 with strong audio signals– the stronger the better. You then use the MCC-2’s level knobs to bring the levels into optimal range for the camera.
Note: Adding the MCC-2 between your mic and camera has a minimal (-0.7dB) impact on input levels.
For example, you can use the Rode Videomic Pro’s +20dB setting to feed a (really) strong audio signal into the MCC-2 and then use the knobs to bring down the level so it’s not clipping in the camera.
This gives you a lot of flexibility when shooting in dynamic environments where you may need a stronger signal one moment, and a lower signal in the next.
Bottom line: This passive adapter works best with strong audio signals.
Auto Mono
If you’re using a mic that outputs a stereo signal, fear not– the MCC-2 handles stereo signals just fine even when you use one of its mono inputs.
The MCC-2 automatically isolates the first channel from the mic and converts it into a mono signal when you plug it into either of the adapter’s mono inputs.
Bottom line: The MCC-2 works well with both mono and stereo sources.
Safety Track Recording
If you only need to record a single mic, you can still benefit from the MCC-2’s independent 2-channel controls by using the 2nd channel to record a safety track.
When using a mic with a stereo (TRS) plug, use the MCC-2’s stereo input.
For mics with mono (TS) plugs, use a y-adapter to split the signal to both of the MCC-2’s mono inputs.
Now that you are feeding the same signal into both channels, you can lower the level of the second channel to protect against clipping.
This way, if channel 1 ever clips, you’ll still have usable audio on channel 2 as a backup.
Bottom line: Record a safety track for backup when using a single mic.
Step-by-Step Attenuation
The MCC-2’s level knobs are stepped, meaning that they can be rotated to 30 distinct positions rather than being infinitely variable.
The results of this stepped knob design are a mix of both good and bad.
Good: Consistent Settings
The stepped design makes it easy to consistently set the knobs to a specific position. For example, if you know that your shotgun mic works best at 5 clicks down from maximum, then it’s quick and easy to set the same level every time you use it.
In this respect, it would have been nice if the positions around the knob were numbered. This would make setting the appropriate level even easier.
Neutral: Coarse Adjustment
However, due to the stepped design, level adjustment is not as smooth as it could be. Changes in levels should ideally be smooth, but you can clearly see the changes between each step on the knob when recording a test tone:
Thankfully, the steps between levels are “softened”, so changes in levels are not abrupt. Furthermore, each step on the knob attenuates the audio signal by an average of 1.4dB, providing decent granularity.
While a non-stepped knob would provide even smoother transitions between levels, the steps do not adversely affect the audio, especially when recording dialog (and not test tones).
Bad: Vibration & Noise
The biggest issue with the MCC-2’s stepped knob design is that turning the knob generates noise and vibration.
The noise from turning the knobs is loud enough to be picked up by a Rode Videomic Pro mounted on the MCC-2:
Unfortunately, even turning the knob slowly produces enough of a sound to be picked up by the Rode Videomic Pro and will be clearly audible during quiet moments.
For many situations, you’ll simply set the levels on the MCC-2 before you start shooting and they’ll rarely need to be touched again. In these cases, the knob noise is a non-issue.
However, if the type of production you do requires you to ride levels, then the noise produced by the MCC-2’s stepped knobs may be a deal-breaker.
It’s unclear why Beachtek chose knobs that produce noise for the MCC-2. Non-stepped knobs with a decent amount of drag would have provided sufficient consistency for setting levels while avoiding the noise issue altogether.
Bottom line: Stepped knob design provides consistency, but also produces an audible clicking.
Build Quality
Though small, the MCC-2 is impressively well-built.
The adapter’s outer shell is made of a single piece of extruded aluminum. This protects the unit’s internals, but also provides a solid foundation for the devices you’ll be mounting in the adapter’s integrated cold shoes.
What you end up with is a compact unit that feels very solid and robust. Nothing creaks or bends on the MCC-2– even the brass hot shoe mount is permanently fused to the main unit.
That said, it would have been nice if there were a 1/4″-20 threaded hole under the hot shoe mount. This would make it possible to mount the MCC-2 in different locations on your camera rig, especially when the camera’s hot shoe is inaccessible (e.g. by a cage).
Bottom line: The MCC-2 is solidly built to stand up to the rigors of production.
Recommended Setup
Use these settings on the Panasonic GH4 to get the best performance out of the MCC-2:
- Mic Level: -12dB (
Menu > Motion Picture > Page 5) - Mic Level Limiter: On (
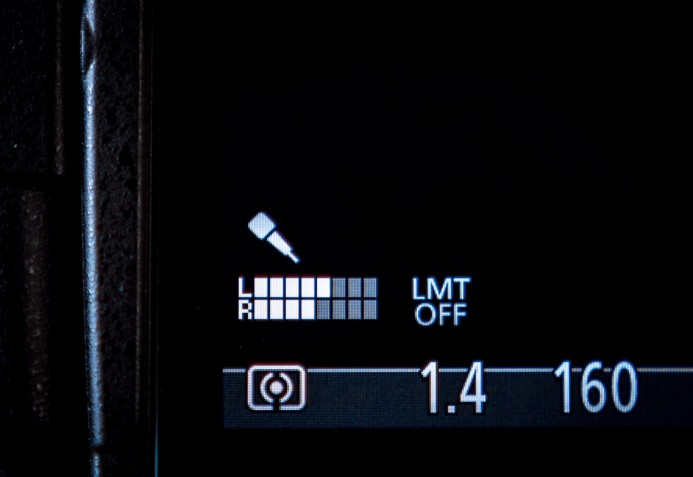
Menu > Motion Picture > Page 5) - Audio Meters: Peaks at block 5 (-12dB)
These settings keep noise to a minimum by turning the GH4’s preamps all the way down. Feed strong signals into the MCC-2 and use the adapter’s knobs to adjust the levels until they are peaking at block 5 on the GH4’s audio meters (approximately -12dB).
Finally, activating the GH4’s limiter will help to protect against unexpected jumps in volume that could cause clipping before you have a chance to manually adjust the levels on the MCC-2.
MCC-2: Simple But Effective
Beachtek’s MCC-2 audio adapter keeps things simple while providing you with the flexibility and control over audio that DSLRs lack.
This adapter is especially ideal for documentary/run & gun shooters who need to record multiple audio sources, but do not want to be weighed down by the bulk, power requirements, and post-workflow hassles of dual-system sound.
Instead, the MCC-2 provides a simple plug-and-play way to capture quality audio directly in-camera. No external recorders, no wrangling separate audio and video files, and no post-syncing necessary.
Bottom line: The MCC-2 brings us one step closer to using DSLRs as well-rounded video production tools.
Related
- Beachtek MCC-2 Audio Adapter — Liberate yourself from dual-system sound with this simple adapter.
- Rode VideoMic Pro (VideoMic Pro/MCC-2 Bundle) — Nice compact shotgun mic with a +20dB setting for feeding a strong signal to the MCC-2.
- Micover Rode VideoMic Pro Windscreen — High-quality windscreen for shooting with the Rode Videomic Pro in outdoor/windy conditions.
- Sennheiser G3 Wireless Mic System — The most popular wireless lav for DSLR video production.
- Panasonic DMC-GH4
Panasonic GH4 Audio Resources
Setup Guides
- Cracking the Code: Panasonic GH4’s Audio Meters Explained
- It’s All About the Levels: How to Set up the GH4 for the Best Audio
Gear
- The Definitive Guide to Audio Input Options
- Zoom H5: Run & Gun Audio Recorder
- Review: Beachtek MCC-2 Audio Adapter
Issues
- Panasonic GH4 Audio Buzz
- How to Fix the Panasonic GH4’s Audio Buzz
- Panasonic GH4 Audio Buzz Fix: The Good, the Bad, & the Strange
More Panasonic GH4 Guides
- Why You Should Be Excited About the Panasonic GH4
- Lenses for the Panasonic GH4 — Awesome glass for an awesome camera.
- Memory Cards for the Panasonic GH4 — Get the right memory cards for HD and 4K.
- Configuring the Panasonic GH4 for Video Production — Set the GH4 up for filmmaking.
- Rigging the Panasonic GH4 — Cages, Rigs, Components, Gear, and Reviews.
- Stabilizing the Panasonic GH4 — Tripods, Monopods, Sliders, 3-Axis Gimbals, etc.
- Maximizing the Panasonic GH4’s Audio Performance — Sound matters.
- Powering the Panasonic GH4 — Keep the GH4 shooting all day.
- Should you buy the YAGH for the Panasonic GH4?
- 6 Reasons Why DSLR Shooters Love the Panasonic GH4
