The Art of Awesome In-Camera Audio
Keep your shoots simple and straightforward by recording high-quality audio internally with the Panasonic GH4.
Dual-system sound definitely has a place in video production (multi-cam shoots, long-distance shots, etc.), but when you’re shooting solo, recording audio in-camera saves you from a lot of headaches on set and hoop-jumping in post.
Thankfully, unlike most other hybrid cameras, the Panasonic GH4’s internal audio capabilities are quite good. This means you can record audio directly to the camera, avoiding the extra steps and hassle of synchronizing audio in post.
Here are some tips and best practices to help you get the best quality possible out of the GH4’s in-camera audio.
Drop the Gain
Professional audio starts with high-quality preamps. The only problem is that most hybrid cameras don’t have good preamps. When you increase audio levels (gain) using low-quality preamps, you get more noise and hiss in your recordings.
Even the GH4– which has been tested to deliver some of the best audio performance of any DSLR/hybrid camera– does not fare too well when its preamps are pushed too far.
As a result, the best way avoid noise and get the cleanest possible in-camera audio is to drop the GH4’s audio gain all the way down. This will keep noise as low as possible and provide the best signal to noise ratio (SNR).
Do this: Go to Menu/Motion (5)/Mic Level Adjust and set it to -12dB.


Bottom line: Drop the GH4’s audio gain to its minimum to keep noise as low as possible.
Feed the GH4 a Strong Audio Signal
Once you’ve set the GH4’s preamps up for the cleanest audio, the next step is to provide them with strong signal. In-camera gain has been lowered to its minimum, so a strong feed is particularly important for high quality audio. If the audio signal is too quiet, you’ll have to boost it in post and you’ll be back at square one with noisy audio.
Here are some examples of how you can feed the GH4 with a strong signal using different types of audio inputs:
On-Camera Mic
Rode’s VideoMic Pro on-camera shotgun mic features a +20dB setting that provides a clean and strong signal to the camera.

Mixer/Preamp
Using a professional mixer with high-quality preamps like Sound Devices’ MixPre-D allows you output strong levels without dramatically increasing noise.

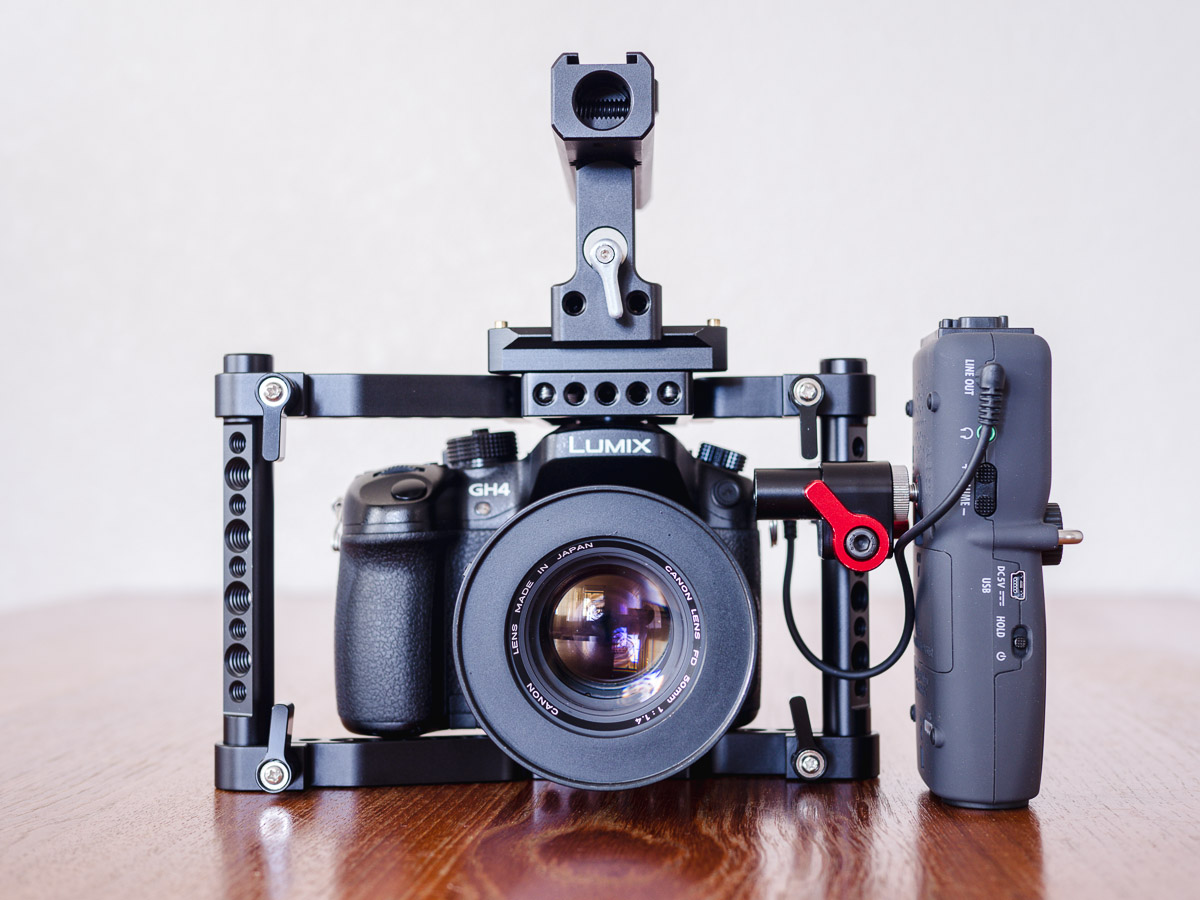
External Recorder
A good external audio recorder like Zoom’s H5 has relatively clean preamps for increasing audio levels before sending the signal to the GH4’s mic input. The H5’s output level can also be independently controlled to match the GH4’s input level requirements.

Further Reading: The Definitive Guide to Audio Input Options for the Panasonic GH4 — full details on various methods of sending audio to the camera.
Bottom line: Saturate the GH4’s mic input with a strong audio signal from a mic, mixer, recorder, or other external device.
Calibrate Your Levels
While you want to feed the GH4 a clean signal with strong levels, there can also be too much of a good thing. If you overload the GH4’s audio range with levels that are too hot, the audio will clip, leaving you with distorted and unusable audio.
Calibrating your levels between the external device and the GH4 ensures that you’re providing an optimal audio signal with consistent levels. This avoids the guessing game when sending audio to the camera so that you can be confident that you’re levels are properly set while shooting.
Using the GH4’s on-screen audio meters, adjust the audio levels being sent to the GH4 using the controls on the external mixer/recorder/etc. until audio peaks max out at block 5 on the audio meters.

Targeting block 5 on the GH4’s audio meters means that peaks will come in at around -12dB (and no louder than -9dB). This provides for a strong audio signal, while still giving you enough headroom to avoid clipping that occurs at 0dB.
Even better, if your mixer/recorder can output a test tone, set it to -12dB and adjust the device’s output levels to the GH4 until the tone reaches block 5 on the GH4’s meters. This will calibrate your audio device with the GH4 almost perfectly.
Further Reading: Cracking the Code: Panasonic GH4’s Audio Meters Explained — go deep with this in-depth guide on using the GH4’s audio meters.
Bottom line: Calibration matches audio levels between the external audio device (mic, mixer, etc.) and the GH4, giving you end-to-end consistency.
Enable the Limiter
Now that you have your levels calibrated, you can add an additional layer of protection against audio clipping by enabling the limiter.
The limiter is like an emergency pressure release valve for audio. When there is a spike in audio levels that would result in distortion, the limiter springs into action, lowering audio levels into a safe range (below the clipping point) until things settle down.
Do this: Go to Menu/Motion (5)/Mic Level Limiter and set to On.

It’s easy to tell at a glance whether the limiter is enabled or not. When the limiter is disabled, it says so right next to the GH4’s on-screen audio meters:

Bottom line: Enable the GH4’s limiter to protect your audio against unexpected spikes in volume that would otherwise result in clipping.
Check Your Cables
A bad cable can ruin your shoot due to static, noise, or audio dropouts.
Once you have everything connected, make sure to check and double-check all cables before you start shooting to ensure that everything is in proper working order.
Sometimes a cable might just need to be plugged in better, while other times, the cable needs to be replaced entirely. The latter is especially true for small patch cables that get worn out with use. Make sure that you bring spare cables with you so that a faulty cable does not bring production to a grinding halt.
Bottom line: Cables wear out– it happens. Avoid audio disaster by checking your cables before every shoot and pack spare cables to use in the event of a failure.
Monitor Your Audio
The GH4’s live audio meters are pretty spiffy, dancing around in sync with audio from your mic or mixer. However, don’t let its beguiling visuals lull you into a false sense of safety.
Moving meters do not mean usable audio.
As useful as they are, audio meters merely convey audio levels, not audio quality. Unless you are also monitoring the audio with headphones, you have no way of knowing if there are issues such as static or dropouts.

The GH4 offers two different ways to monitor audio– real time or recorded, each with their own benefits and compromises.

Real time monitoring sends the live audio straight to the headphone output, bypassing any further processing. This avoids any delays in audio, but it does not represent what the camera is actually recording, so it is possible for you to not realize when there is a glitch when monitoring audio in this mode.
Recorded monitoring sends audio to the headphone after it has been processed by the camera. This results in a short audio delay, but it also means that what you hear represents what is being recorded in-camera.
The audio delay when using the recorded monitoring mode is noticeable, so it may take some time to get used to, but it is the safest monitoring option, especially when you’re shooting once-in-a-lifetime events (wedding vows, speeches, performances, etc.).
Do this: Go to Menu/Motion (5)/Sound Output and select REC SOUND.

Bottom line: Monitoring the audio from the GH4’s headphones output is the only way to ensure you’re recording usable audio.
High Quality In-Camera Audio is Possible with the GH4
There’s no doubt that dual-system audio is the right option for certain situations, but it may not always be the best choice, especially for solo shooters. Thanks to the GH4’s solid audio capabilities, recording audio in-camera is also a viable option for you.
Even when I use external audio recorders like the Zoom H5, the focus is still on getting the audio right in-camera. In this way, the H5 is used as a high-quality preamp that also provides a backup recording should the need arise.
As long as everything goes according to plan, you have perfectly-usable audio already attached to your footage without having to deal with any additional steps such as post-synchronization.
By following these simple tips and best practices, you have the choice when to use in-camera or dual-system audio based on the project’s needs.
Related
- Panasonic GH4
- Beachtek Panasonic GH4 audio performance tests
- Rode VideoMic Pro
- Sound Devices MixPre-D
- Zoom H5
Panasonic GH4 Audio Resources
Setup Guides
- Cracking the Code: Panasonic GH4’s Audio Meters Explained
- It’s All About the Levels: How to Set up the GH4 for the Best Audio
Gear
- The Definitive Guide to Audio Input Options
- Zoom H5: Run & Gun Audio Recorder
- Review: Beachtek MCC-2 Audio Adapter
Issues
- Panasonic GH4 Audio Buzz
- How to Fix the Panasonic GH4’s Audio Buzz
- Panasonic GH4 Audio Buzz Fix: The Good, the Bad, & the Strange
More Panasonic GH4 Guides
- Why You Should Be Excited About the Panasonic GH4
- Lenses for the Panasonic GH4 — Awesome glass for an awesome camera.
- Memory Cards for the Panasonic GH4 — Get the right memory cards for HD and 4K.
- Configuring the Panasonic GH4 for Video Production — Set the GH4 up for filmmaking.
- Rigging the Panasonic GH4 — Cages, Rigs, Components, Gear, and Reviews.
- Stabilizing the Panasonic GH4 — Tripods, Monopods, Sliders, 3-Axis Gimbals, etc.
- Maximizing the Panasonic GH4’s Audio Performance — Sound matters.
- Powering the Panasonic GH4 — Keep the GH4 shooting all day.
- Should you buy the YAGH for the Panasonic GH4?
- 6 Reasons Why DSLR Shooters Love the Panasonic GH4