Build a Quick-Release Articulating Arm for $30 in 10 Minutes or Less
Mount monitors, lights, and more quickly and securely to your camera rig with a flexible quick-release articulating arm that you can build in minutes for only $30.
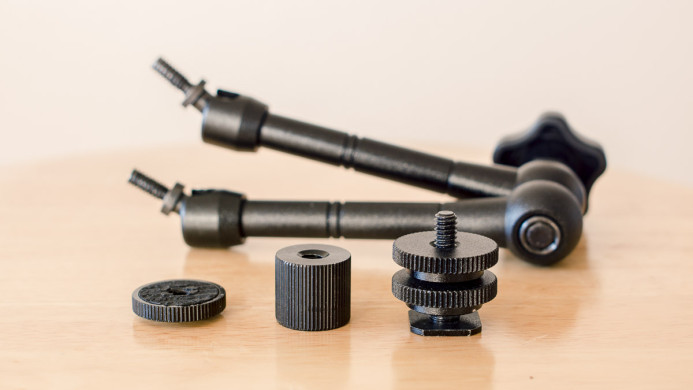
There’s a lot to love about articulating friction arms. They’re flexible, simple to use, and quick to adjust with a single knob, making them perfect for mounting accessories like monitors and LED lights that need to be repositioned frequently.
There’s just one problem with standard friction arms– they take forever to mount on your rig.
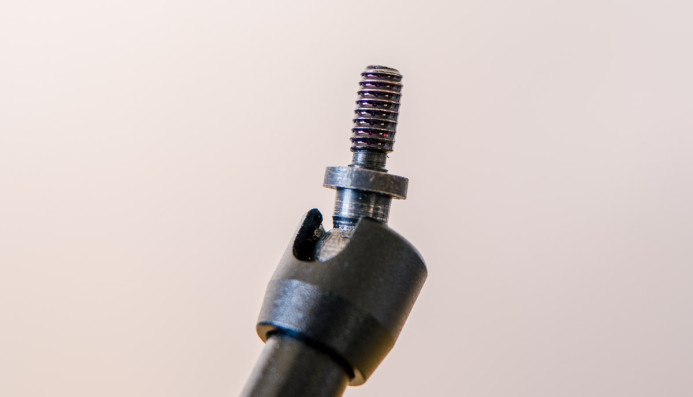
Friction arms use a standard 1/4-20 screw for mounting. Winding a long arm into a small threaded hole on your rig is slow and cumbersome. Worse yet, once you get it mounted, you need to be on guard not to position the arm on the left side of the screw mount, as the arm can unscrew itself due to the weight of the item it’s holding (such as a monitor or LED light).
Zacuto do a good job of illustrating these issues in this short clip:
Ultimately, a standard friction arm is an incredibly flexible tool that’s hampered by a poor mounting method. What we really need is an articulating arm that employs the same secure quick-release mounting solution as the rest of your rig– 15mm rods.
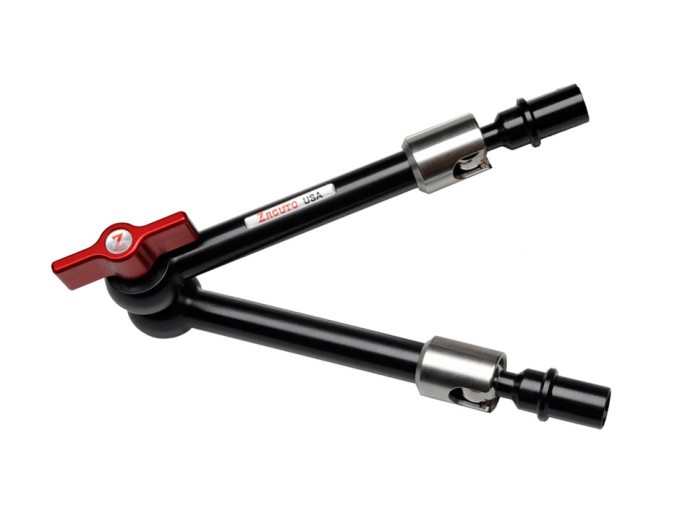
In fact, Zacuto’s Zamerican Arm does exactly this. By replacing the 1/4-20 screws on each end of the friction arm with 15mm rod studs, the arm can be mounted anywhere on your rig quickly and securely.
The Zamerican arm is a solid mounting option, and if your budget allows for it, you should get it and call it a day. However, hovering at about $2oo a pop, the Zamerican arm won’t fit in everyone’s budget.
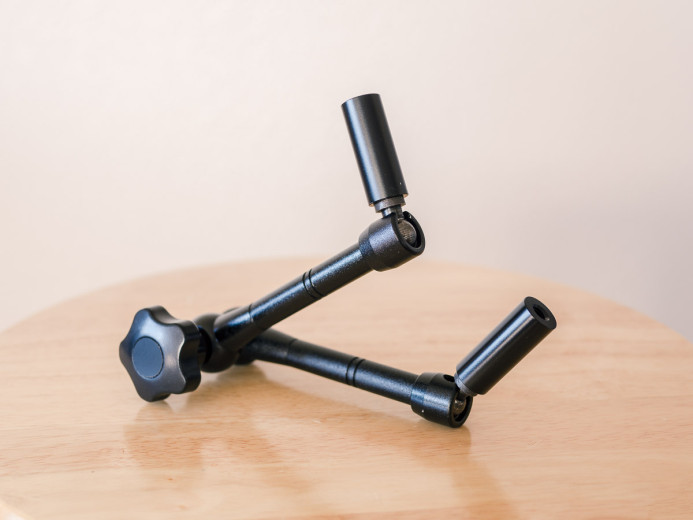
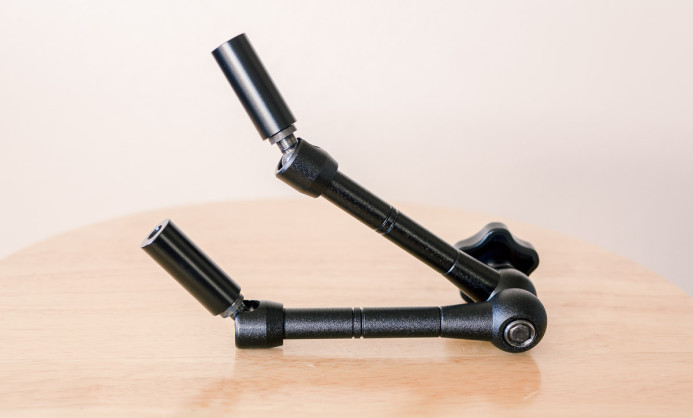
This guide will show you how to build a similar quick-release friction arm that I’ve been using before learning about the Zamerican arm. Like the Zamerican arm, it mounts quickly and securely to your rig using any 15mm rod clamp, but this quick-release articulating arm costs only about $30.
Plus, you don’t even need any tools to make one yourself.
Parts List
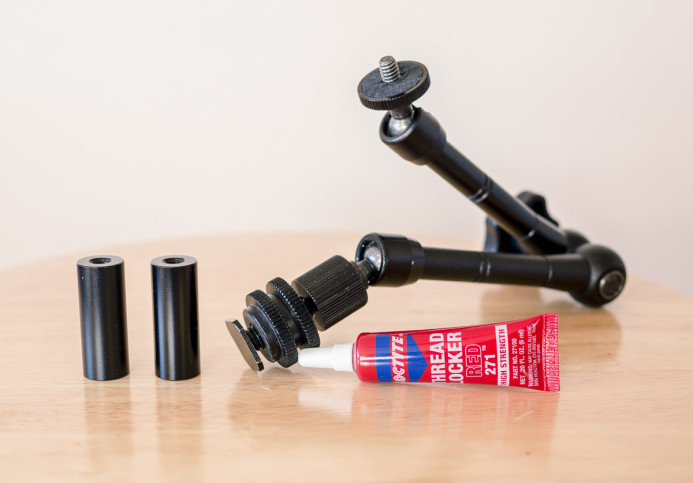
Here are the parts you need to pick up to build your own quick-release friction arm.
- 11″ Friction Arm – $14.35 (other lengths are available)
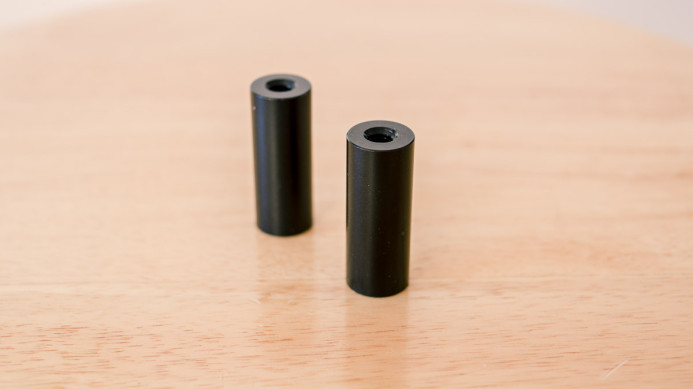
- SmallRig Micro Rods (2 pack) – $8.99
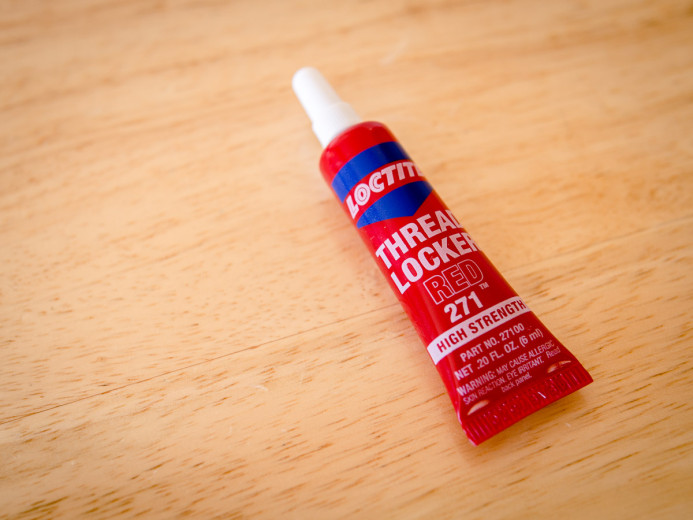
- Loctite 271 Red Threadlocker – $7.68
- Total Cost: $31.02
Instructions
Building this quick-release friction arm doesn’t require any tools and only takes about 10 minutes to put together.
Just follow these 3 simple steps:
1. Prep the Friction Arm
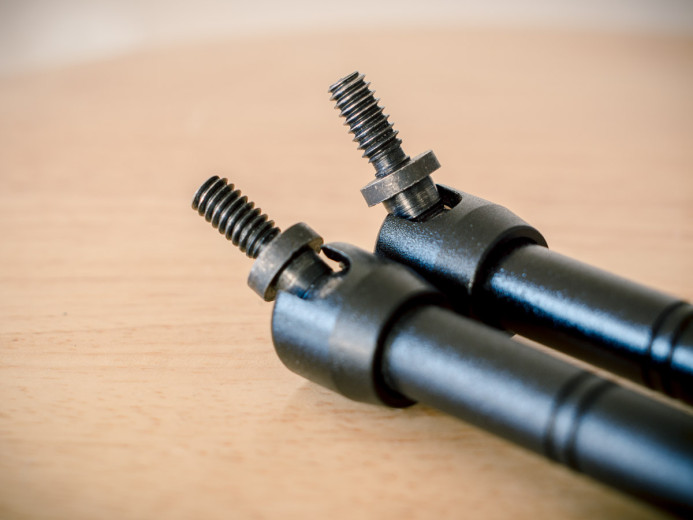
Remove all the extra mounting hardware attached to each end of the friction arm so that all that remains are the bare 1/4-20 studs.
2. Attach Micro Rods to Friction Arm
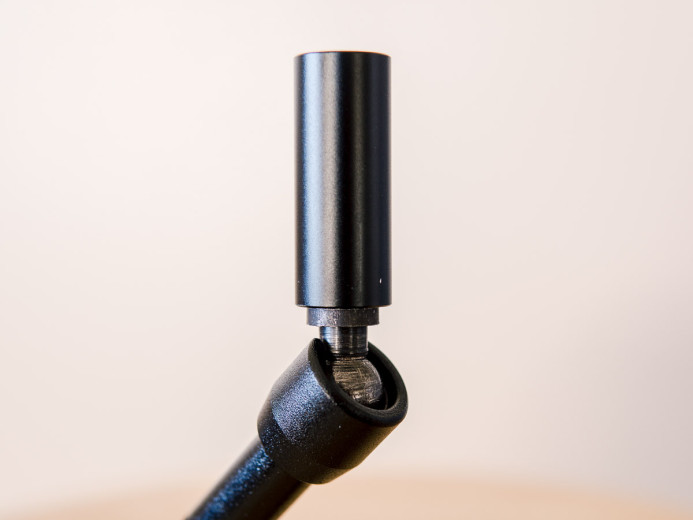
SmallRig’s micro rods are short 15mm rods with a 1/4-20 threaded hole milled through the center. This allows them to be easily attached to the 1/4-20 studs on each end of the friction arm.
Important: Test fit the micro rods on the friction arm’s 1/4-20 studs to ensure there are no issues before attaching them permanently.
Clean the friction arm’s threaded studs and apply a bead of Loctite 271 all the way around the threads. This will create a strong bond between the friction arm and the micro rods.
With the Loctite 271 applied, slowly screw a micro rod on each end of the friction arm and hand tighten. Wipe away any excess Loctite with a lint-free towel.
3. Cure for 24 Hours
You now have a quick-release friction arm that can be securely mounted on your camera rig!
However, before you use your modified friction arm, set it aside for at least 24 hours to let the Loctite cure completely so that a strong bond is formed.
Benefits
Here are some of the benefits of your new quick-release friction arm:
Quickly Mount the Arm on Your Rig
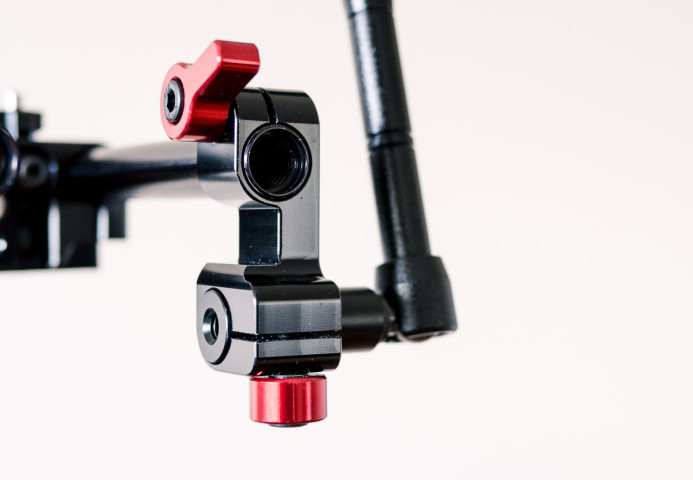
The days of wasting time screwing friction arms onto your rig are over. Your quick-release friction arm can now be attached to your rig in seconds using a standard 15mm rod clamp.
Attach Accessories in Seconds
Attaching a light or monitor to your rig in the past meant you needed to stop shooting for several minutes while you mount a friction arm to your rig and then mount the accessory on to the arm. Instead of slowing down production, you might often choose to go without these useful tools, causing your shots to suffer.
Now you don’t have choose between causing delays and getting the best shot. By equipping your accessories with 15mm rod clamps, you can add a monitor, LED light, or audio recorder to your rig at a moment’s notice.
Of course, this also makes breaking down your rig quick and easy as well.
Secure Mounting
The quick-release friction arm’s rod clamps provide a more secure hold on your rig than 1/4-20 screws ever could. Even better, since the rods are clamped and not screwed in, there’s no chance of the arm failing abruptly due to the position and load on the arm like there is with standard friction arms that simply screw in to your rig.
Important: Friction arms are meant for mounting small accessories to your rig. While the Loctite bond is strong, it may come loose if overloaded, so keeping the load on the arm under 5lbs is recommended.
If you need to support heavier loads, consider using Zacuto’s Zamerican arm (where the 15mm rods are built in), or a 15mm rod with a locking collar.
Bonus: Mount Hot Shoe Accessories
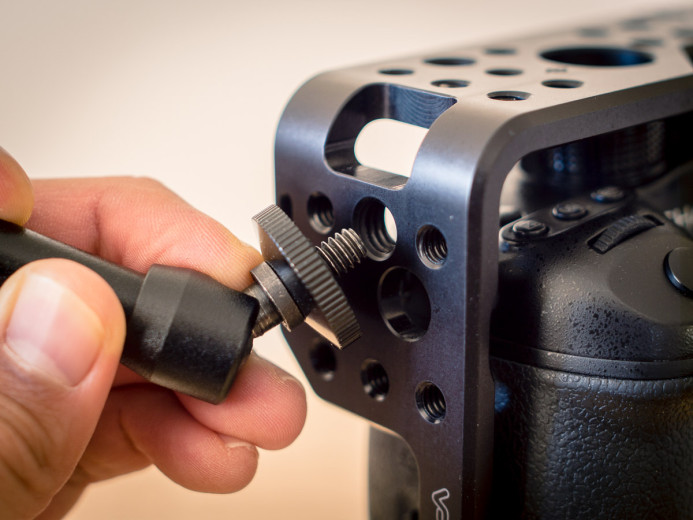
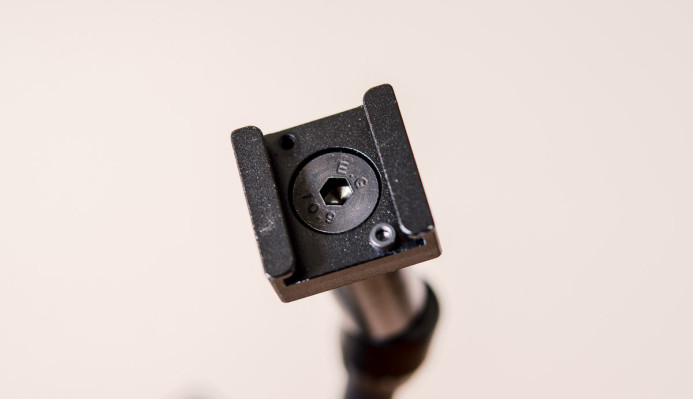
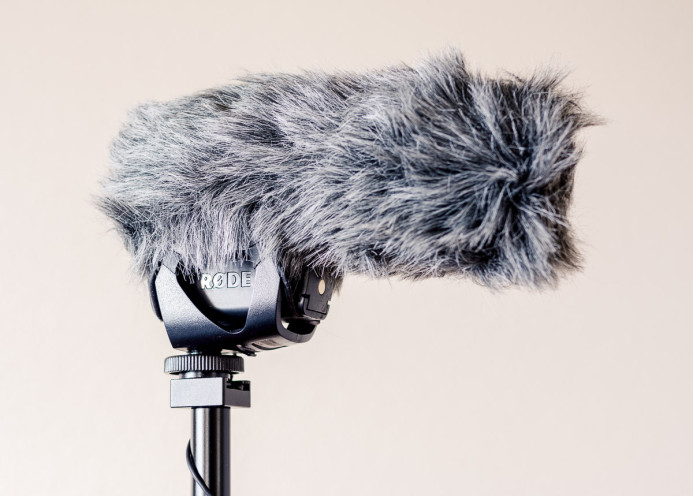
Thanks to the 1/4-20 threaded holes milled into the both ends of the micro rods, you can even attach a cold shoe adapter to one end of the quick-release friction arm to use accessories with a hot shoe mount like a microphones and LED lights.
Friction Arm + 15mm Micro Rods = Awesome
You’ll be surprised by how much of a difference a quick-release friction arm can make when shooting. Tools that are a hassle to use tend to stay in the bag, but when they can be mounted on your rig in seconds, you end up using the right tools for the job.
For around $30, you can completely transform your workflow with a quick-release friction arm. You can use the tools you need without hesitation, allowing you to focus on being more creative and getting better shots, and everyone will go home happy.
And that is awesome.
Related
- Zacuto Zamerican Arm — Zacuto’s robust quick-release friction arm.
- SmallRig 15mm Rod with 1/4-20 locking collar — Uses a locking collar for a more secure hold when converting a standard friction arm to a quick-release arm.
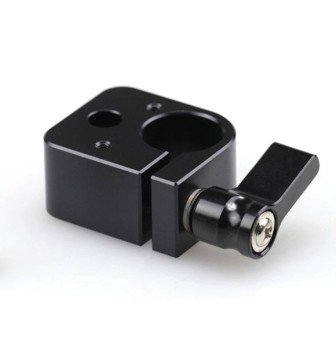
- SmallRig 1/4-20 mount with 15mm Rod Clamp — Add quick-release functionality to accessories with 1/4-20 mounts (monitors, lights, audio records, etc.)
- SmallRig Cold Shoe — Add a cold shoe for mounting accessories to your quick-release friction arm or anywhere else with a 1/4-20 threaded hole.
Rigging the Panasonic GH4
Cages
- Cage Fight! 5 Cages for the Panasonic GH4
- Wooden Camera Quick Cage Review
- Viewfactor Contineo Cage Review
- SmallRig VersaFrame Cage: First Impressions
- Fhugen Honu Cage Review
Camera Rigs
Rig Components
- Wooden Camera DSLR 15mm Base Review — Expand the Quick Cage using 15mm rods with this base
- Wooden Camera NATO Handle Plus Review — More than just a top handle
- How to Build a Quick-Release Friction Arm for $30
- Quick Comparison: Zacuto Zwivel & Zwivel II
More Panasonic GH4 Guides
- Why You Should Be Excited About the Panasonic GH4
- Lenses for the Panasonic GH4 — Awesome glass for an awesome camera.
- Memory Cards for the Panasonic GH4 — Get the right memory cards for HD and 4K.
- Configuring the Panasonic GH4 for Video Production — Set the GH4 up for filmmaking.
- Rigging the Panasonic GH4 — Cages, Rigs, Components, Gear, and Reviews.
- Stabilizing the Panasonic GH4 — Tripods, Monopods, Sliders, 3-Axis Gimbals, etc.
- Maximizing the Panasonic GH4’s Audio Performance — Sound matters.
- Powering the Panasonic GH4 — Keep the GH4 shooting all day.
- Should you buy the YAGH for the Panasonic GH4?
- 6 Reasons Why DSLR Shooters Love the Panasonic GH4
