Review: View Factor Contineo Cage for the Panasonic GH4
View Factor’s Contineo cage for the Panasonic GH4 is a marvel of form and function, but does its minimalist design come at the cost of usability? Find out if this is the right cage for you in this in-depth review.
View Factor builds rig parts and accessories for cameras ranging from Blackmagic Design’s diminutive Pocket Cinema Camera to the hyperbolically-named RED Epic. They’re also one of the first manufacturers to release a cage custom-built from the ground up for the increasingly-popular Panasonic GH4.
View Factor sent over the Contineo Cage and we’ve been using it in the field for several months to find out if this cage has what it takes to handle the rigors of production as the foundation of your camera rig.
There’s no doubt that the Contineo is solid, but there are a few issues that may affect certain users. Read on for the full details.
Just the Stats Ma’am
- Manufacturer: View Factor Studios
- Form-factor: Full cage
- GH4-specific: Yes
- Mounting Options
- 1/4″-20: Yes (46)
- 3/8″-16: Yes (5)
- Weight: 230g (including mounting hardware)
- Price: $249
A Form-Fitting & Functional Design
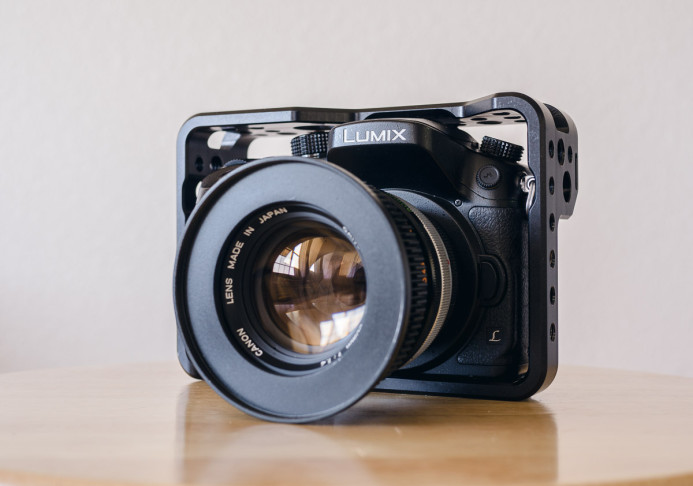
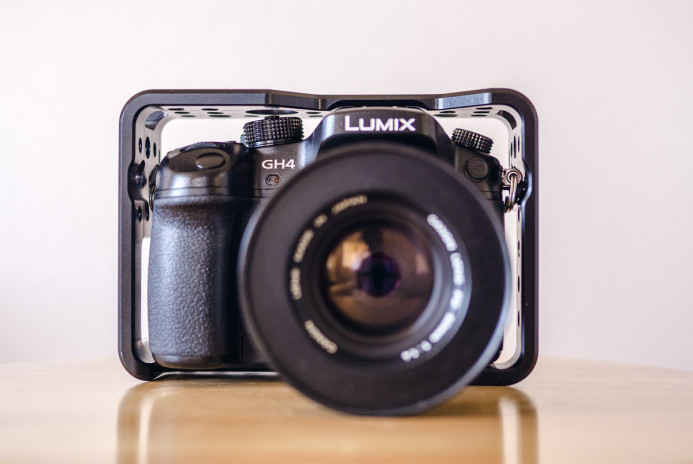
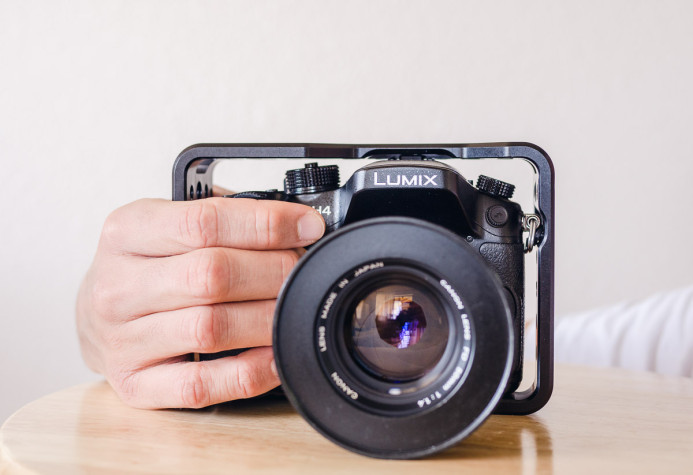
You can tell that the Contineo was built specifically for the GH4 because absolutely no space is wasted in the design.
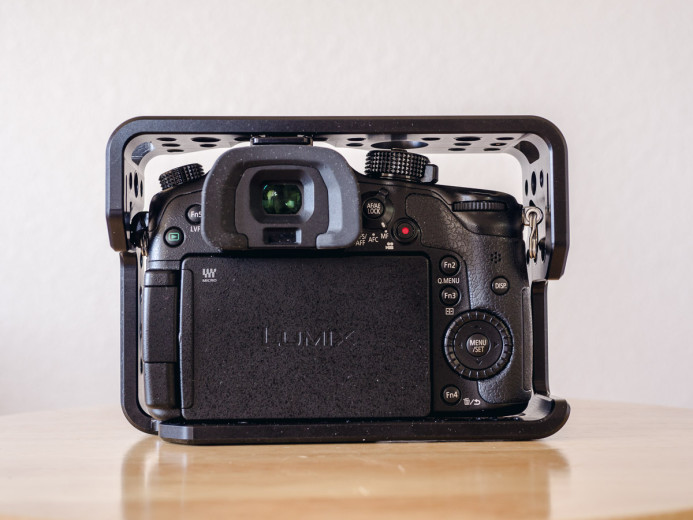
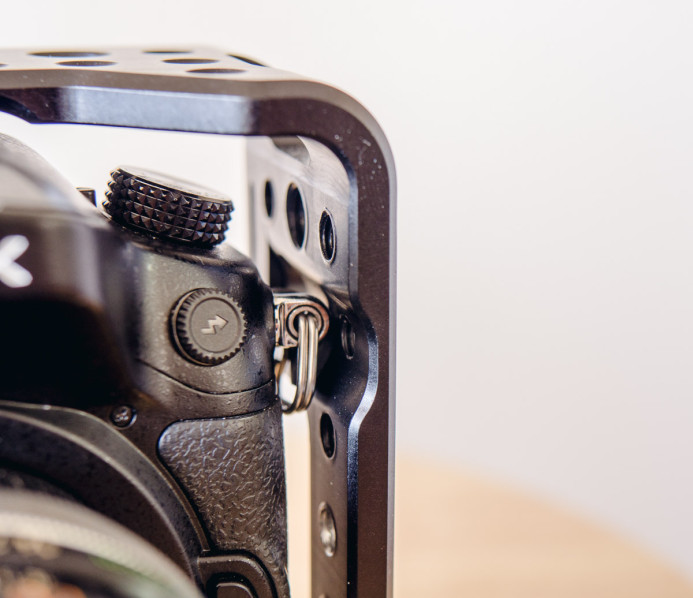
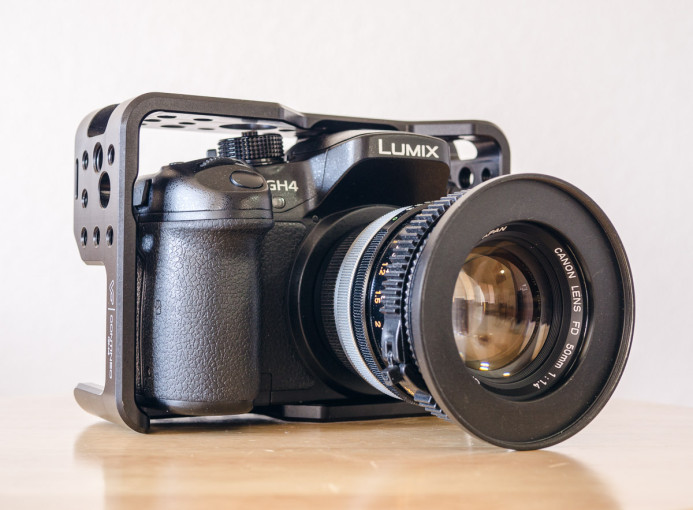
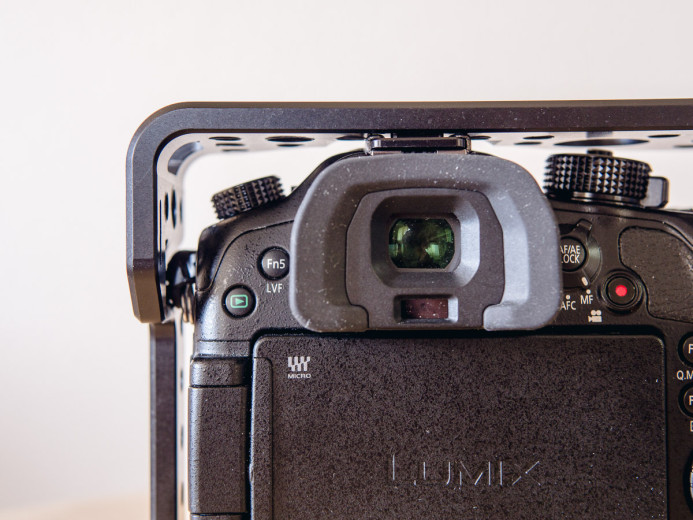
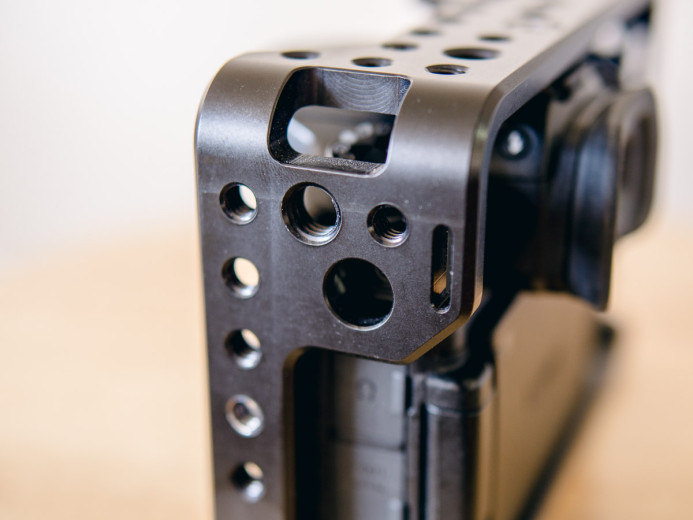
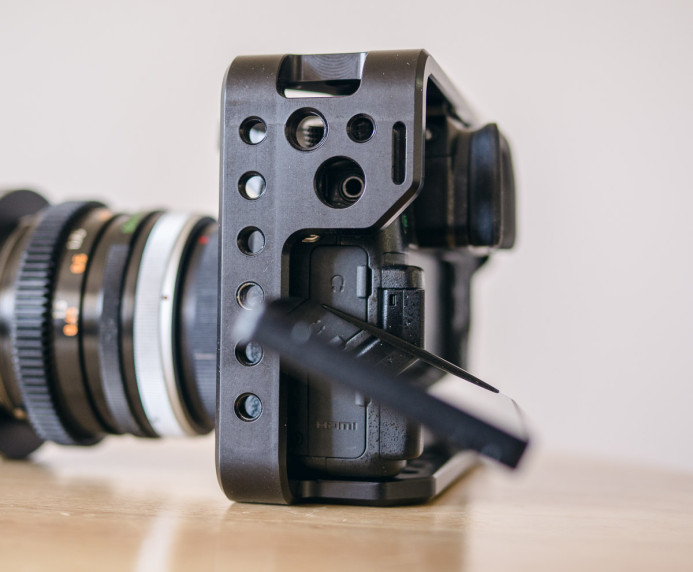
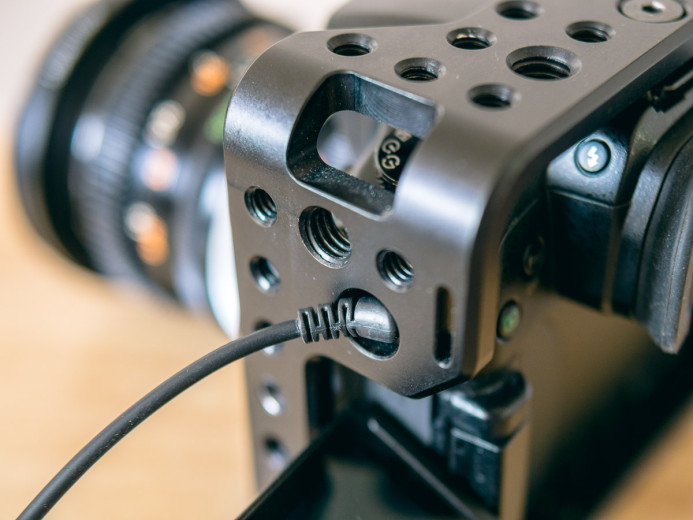
This full cage wraps around all sides of the GH4. In some places the cage comes so close to the camera’s body that grooves are milled out of the cage’s frame to make room for protrusions such as the GH4’s shoulder strap lugs.
Full cages can make hand-holding the camera difficult because of the extra material around the camera, but the GH4 remains comfortable to hold in your hand thanks to the Contineo’s close fit.
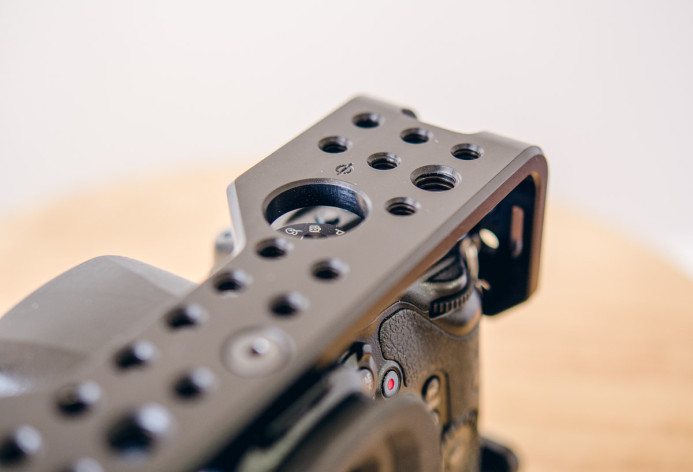
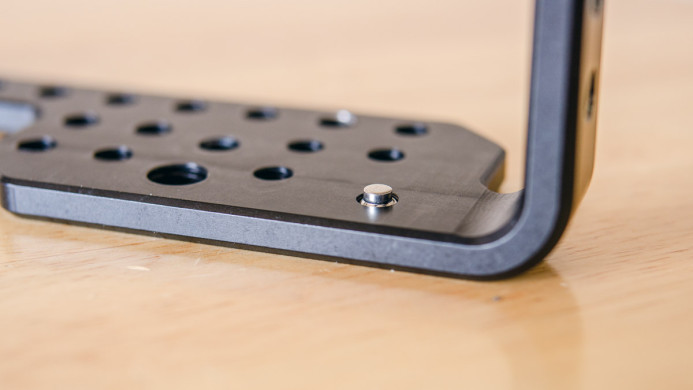
The Contineo’s design is also quite practical. There are no unnecessary angles or curves– all surfaces are flat, providing you with the most flexibility in how the cage can be used.
Still, while it may not be flashy, the Contineo’s streamlined design make it one of the best looking cages for the GH4.
Third-Party Compatibility
There is one issue with the Contineo’s design that affects compatibility with third-party accessories, especially if you use a viewfinder/loupe on the rear monitor.
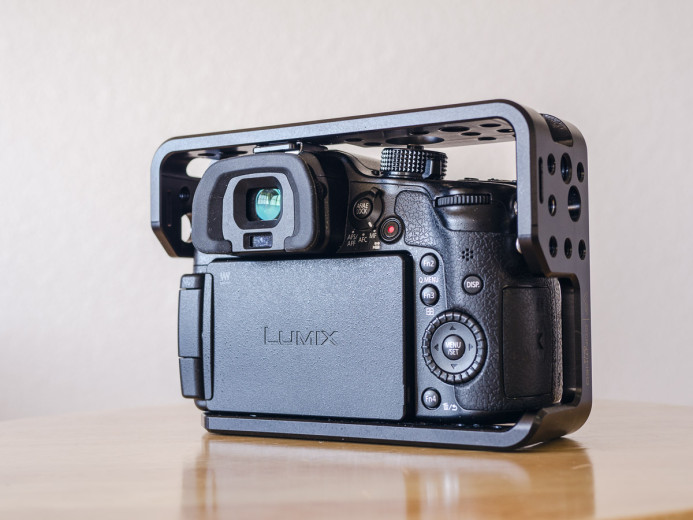
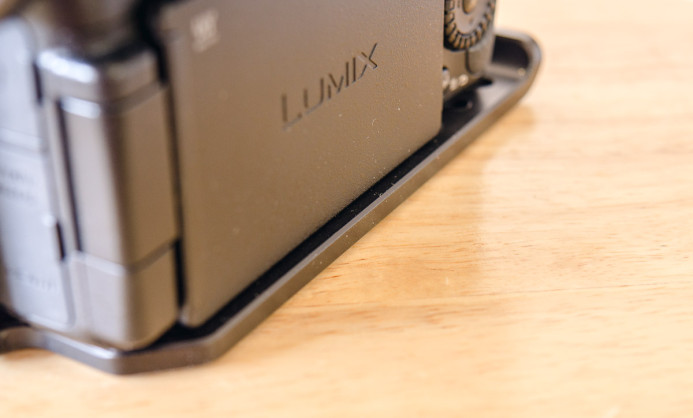
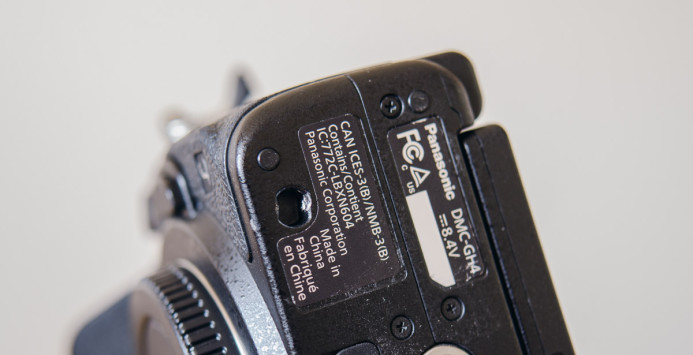
Some cages are flush with the rear of the camera, but the bottom of the Contineo extends beyond the rear of the GH4. As a result, LCD loupes like the Zacuto Z-Finder are blocked from pressing up against the GH4’s monitor when the camera is in this cage.
This means you need to choose between using a viewfinder or this cage when shooting with the GH4, which is unfortunate because the GH4’s monitor is so sharp. While the GH4’s EVF is certainly nice, it feels positively tiny after you’ve used the GH4 monitor with a magnified loupe.
I would love to see View Factor revise the Contineo’s design so that the bottom of the cage is flush with the rear of the GH4. If it were, the Contineo would be the perfect cage for a minimal rig that uses an LCD viewfinder for monitoring and stability.
Solid Build Quality (Without Weighing You Down)
The Contineo is machined out of the single block of aircraft-grade aluminum. Not only is this impressive from an engineering standpoint, the unibody design provides an extremely rigid structure while still remaining lightweight.
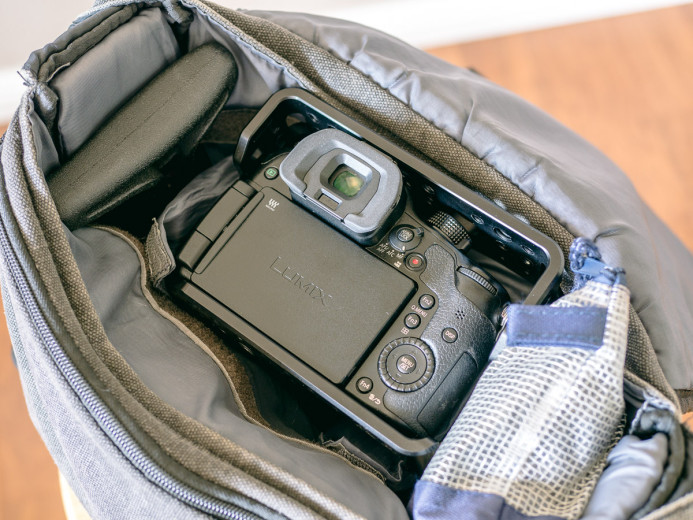
View Factor has struck a good balance size and strength. The cage’s walls are 1/4″ thick all the way around, giving the Contineo a very solid feel. At the same time, the size of the camera has not changed dramatically, so it still fits well in a normal camera bag.
A solid cage for your camera is nice, but a heavy cage can quickly weigh you down. Thankfully, despite being a full cage, the Contineo is surprisingly light, tipping the scales at only 230 grams.
This means you can benefit from the protection and mounting options afforded by a cage without sacrificing the ease and comfort of shooting with a compact camera like the GH4.
Attention to Detail
View Factor shows great attention to detail with the Contineo’s finishing touches.
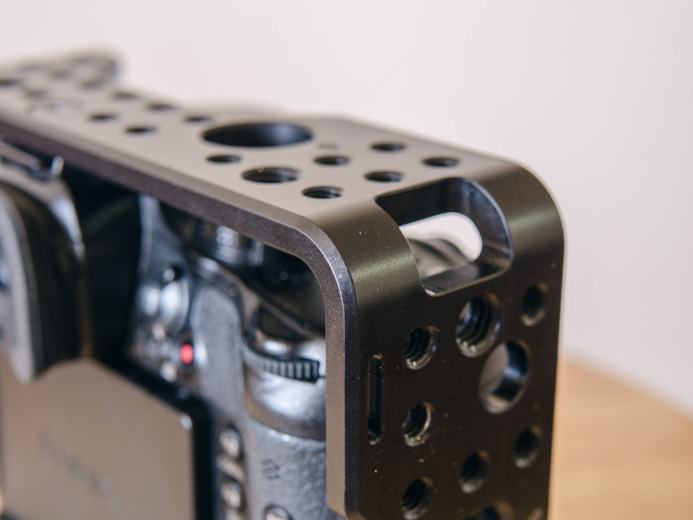
For example, virtually all of the cage’s edges are beveled, so there are no sharp edges that could make holding the camera for extended periods of time uncomfortable.
Additionally, the cage’s corners have all been nicely rounded off to keep your rig from scratching or catching on anything.
The Contineo’s anodization is also well-done. The surface is smooth and evenly coated and protects nicely against stratches and other signs of wear. Even after using the cage in the field for several months and mounting bare metal accessories to the cage, only a couple threaded holes show any evidence that the cage has even been used.
Abundant Mounting Options
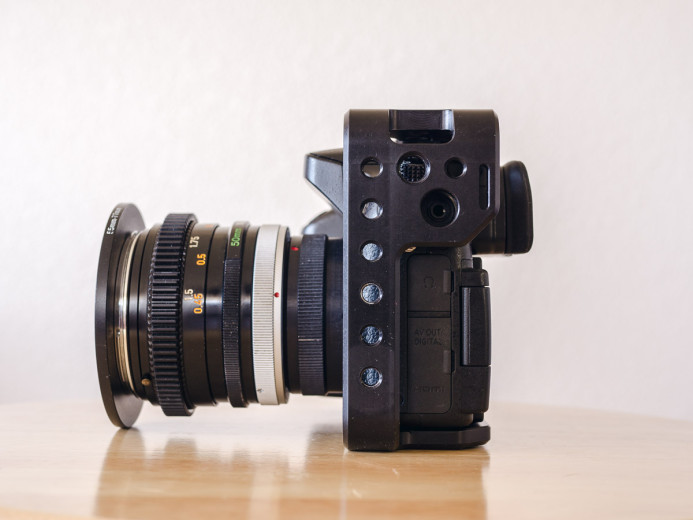
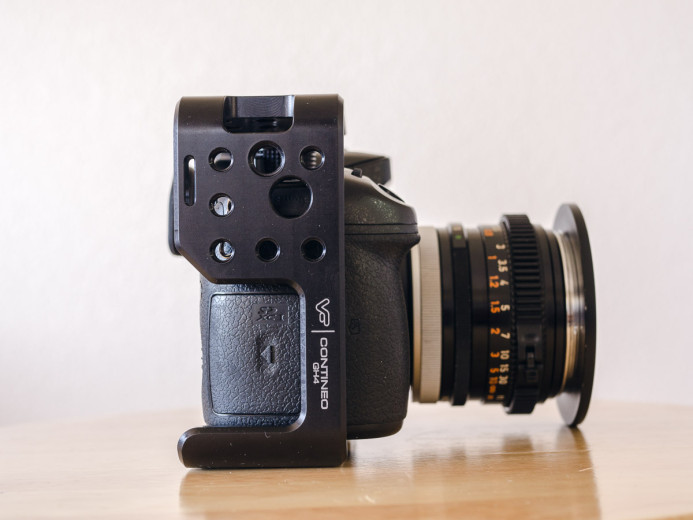
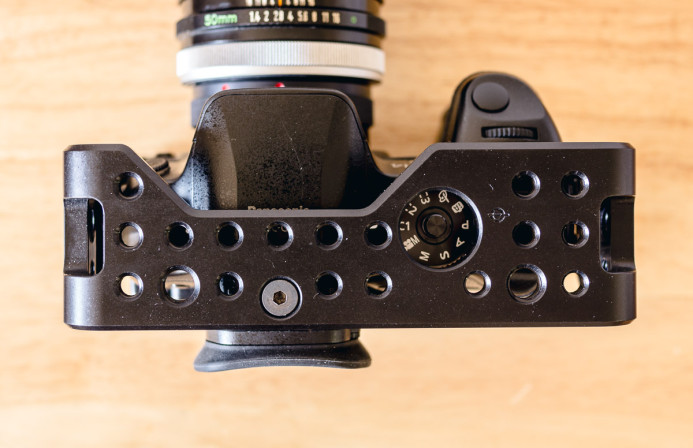
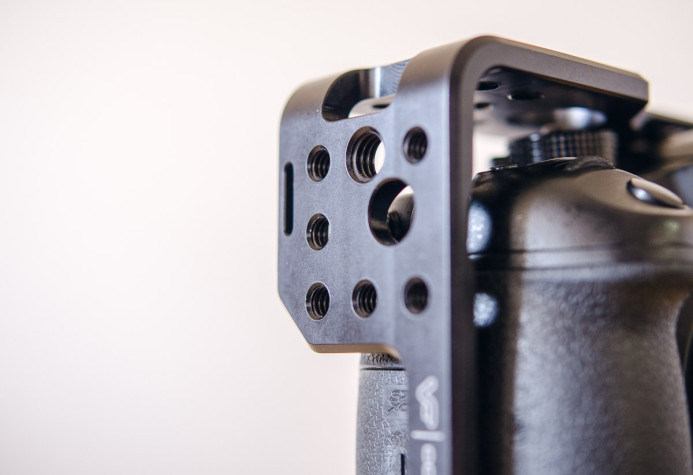
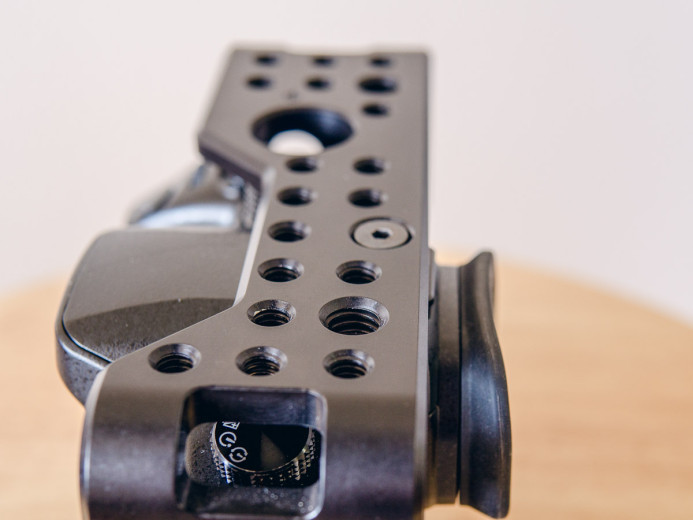
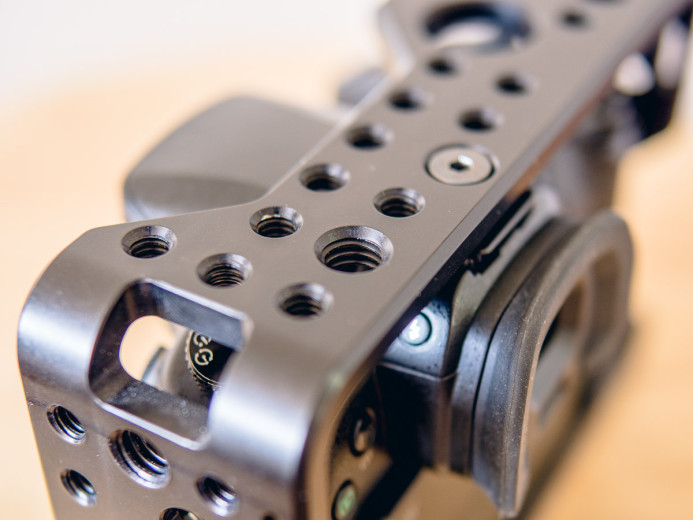
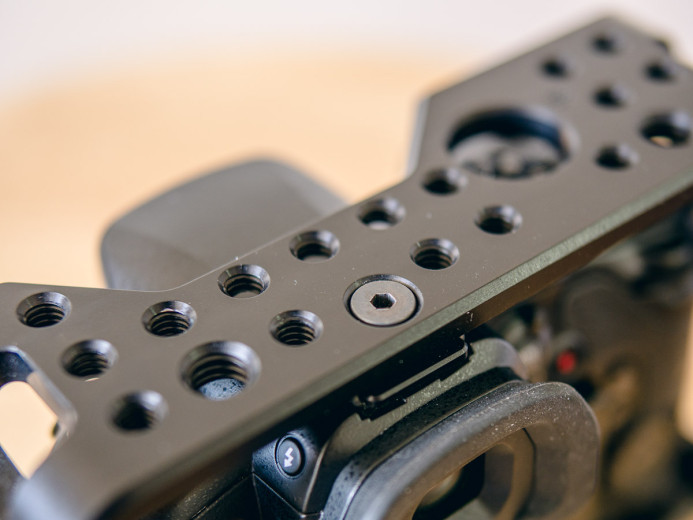
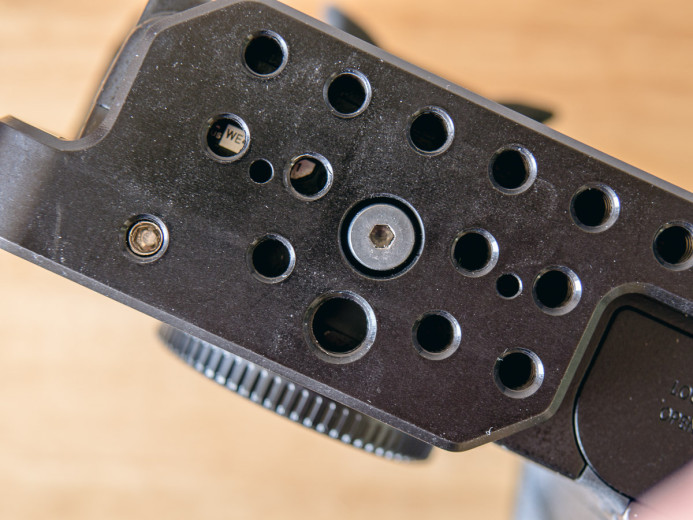
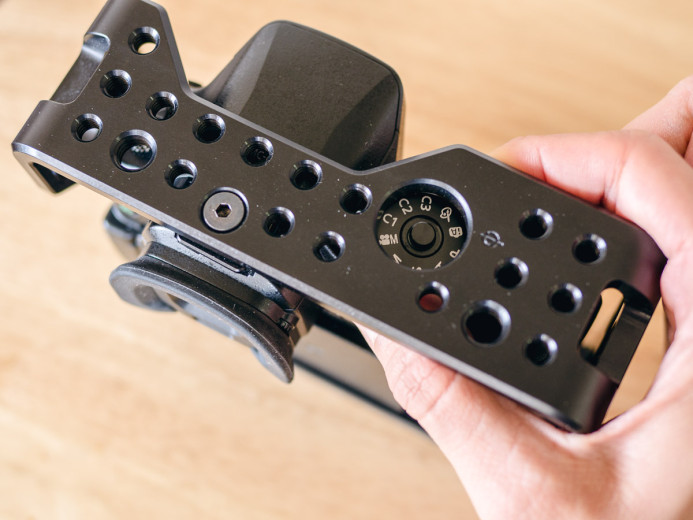
View Factor makes good use of the Contineo’s surface area by covering the cage with industry-standard threaded holes, giving you a wealth of mounting options when building your camera rig.
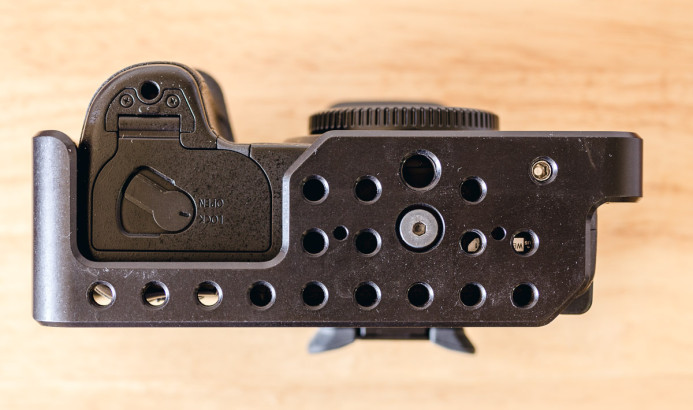
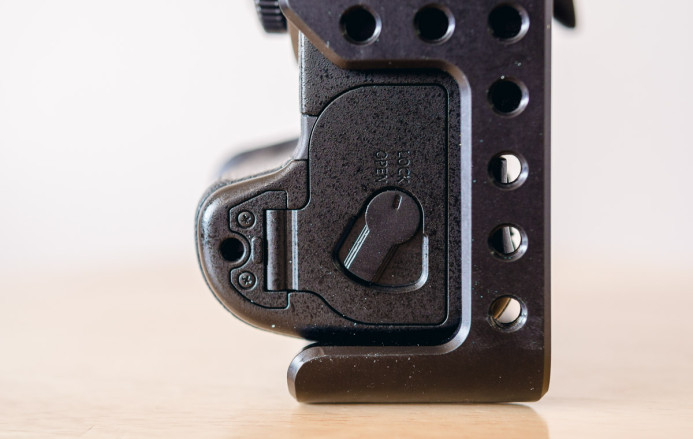
In total, the Contineo has 46 1/4″-20 and 5 3/8″-16 threaded holes distributed across its 4 sides.
Even the bottom of the camera has more threaded holes than you likely will ever need.
I was also happy to find that the threads are all quite smooth. Most mounting hardware can be screwed in by hand, with a tool only required for final tightening.
Anti-Twist Functionality
View Factor also took a novel approach to adding anti-twist functionality to the cage so that the GH4 is always pointing straight ahead.
Instead of using pins or blocks that press up against the camera’s body, the Contineo takes advantage of the GH4’s existing anti-twist functionality designed for use with official accessories like the battery grip and YAGH interface adapter.
The Contineo mounts to the GH4 at two additional points– the tripod mount and the hot shoe. When all 3 points are tightened down, twisting is greatly reduced, helping to ensure that the camera will remain properly aligned during shooting.
Installation
Installing the GH4 into a cage as tight-fitting as the Contineo can be a bit tricky and can lead to usability issues if you don’t do it right.
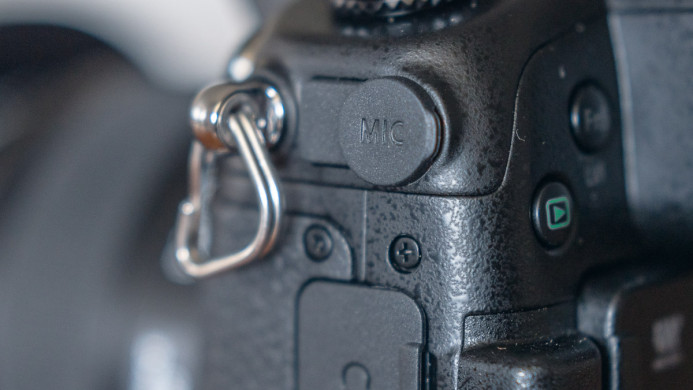
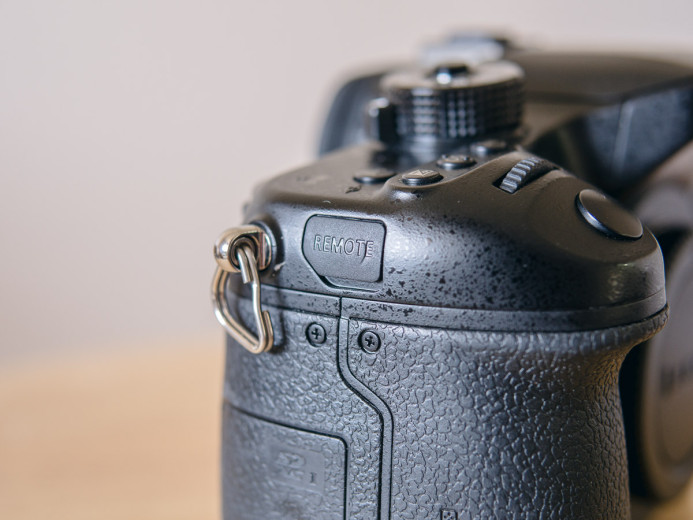
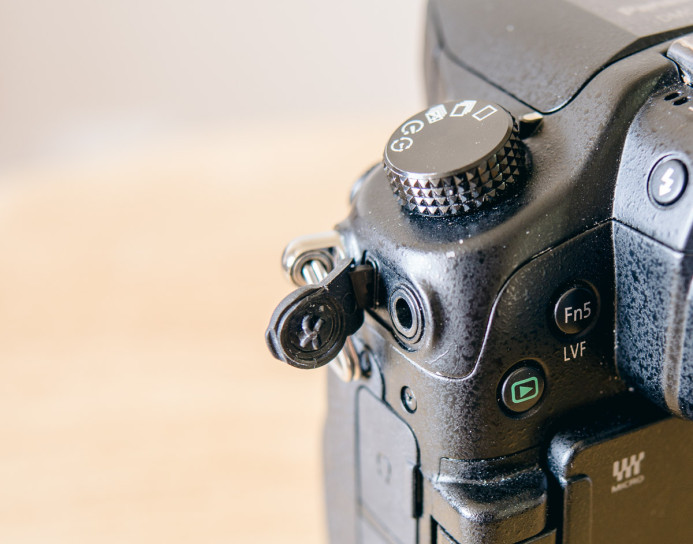
For example, the cage hugs the GH4 so tightly that the covers need to be removed from certain inputs before you install the camera in the cage, otherwise you will not be able to use those inputs when the cage is fully mounted.
However, once you figure out the right procedure, installation is relatively straightforward. Here is the best process we’ve found for installing the GH4 in the Contineo cage:
- Open and fold back the rubber covers for the GH4’s mic and remote inputs.
- Slide the Contineo top mount into the GH4’s hot shoe.
- Back the GH4 into the cage from the front (top mount will not fit when sliding the camera from the rear of the cage).
- Align top mount with its mounting hole and partially tighten to hold the GH4 in place.
- Align the GH4’s tripod mount with the mounting hole on the bottom and partially tighten.
- Align anti-twist pin with the GH4’s registration hole and tighten.
- Fully tighten tripod mount bolt, followed by hot shoe mounting bolt.
Once you get used to this installation process, you can install the GH4 in the Contineo cage in less than 2 minutes.
Access
Once you get the GH4 installed in the Contineo, how hard is it to access the camera’s controls?
As you might expect from such a compact cage, access is tight, but it is thankfully not prohibitive for the most part, though there are a few issues that make access less than ideal. Also, if you have thick fingers, you may want to look for a more spacious cage.
The Basics: Memory Card, Battery, & Monitor
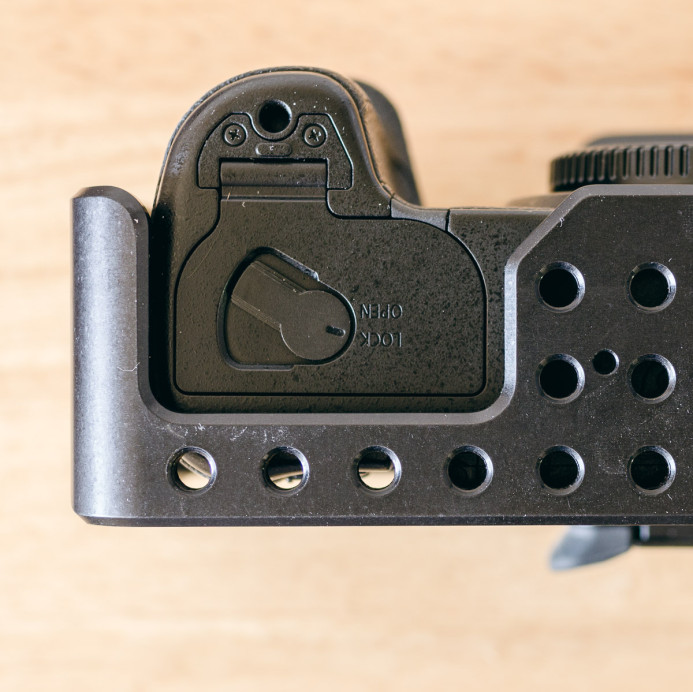
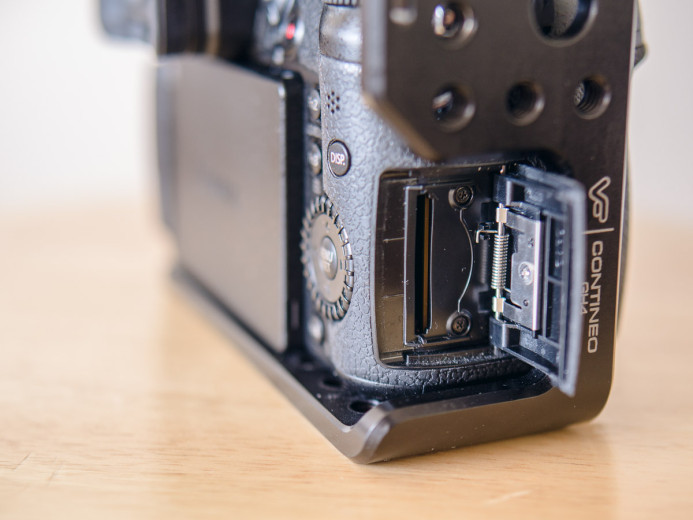
The Contineo is custom-built for the GH4, so to the cage fits like a glove around the memory card and battery doors. Perfect.
The GH4’s OLED monitor also has a good range of motion, though it will come into contact with the cage if you attempt to flip it around when fully extended. However, the monitor can be fully rotated simply by folding it back toward the camera’s body a bit.
Shutter Button & Exposure Dials
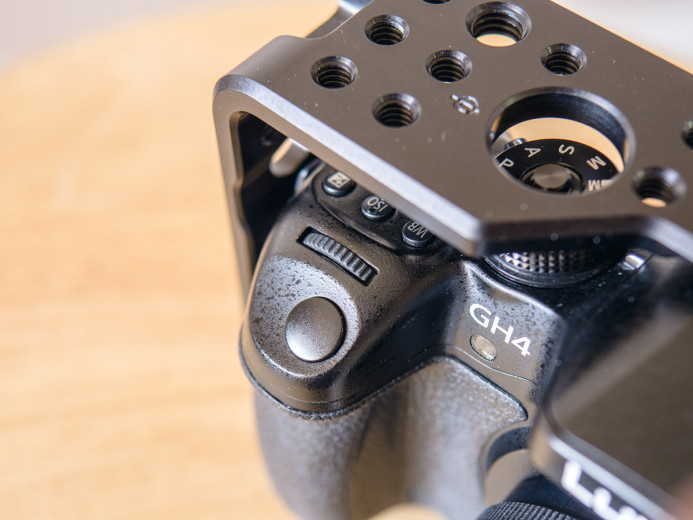
The shutter button and exposure adjustment dials are completely unencumbered by the cage. Access to these controls is exactly the same as with a naked GH4.
Mode Dials
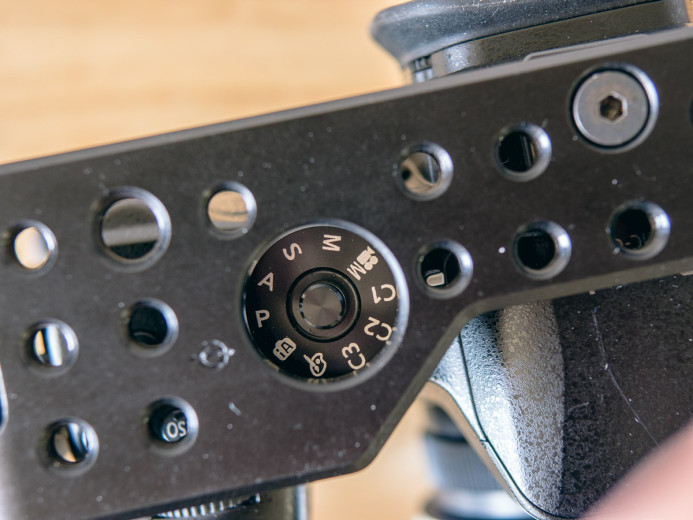
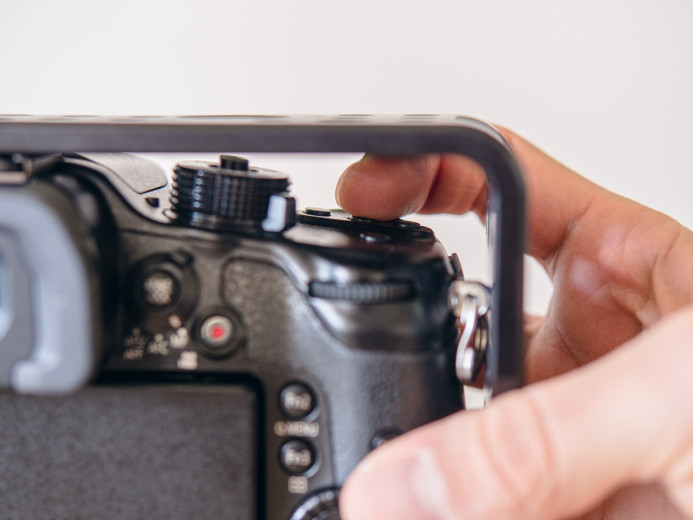
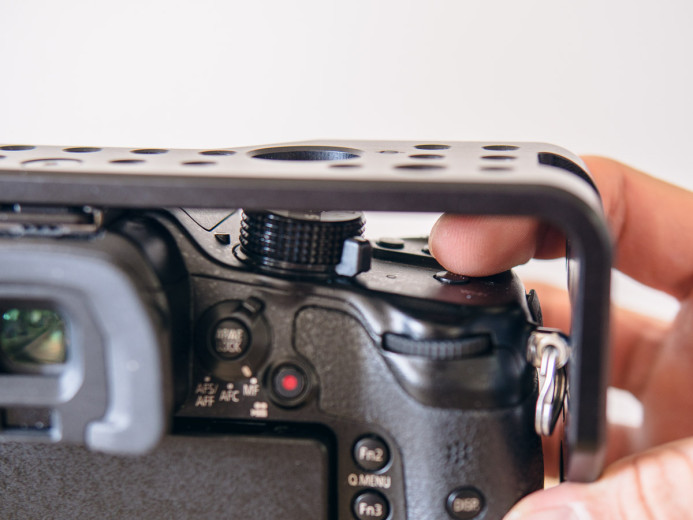
Both mode dials on the top of the GH4 are still easily accessible with your index finger and thumb.
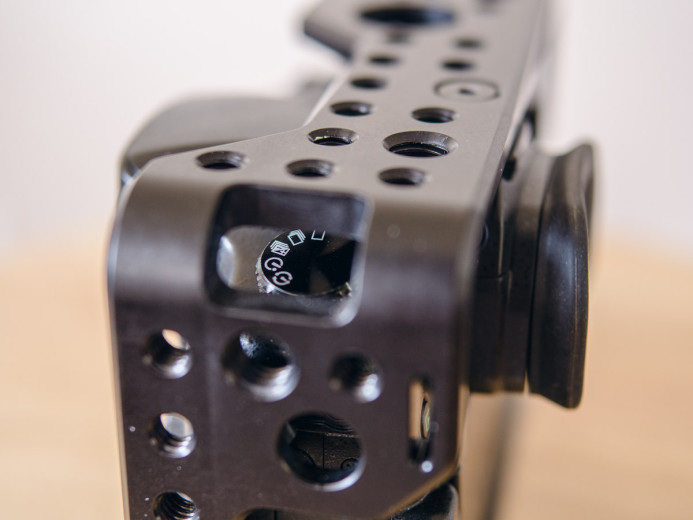
The Contineo has a cutout for the main mode dial that allows see it quite clearly. If you don’t have anything mounted too closely to the cutout, you can also see the selection indicator, making it even easier to determine which mode is selected.
You can also access the drive mode dial fairly easily, but there’s no cutout for this dial on the cage. This makes it a bit more difficult to see which drive mode is selected, but you can sort of peek in from opening in the cage’s corner.
Buttons
The white balance, ISO, and exposure compensation buttons are all relatively easy to access with your index finger.
Also, while it’s a bit of stretch, I’ve found that using you index finger to reach the FN1 button from the front of the cage is easier than trying to access this button from the rear.
Flash
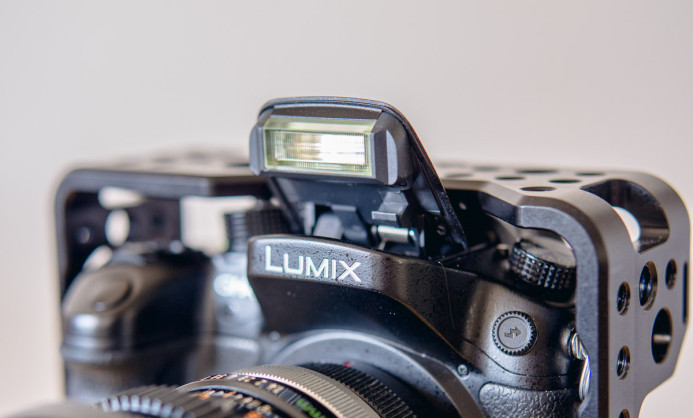
Surprisingly, the GH4’s flash is still fully functional in the Contineo cage. Most cages don’t account for the flash because they are focused more on video use, so it is nice to see a cage that does not reduce the GH4’s functionality when shooting stills.
Inputs
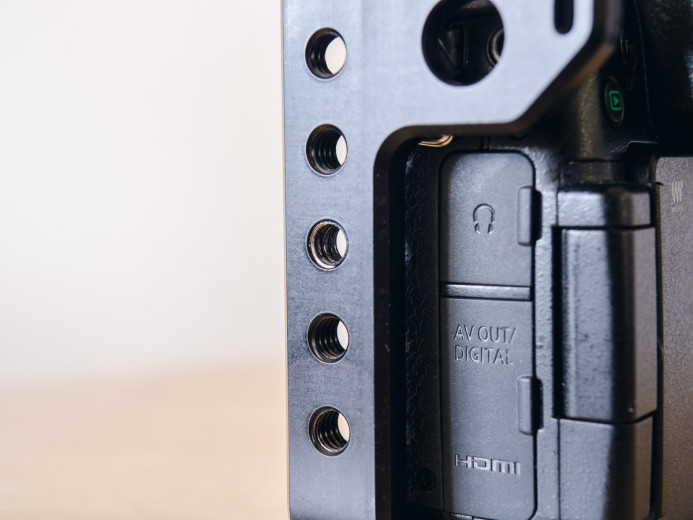
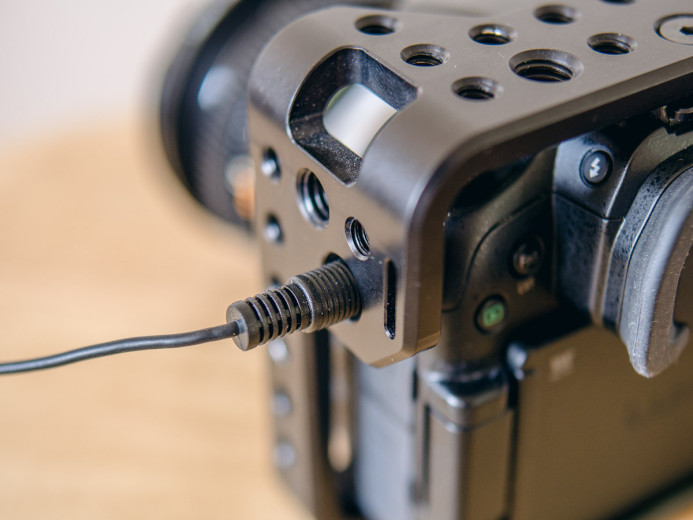
The Contineo’s biggest accessibility issue is access to the microphone and remote inputs.
As noted in the installation instructions above, clearance is so minimal, that you need to make sure to open the rubber covers for these inputs and fold them back before installing the camera into the Contineo. If you skip this step, access to the microphone and remote inputs is impossible when the GH4 is in this cage.
Unfortunately, this makes installation more cumbersome and causes these inputs to be exposed to the elements. Furthermore, prolonged bending of the rubber input covers have caused them to warp significantly, to the point that they no longer properly cover their respective inputs.
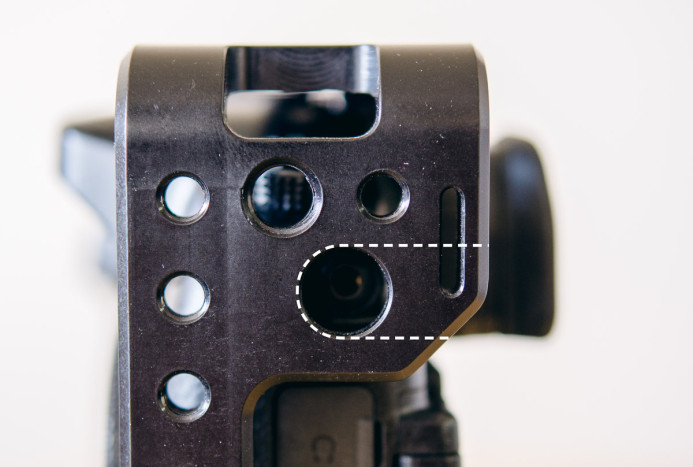
If you can move past these issues, there’s a bigger issue you still have to deal with– the Contineo’s cutouts for the mic and remote inputs are too small and restrict the type of plugs you can use.
Specifically, cables with right-angle plugs can no longer be used with the GH4 due to the Contineo cage. You may be able to force a right-angle plug to fit in the mic input if you find a particularly flexible one, but I would be concerned about the off-axis stress the input is being subjected to.
As such, if you want unencumbered access to the mic input, you’ll need to use a 3.5mm adapter cable with a straight plug. This cable will pass through the Contineo’s cutout and allow you to use your audio cables with right-angle plugs.
That said, adding extra connections into your audio chain is never ideal. It adds additional points of failure and forces you to carry spare adapter cables in case the one you are using fails during a shoot.
The remote input suffers from the same issue as the mic input on the other side of the camera– the Contineo’s cutout for the remote input is too small to allow access.
This is a strange omission, as even Panasonic’s official remote uses a right-angled plug. It’s difficult to understand why View Factor made a cutout that was too small even for the GH4’s official accessories.
Remotes for the GH4 with straight plugs are difficult to find to say the least. A potential solution would be to use an adapter cable like you can with the mic input. Unfortunately, I have yet to find a 4-pole 2.5mm adapter cable.
As a result, the GH4’s remote input is basically when using the Contineo cage. If you use a remote for triggering recording (e.g. from a handle on your rig), then you may need to look for a different cage.
This is an area where I would like to see View Factor make some revisions to the Contineo cage. Enlarging the cutouts would be start, but extending the cutouts to the edge of the cage would be an even better solution.
This would not only allow you to use any plug with the GH4, but it would also allow the inputs to be protected by their rubber covers when not in use (rather than having to fold them back prior to installing the camera in the cage).
I may well take a saw to the Contineo to resolve these accessibility issues. Sign up at the end of this post to receive an update when I do.
Contineo Minimal Rig Setup
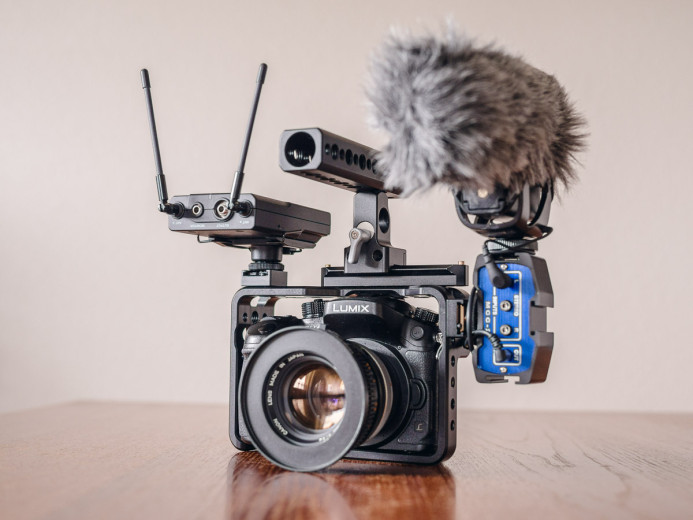
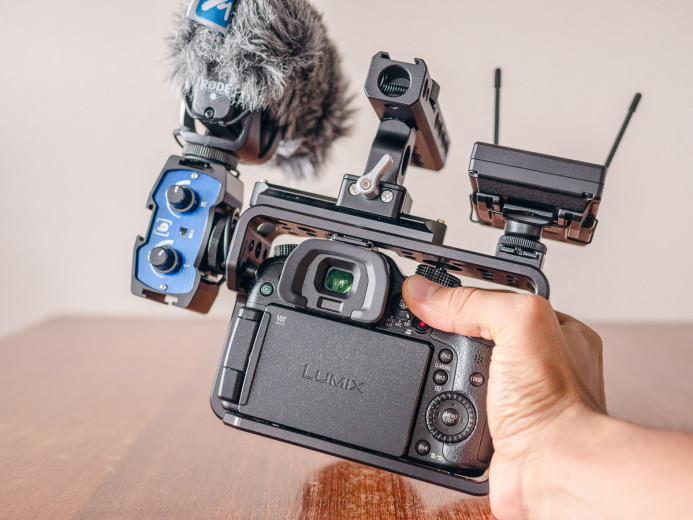
This is the setup that I use with the Contineo cage. It’s a lightweight and mobile handheld rig, but thanks in part to the Contineo’s mounting options, it also can be quickly built out to a larger rig when necessary.
Rig Breakdown
- Panasonic GH4
- View Factor Contineo Cage
- Cold Shoe adapter (2) — Mount accessories that use the camera’s hot shoe (mic, lights, monitor, etc.) anywhere on your rig.
- Rode VideoMic Pro (with Micover windscreen) — A compact and high-quality on-camera shotgun microphone.
- Beachtek MCC-2 Audio Adapter — Independently record to and control levels for each of the GH4’s audio channels (review).
- Sony UWP-D11/30 — A solid wireless mic system.
- Wooden Camera NATO Handle Plus — A versatile quick-release top handle (review)
- SmallRig 100mm Safety Rail — Quick-release rail for top handles and other accessories.
- Zacuto Gorilla Plate — Mounts under the cage to quickly attach the camera to a rig for additional support.
Note: If it were compatible with the Contineo cage, I would also use a viewfinder for the OLED screen such as the Zacuto GH4 Z-Finder for improved monitoring and stability.
Is the Contineo Cage Right for your Rig?
A cage is the foundation of your camera rig. It allows you to mount additional equipment, improves rigidity, and protects the camera.
In these ways, View Factor’s Contineo is an excellent cage for your camera rig, especially if keeping things light and mobile are priorities.
The Contineo is solid, streamlined, and lightweight, making it a great way to add a cage without dramatically increasing your rig’s bulk.
That said, the Contineo also has a few accessibility issues that could definitely be improved upon in future revisions. Until then, the Contineo may not be the right cage for users that shoot with an LCD viewfinder or use a remote to trigger recording.
Aside from those issues, the Contineo is one of the best cages custom-designed for the GH4 I’ve used, so hopefully we’ll see an updated version that resolves these issues in the near future.
Related
- View Factor Contineo Cage — A solid and lightweight cage custom-designed for the Panasonic GH4.
- Panasonic GH4 — A solid camera for your video production needs.
- Zacuto GH4 Z-Finder — Make the most of the GH4’s excellent OLED monitor with this viewfinder (not currently compatible with the Contineo cage).
- Zacuto Gorilla Plate — Mounts under the cage to quickly attach the camera to a rig for additional support.
- Wooden Camera NATO Handle Plus — A versatile quick-release top handle (review)
- SmallRig 100mm Safety Rail — Quick-release rail for top handles and other accessories.
- Rode VideoMic Pro — A compact and high-quality on-camera shotgun microphone.
- Micover Rode VideoMic Pro Windscreen — Dramatically improve the Rode VideoMic Pro’s performance when shooting outdoors.
- Beachtek MCC-2 Audio Adapter — Independently record to and control each of the GH4’s audio channels (review).
- Sony UWP-D11/30 — A solid wireless mic system that I’ve been using for years.
- Sennheiser G3 Wireless Mic System — Another very popular wireless mic system.
- SmallRig Cold Shoe adapter — Mount accessories that use the camera’s hot shoe (mic, lights, monitor, etc.) anywhere on your rig.
Rigging the Panasonic GH4
Cages
- Cage Fight! 5 Cages for the Panasonic GH4
- Wooden Camera Quick Cage Review
- Viewfactor Contineo Cage Review
- SmallRig VersaFrame Cage: First Impressions
- Fhugen Honu Cage Review
Camera Rigs
Rig Components
- Wooden Camera DSLR 15mm Base Review — Expand the Quick Cage using 15mm rods with this base
- Wooden Camera NATO Handle Plus Review — More than just a top handle
- How to Build a Quick-Release Friction Arm for $30
- Quick Comparison: Zacuto Zwivel & Zwivel II
More Panasonic GH4 Guides
- Why You Should Be Excited About the Panasonic GH4
- Lenses for the Panasonic GH4 — Awesome glass for an awesome camera.
- Memory Cards for the Panasonic GH4 — Get the right memory cards for HD and 4K.
- Configuring the Panasonic GH4 for Video Production — Set the GH4 up for filmmaking.
- Rigging the Panasonic GH4 — Cages, Rigs, Components, Gear, and Reviews.
- Stabilizing the Panasonic GH4 — Tripods, Monopods, Sliders, 3-Axis Gimbals, etc.
- Maximizing the Panasonic GH4’s Audio Performance — Sound matters.
- Powering the Panasonic GH4 — Keep the GH4 shooting all day.
- Should you buy the YAGH for the Panasonic GH4?
- 6 Reasons Why DSLR Shooters Love the Panasonic GH4
