Quick Comparison: Zacuto Zwivel & Zwivel II
Zacuto’s Zwivel is a versatile 15mm rod clamp that can greatly streamline your camera rig. Here’s a quick look at the updated Zwivel II compared to the original Zwivel.
What’s a Zwivel?
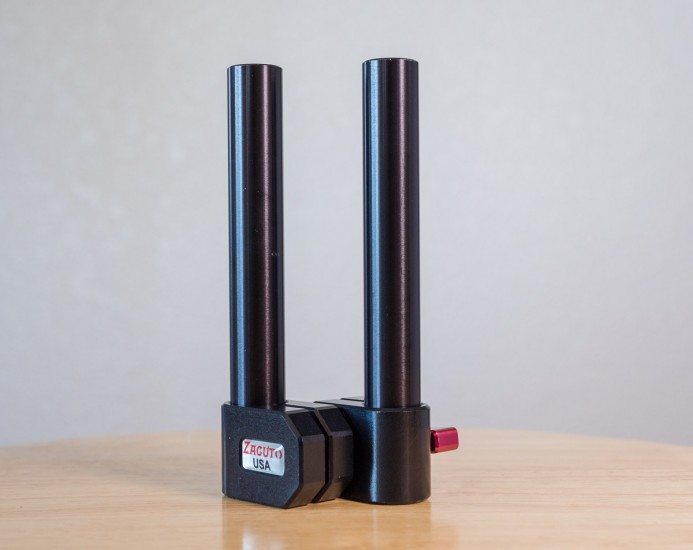
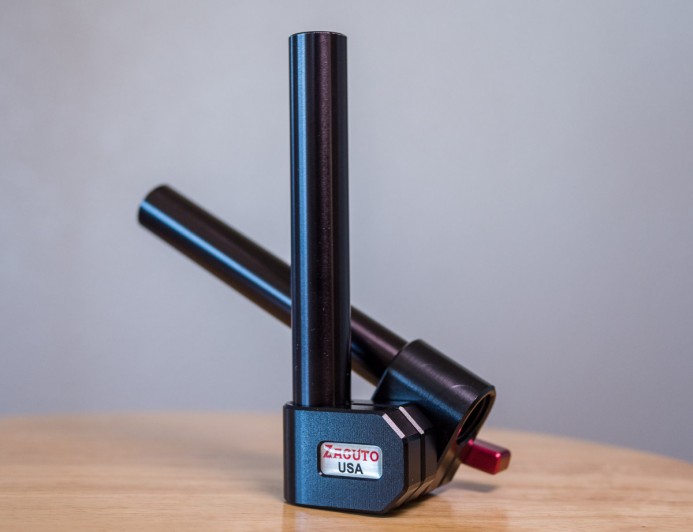
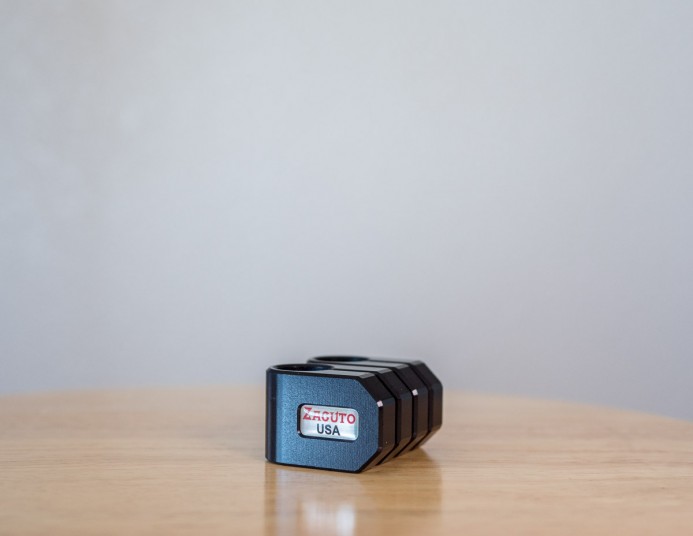
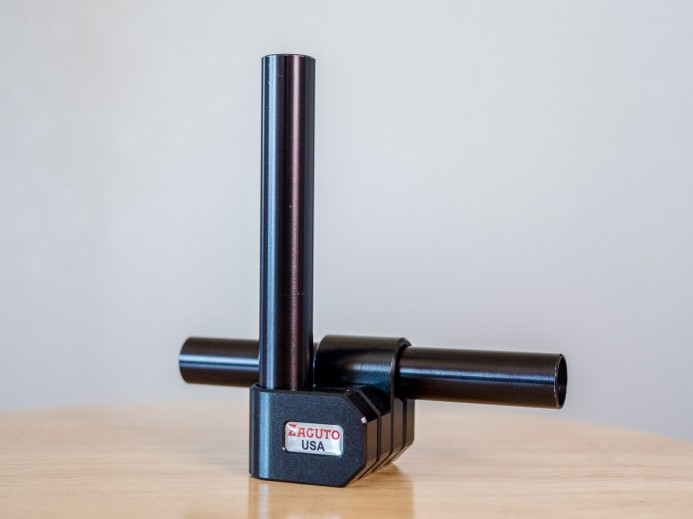
Most 15mm rod clamps force you set your rods at a specific angle to each other (generally perpendicular or parallel). Zacuto’s Zwivel is unique in that it allows you to choose the angle the rods are set to.
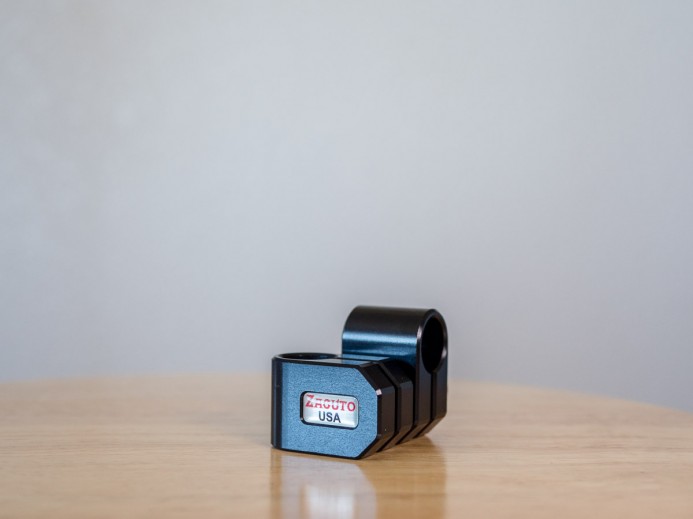
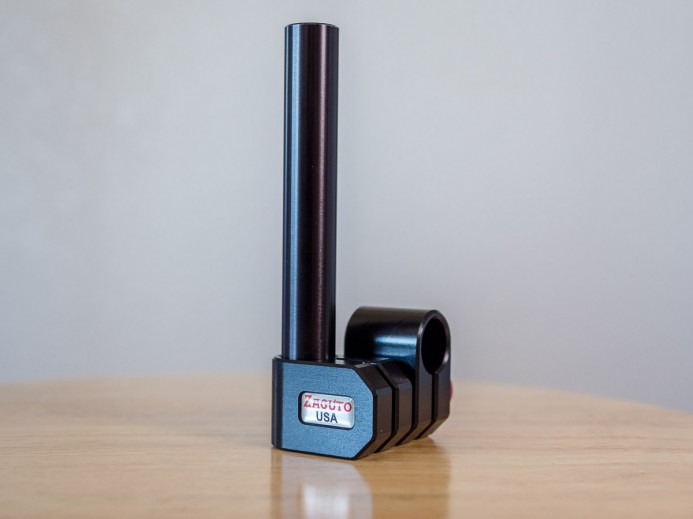
Rods can be set at right angles to each other with the Zwivel.
The Zwivel can be used to set rods parallel to each other as well.
Replacing two different clamps already makes the Zwivel a versatile clamp, but the real magic is that you can also set the rods at virtually any angle in between.
The Zwivel can rotate rods a full 360° in 30° increments, giving you a wide range of adjustment to find the best angle for your needs.
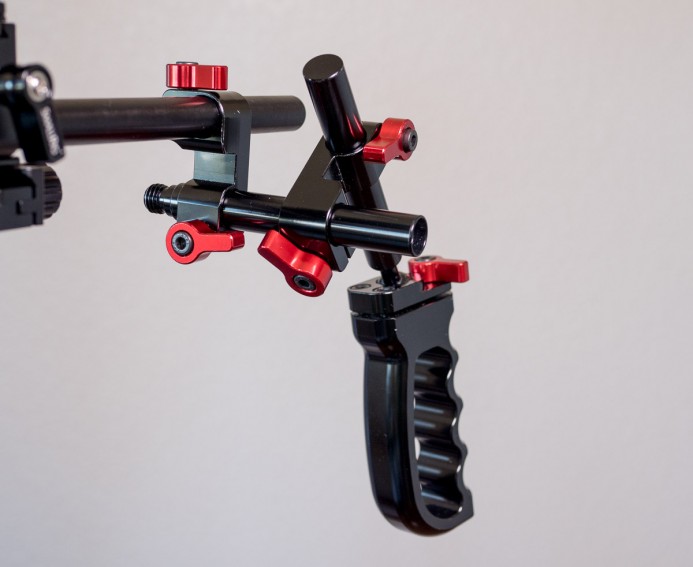
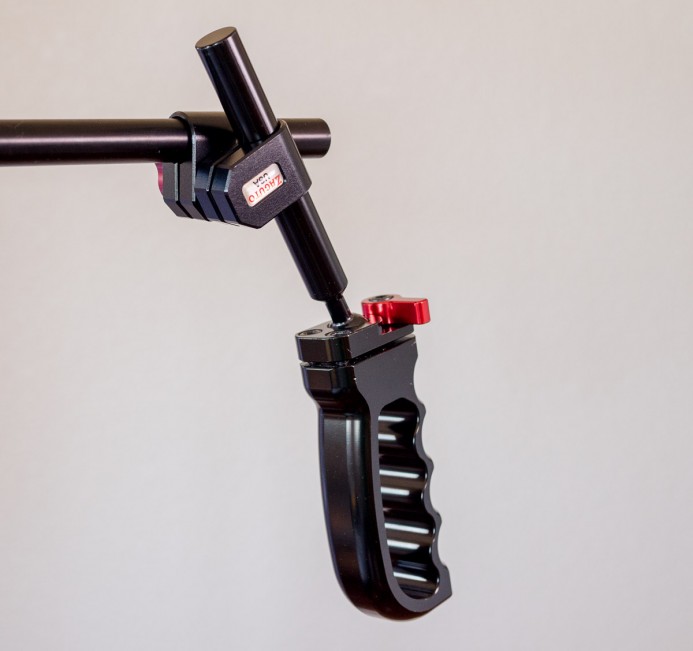
For example, normally you would need to use a mess of right angle clamps and rods to set a handle or chest brace at an odd angle.
The Zwivel replaces this monstrosity with a single clamp, giving you a much simpler and cleaner setup.
Bottom line: The Zwivel replaces multiple 15mm rod clamps and helps you streamline your rig.
OG Zwivel
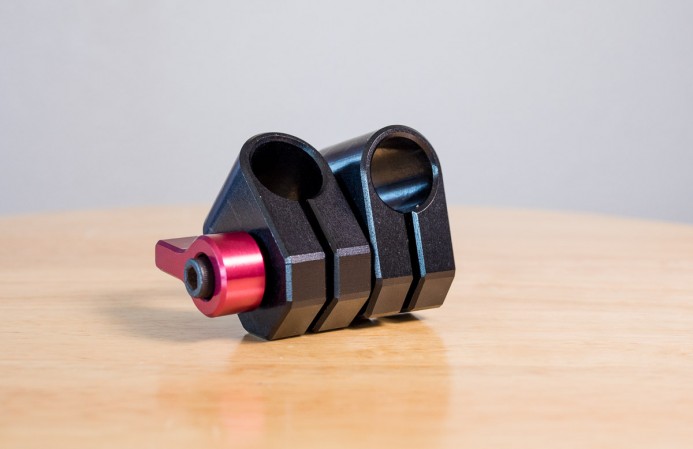
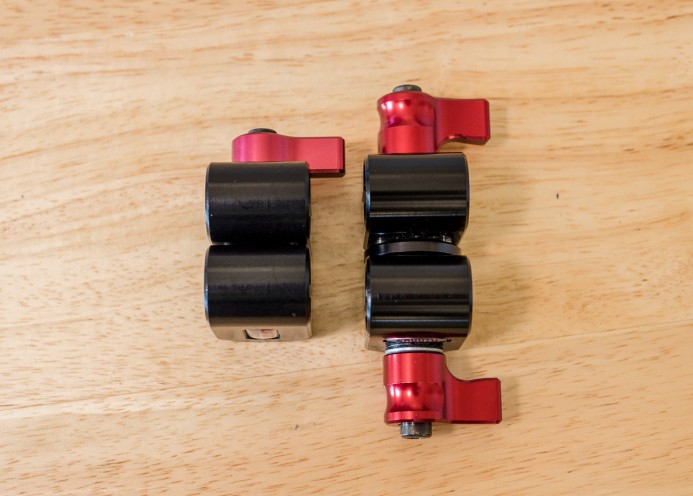
The original Zwivel is pretty straightforward– it’s just two 15mm rod clamps and a single knob.
To use the Zwivel, you loosen the knob until the two rod clamps separate enough to rotate them, set the desired angle, and tighten the Zwivel up.
Lock It Down
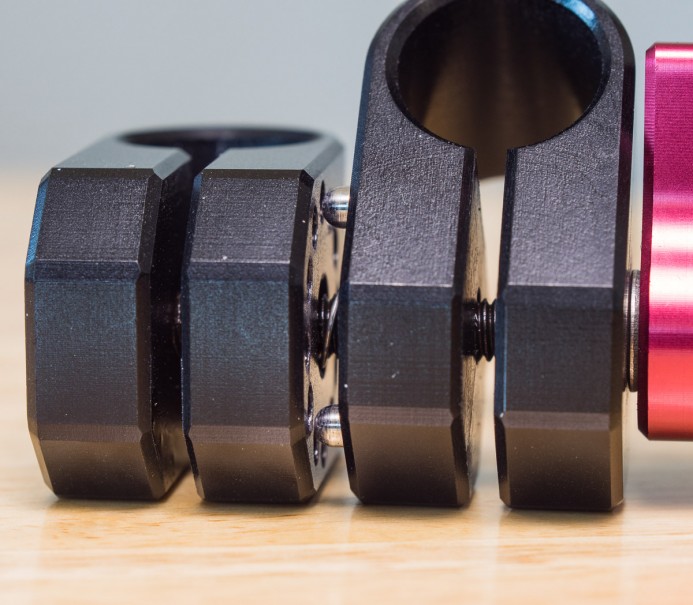
To ensure that the Zwivel remains at the angle you set without any slippage, one clamp has 3 small registration posts that fit into a circular array of holes on the other clamp when the Zwivel is tightened.
Since the posts need to match up with the holes, the Zwivel’s angle is adjustable in 30° increments, giving you a total of 11 different angles that the Zwivel can be set to.
Juggling Act
One potential issue with the Zwivel’s simplicity is that when you loosen the knob to adjust the clamp’s angle, the rods are also loosened.
This can create a bit of a juggling act where you need to keep the rods from sliding out of the clamps until you can make the desired adjustments and then tighten the clamp back down.
Further, since a single knob controls both of the Zwivel’s rod clamps, both rods come loose at the same time. This means you need to pay attention to both rods even if only one requires adjustment.
The best workflow I’ve found is to focus on setting the angle first, tighten the clamp enough to lock the angle, and then position the rods in the clamps as desired. Trying to get everything positioned perfectly at the same time is tricky to say the least.
Bottom line: The Zwivel gives you a lot of flexibility, just make sure you pay attention to both rods when making adjustments.
Zwivel II: The Next Generation
The new Zwivel II looks a lot like the original Zwivel, but there are a few key features that make a world of difference.
Double the Knobs, Double the Fun
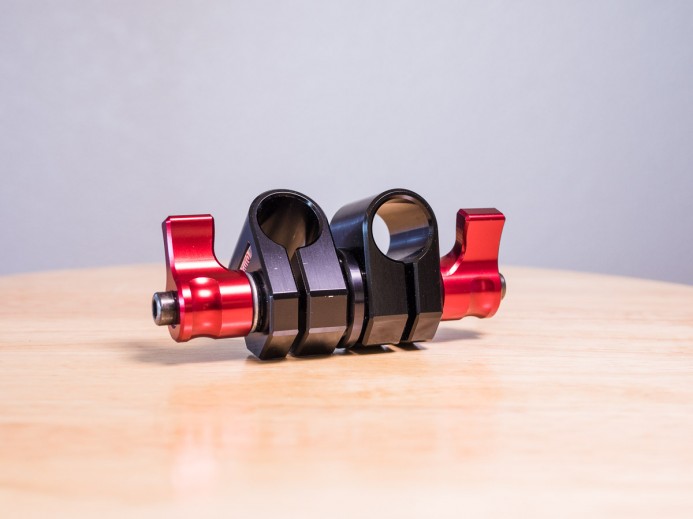
The most obvious difference is that the Zwivel II has two knobs instead of one.
Now each 15mm rod clamp can be independently loosened and rotated without affecting the other rod at all. This means that you can adjust the rod position and angle of one clamp without having to worry about the other rod falling out of the clamp in the process.
Very nice.
Refined Rotation
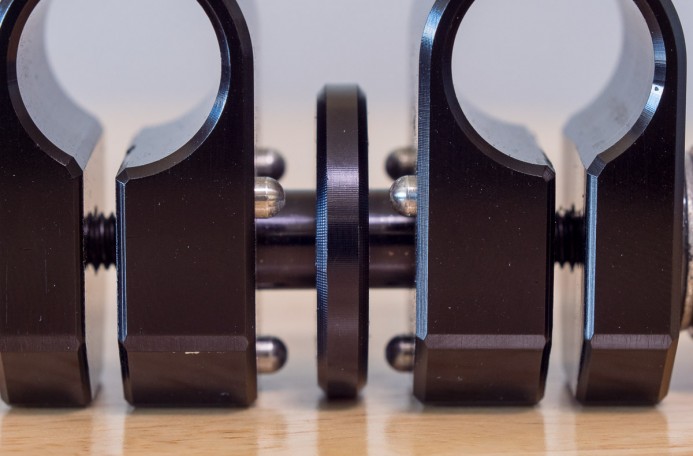
The Zwivel II has the same level of angle adjustment as the original, allowing for 360° of rotation in 30° increments. However, instead of having registration posts on one clamp and reciprocal holes in the other, both clamps now have posts that lock into holes in a central disc that is sandwiched between both clamps.
Also, the Zwivel II’s spring mechanism between the clamps is now internal as opposed to the original Zwivel’s exposed spring. This may help to keep the Zwivel II’s spring mechanism in good working order since it isn’t as exposed to the elements.
Bulking Up
The extra knob and central registration disc add a bit of additional bulk to the Zwivel II, making it slightly wider than the original Zwivel.
That said, I think independent control over each rod clamp is worth the small amount of added bulk.
Ratcheting for the Win
As with all of Zacuto’s current clamps, both of the Zwivel II’s knobs are ratcheting. This allows you to easily reposition the knobs so that they can be adjusted even in tight spaces. The original Zwivel’s knob is not ratcheting, so you need to make sure you have enough clearance to turn the knob.
Bottom line: Same great Zwivel, now with independent locks and rotation for each rod.
Which Zwivel Should You Get?
The Zwivel II has officially replaced the original Zwivel, and for good reason– it’s more secure and more versatile with even fewer compromises than the original.
However, the Zwivel II is $95, which is no small price to pay for a single clamp.
If the Zwivel II is out of your budget, Zacuto still has some original Zwivels on hand for $55 while supplies last. If you don’t need to make frequent adjustments once the angle is set, the original Zwivel is a great option.
Another Option
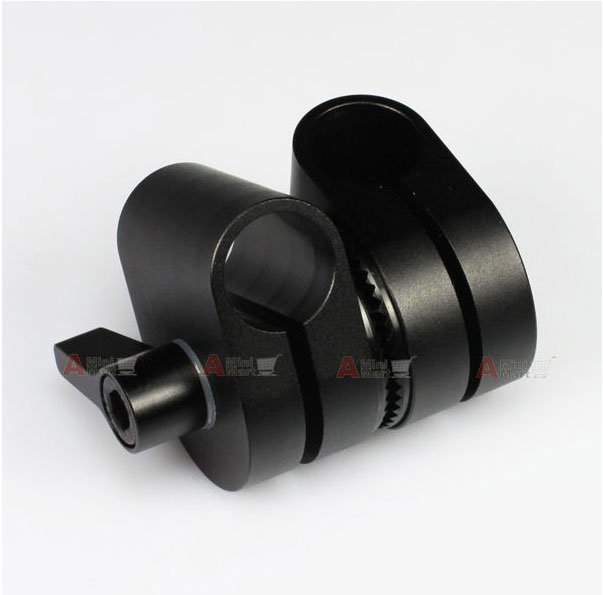
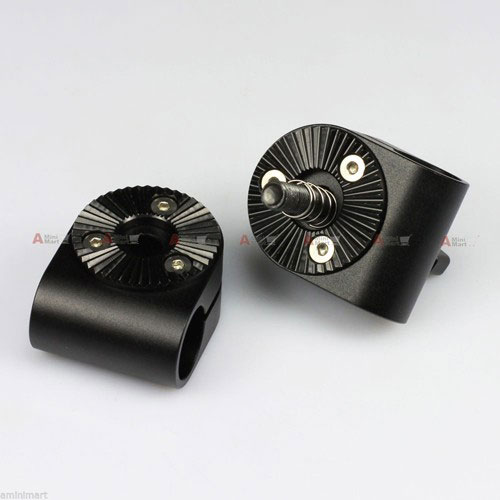
There’s also an alternative rotating clamp that I’ve been meaning to check out.
The single knob design of this clamp is closer to the original Zwivel than the Zwivel II, meaning that both rods are loosened simultaneously.
Like Zacuto’s Zwivel, this clamp can also rotate 360°. Interestingly, this clamp uses a rosette to lock the angle in 9° increments, making it more finely adjustable than the Zwivel.
Here’s the kicker: you can get this rotating clamp for less than $30 (eBay).
The clamp ships from China, so while it will take longer to arrive, it might be a viable option for some. I’m hoping to take a closer look at this clamp in the near future to see how it stacks up to Zacuto’s Zwivels.
Rotating Clamps are Awesome
Here’s the deal: If you’re using camera rig with a chest brace, hand grips, or just want to streamline your rig, a rotating clamp will give you a lot more flexibility and can be used in more situations than standard right-angle or parallel rod clamps.
You can’t really go wrong with either the Zwivel II or the original Zwivel.
Related
Rigging the Panasonic GH4
Cages
- Cage Fight! 5 Cages for the Panasonic GH4
- Wooden Camera Quick Cage Review
- Viewfactor Contineo Cage Review
- SmallRig VersaFrame Cage: First Impressions
- Fhugen Honu Cage Review
Camera Rigs
Rig Components
- Wooden Camera DSLR 15mm Base Review — Expand the Quick Cage using 15mm rods with this base
- Wooden Camera NATO Handle Plus Review — More than just a top handle
- How to Build a Quick-Release Friction Arm for $30
- Quick Comparison: Zacuto Zwivel & Zwivel II
More Panasonic GH4 Guides
- Why You Should Be Excited About the Panasonic GH4
- Lenses for the Panasonic GH4 — Awesome glass for an awesome camera.
- Memory Cards for the Panasonic GH4 — Get the right memory cards for HD and 4K.
- Configuring the Panasonic GH4 for Video Production — Set the GH4 up for filmmaking.
- Rigging the Panasonic GH4 — Cages, Rigs, Components, Gear, and Reviews.
- Stabilizing the Panasonic GH4 — Tripods, Monopods, Sliders, 3-Axis Gimbals, etc.
- Maximizing the Panasonic GH4’s Audio Performance — Sound matters.
- Powering the Panasonic GH4 — Keep the GH4 shooting all day.
- Should you buy the YAGH for the Panasonic GH4?
- 6 Reasons Why DSLR Shooters Love the Panasonic GH4

