Shoot Better Video with these Quick Menu Settings for the Panasonic GH4
When you have a camera that’s packed with as much functionality as the Panasonic GH4, changing settings can take time that you don’t have. The Quick Menu is the solution.
This guide shows you how to configure the GH4’s Quick Menu for video production. Once the Quick Menu is set up, wasting time digging through menus will be a thing of the past.
What is the Quick Menu?
While the GH4’s customizable function buttons are great for toggling simple settings on and off, the Quick Menu provides immediate access to a wide variety of complex settings like recording modes and picture styles.
Furthermore, a function button can only be assigned to a single setting, but the Quick Menu has 15 customizable slots (3 pages with 5 slots each) for settings that can be arranged according to your needs.

Quick Access to the Quick Menu
In order for the Quick Menu to be of any use, it must be assigned to a function button. In fact, this is the only way to launch the Quick Menu.
By default, the Quick Menu is assigned to FN2, but it makes much more sense to assign it to FN1. This way, the Quick Menu is grouped with other buttons that also launch on-screen menus, such as the white balance and ISO buttons.

Further Reading: Panasonic GH4 Function Button Setup Guide
Unlock the Quick Menu’s Full Potential
The GH4’s Quick Menu’s full power is realized by enabling the custom Quick Menu by going to Menu/Custom (7)/Q.Menu and selecting Custom.


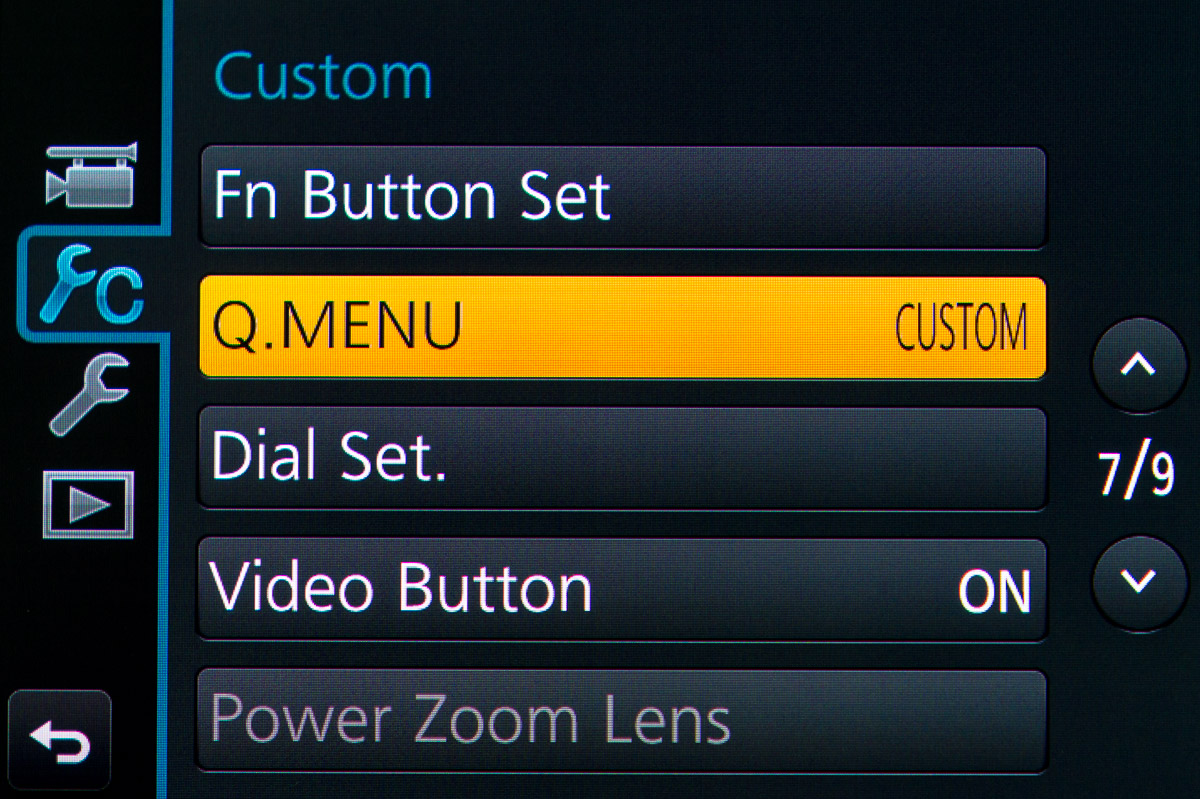
Now instead of simply cycling through the basic settings that are displayed on the screen (shutter speed, aperture, ISO, etc.), you have full control over the settings you have access to in the Quick Menu.
Prepare the Quick Menu
The custom Quick Menu comes prepopulated with settings by default. The first thing you need to do is clear the default settings to make way for your custom setup.
1. Launch the Quick Menu
Press FN1 to launch the Quick Menu

2. Enter Edit Mode
Next, use the touchscreen or the control dial to select the Quick Menu’s wrench icon to enter edit mode.


3. Clear Defaults
Each setting can only be assigned to a single slot in the Quick Menu, so you need to clear the default settings from the slots before you can customize it.
Use the touchscreen or control dial to remove each setting.

Configure the Quick Menu for Video Production
While still in edit mode, assign the following settings to each slot to configure the Quick Menu for video production:
Page 1: Shooting
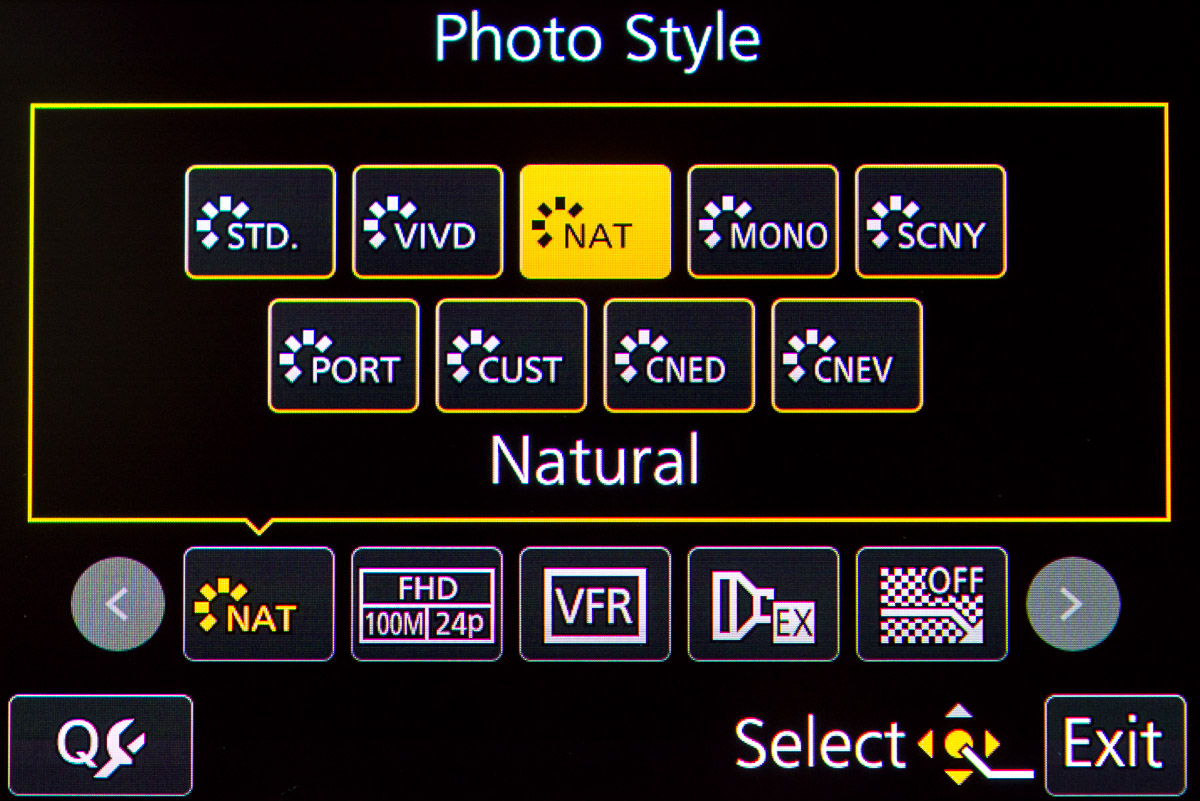
- Photo Style (page 1) — Select from preset and custom-built picture profiles (Cine-D, Cine-V, Natural, etc.).
- Motion Picture Record Quality (page 3) — Select the recording mode (resolution/frame rate/bitrate).
- Variable Frame Rate (page 3) — Choose the frame rate to shoot at when VFR is enabled.
- Extended Tele-Conversion (page 2) — Get closer to the action with a 2.4x magnification of the frame.
- Synchro Scan (page 3) — Reduce flickering by matching the GH4’s shutter speed to the frequency of screens and lights.
Page 2: Tools & Aids
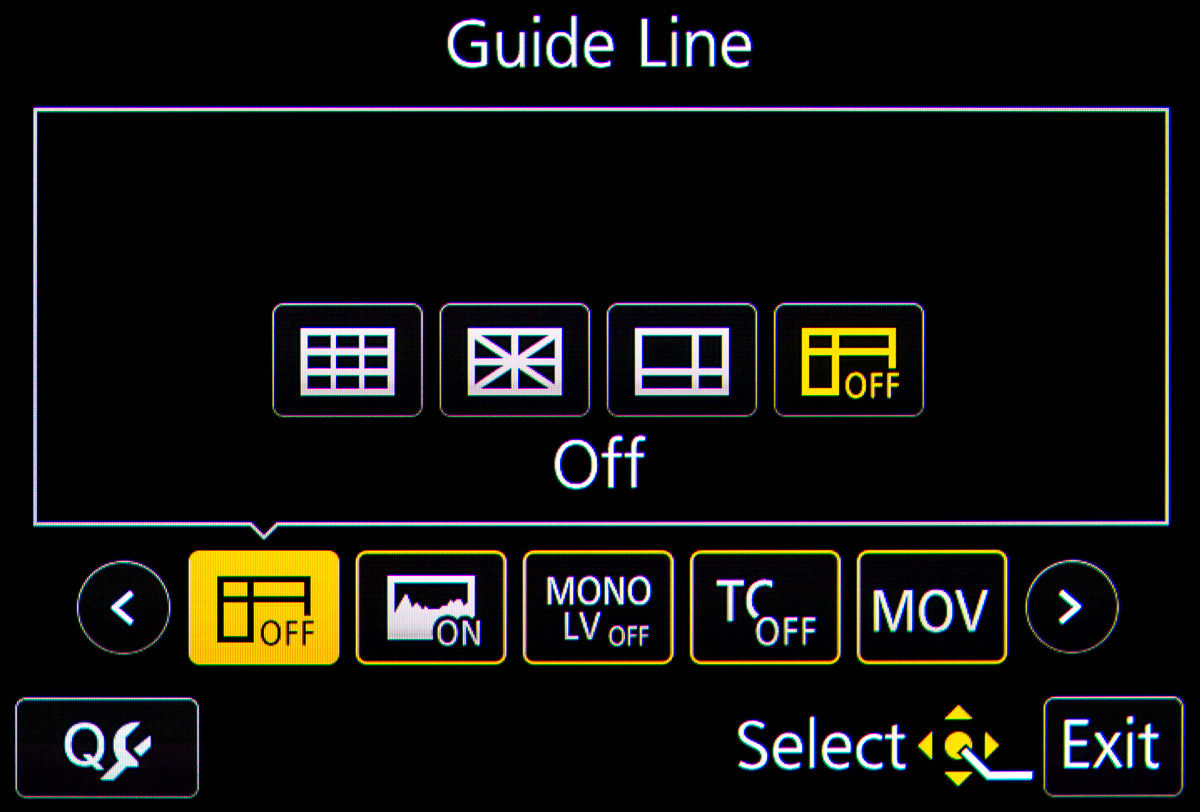
- Guide Line (page 4) — Select and display various guide lines over the image to aid composition and framing.
- Histogram (page 4) — Toggle the histogram display.
- Monochrome Live View (page 4) — Remove color from the EVF/Monitor to help you better gauge contrast and exposure in certain environments (note: video is still captured in color).
- Time Code Display (page 3) — Toggle the display of the current time code on the EVF/Monitor.
- Motion Picture Recording Format (page 3) — Select the file format for video recordings (MOV, MP4, etc.).
Page 3: Stills (Optional)

- Metering Mode (page 1) — Change the mode used to evaluate exposure.
- Flash Adjust (page 2) — Increase or decrease the flash’s output.
- Auto Bracket (page 1) — Select the mode used when taking bracketed exposures.
- Burst Rate (page 1) — Select the continuous shooting speed.
- Self Timer (page 1) — Select the mode used by the self timer.
Note: Page 3 will not be displayed if it is empty, which would allow the Quick Menu to cycle more quickly through the video-specific settings (page 1 and 2). However, if you also shoot stills, adding these settings to page 3 will be useful.
Bring it Together with the Quick Menu
The Quick Menu takes disparate settings spread throughout the GH4’s vast menu system, and brings them into perfect alignment for you. Using the configuration in this guide, you can make major changes to the GH4’s setup in seconds– from shooting 4K at 30fps with a vivid picture profile one moment, to capturing slow motion in HD at 96ps with a natural picture profile.
Now nothing is holding you back from getting the shot just the way you want.
As awesome as the Quick Menu is though, that’s not all the GH4 has to offer. In the next guide, we explore how the GH4’s Custom Profiles allow you to completely transform everything about the camera with the flick of a single switch.
Related
- Panasonic GH4 — A camera that’s almost telepathic once it’s properly configured.
Configuring the Panasonic GH4 for Video
- Panasonic GH4 Configuration Overview
- 5 Minute Quick-Setup Guide
- Fun with Function Buttons: The Best Settings for Filmmakers
- Shoot Better Video with these Quick Menu Settings for the Panasonic GH4
- 5 Custom Profiles to Supercharge the Panasonic GH4 for Video Production
- Unlock the Panasonic GH4’s Full Range of ISO Options
- Why You Should Shoot at 100Mbps (Not 200Mbps)
- Set Up Your GH4 with These Video Guides
- Panasonic GH4’s Shutter Speed Stuck at 1 Second? Here’s the Fix.
V-Log
More Panasonic GH4 Guides
- Why You Should Be Excited About the Panasonic GH4
- Lenses for the Panasonic GH4 — Awesome glass for an awesome camera.
- Memory Cards for the Panasonic GH4 — Get the right memory cards for HD and 4K.
- Configuring the Panasonic GH4 for Video Production — Set the GH4 up for filmmaking.
- Rigging the Panasonic GH4 — Cages, Rigs, Components, Gear, and Reviews.
- Stabilizing the Panasonic GH4 — Tripods, Monopods, Sliders, 3-Axis Gimbals, etc.
- Maximizing the Panasonic GH4’s Audio Performance — Sound matters.
- Powering the Panasonic GH4 — Keep the GH4 shooting all day.
- Should you buy the YAGH for the Panasonic GH4?
- 6 Reasons Why DSLR Shooters Love the Panasonic GH4