The 5-Minute Quick-Setup Guide for the Panasonic GH4
Setting up your camera can be a pain, but it doesn’t have to be.
Whether your Panasonic GH4 is fresh out of the box or you’re just renting the camera for the weekend, this quick-start guide will get the GH4 set up for video production in less than 5 minutes.
Hardware Setup
First, let’s make sure the GH4’s hardware is tuned for video.
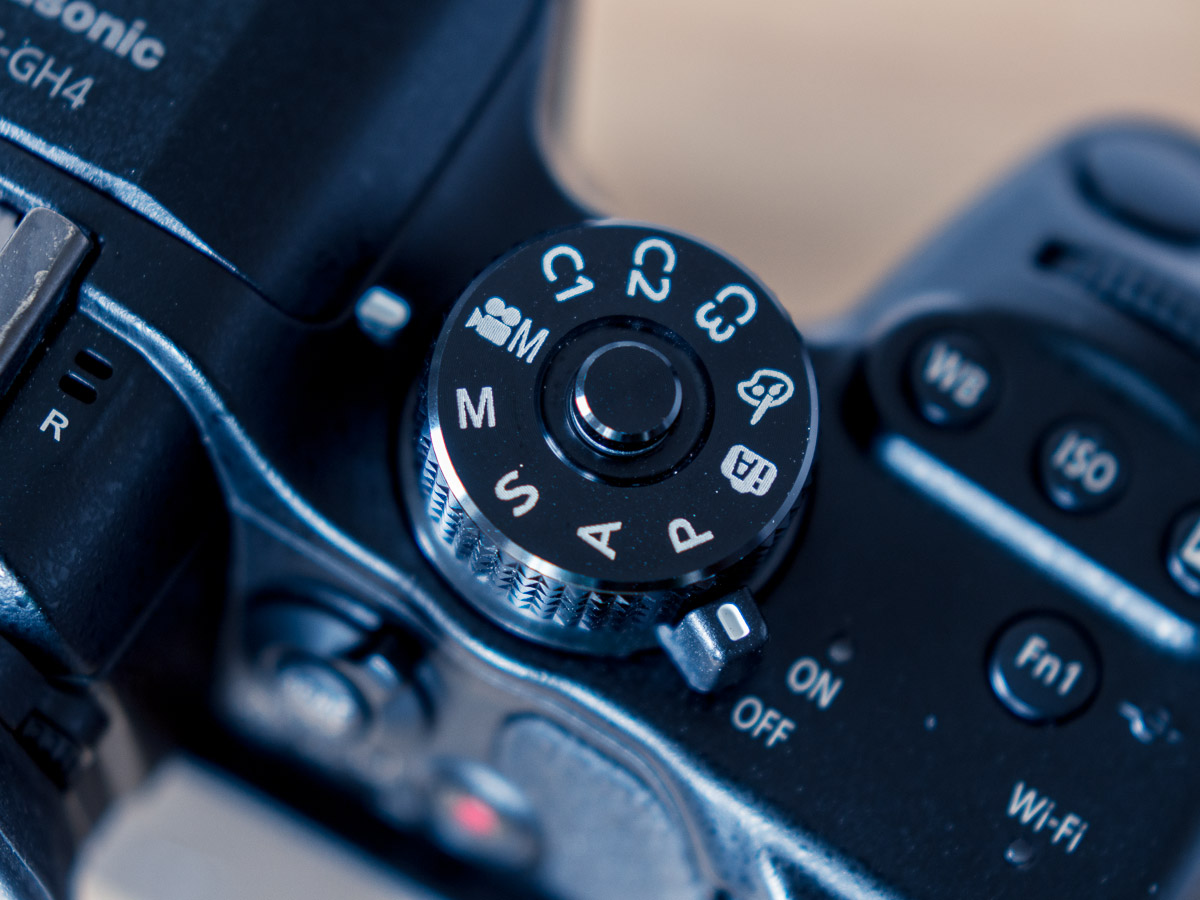
Enable Full Video Functionality
Turn the GH4’s mode dial to Creative Video Mode to enable all of the camera’s video functionality.
Enable Manual Focus
Shooting video with continuous AF is possible on the GH4, but it is slow and there is a high likelihood of focus hunting which will ruin your shot.
For the most control over your shots focus, switch the GH4’s focus mode to manual.
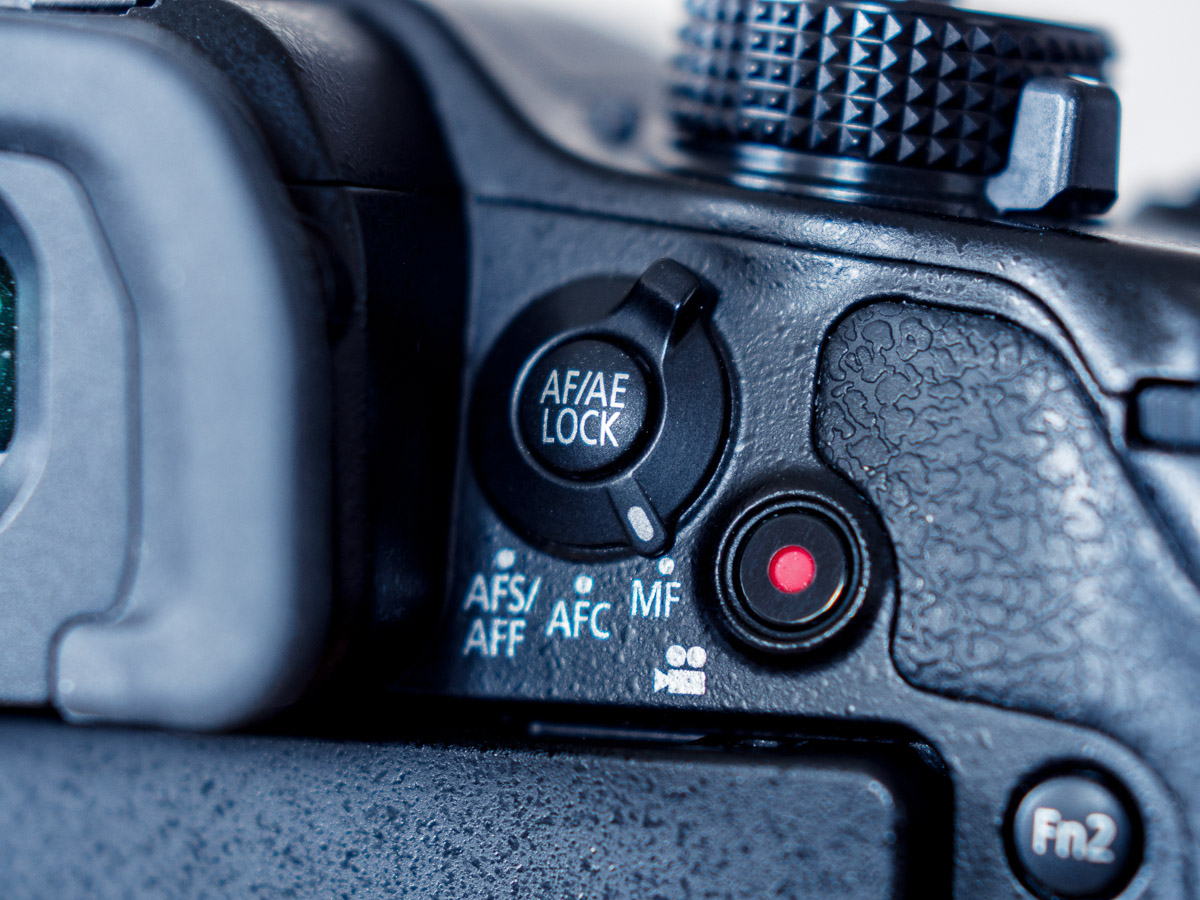
Activate Single Shot Mode
Though you’ll primarily be using the GH4 for video, you should be ready to shoot stills at a moment’s notice. Set the shooting mode to single shot so that the camera operates as expected when you need to shoot stills.

Next, let’s dive into the GH4’s menu:
Pro Tip: Use the fold-out LCD screen to quickly navigate the GH4’s menus as opposed to the EVF.
Reset All Settings
Avoid unexpected behavior due to improper settings by resetting the GH4’s settings to the factory defaults.
Menu/Setup/Page 5/Reset — Reset both recording and custom settings

Set Your Time-Zone
After resetting the GH4’s settings, turn off the camera and then turn it back on. The GH4 will now ask you to set your home area. Select your region on the map and set your time zone.

Next, go back into the GH4’s menu and make the following adjustments:
Note: If a setting is not listed, leave it at the default setting.
Setup Menu

Page 1
- Clock Set — Set the date/time
- Beep
- Beep Volume: Off (option 3)
- E-Shutter Vol: Off (0ption 3)
Page 2
- Headphone Volume: 6
- Monitor Luminance: 1
Page 4
- Menu Information: On — provides information about the selected menu item.
Page 5
- System Frequency: Set according to your region and/or delivery requirements (default: NTSC).
Motion Picture Menu

Page 1
- Photo Style: Skip for now, we’ll come back to this later.
- Rec Format: MOV
- Rec Quality: 4K/100M/24p — provides flexibility in post-production (reframing, downscaling, punch-in, etc.), though you can choose different resolution and frame rates based on your needs.
- Exposure Mode: M — provides full manual control over exposure.
Page 2
- Continuous AF: Off
- Metering Mode: Center Weighted (option 2)
Page 3
- Luminance Level: 0-255 — luminance mapping compatible with most software.
Page 5
- Mic Level Display: On
- Mic Level Adjust: -12dB
Page 6
- Wind Cut: Off
Custom Menu
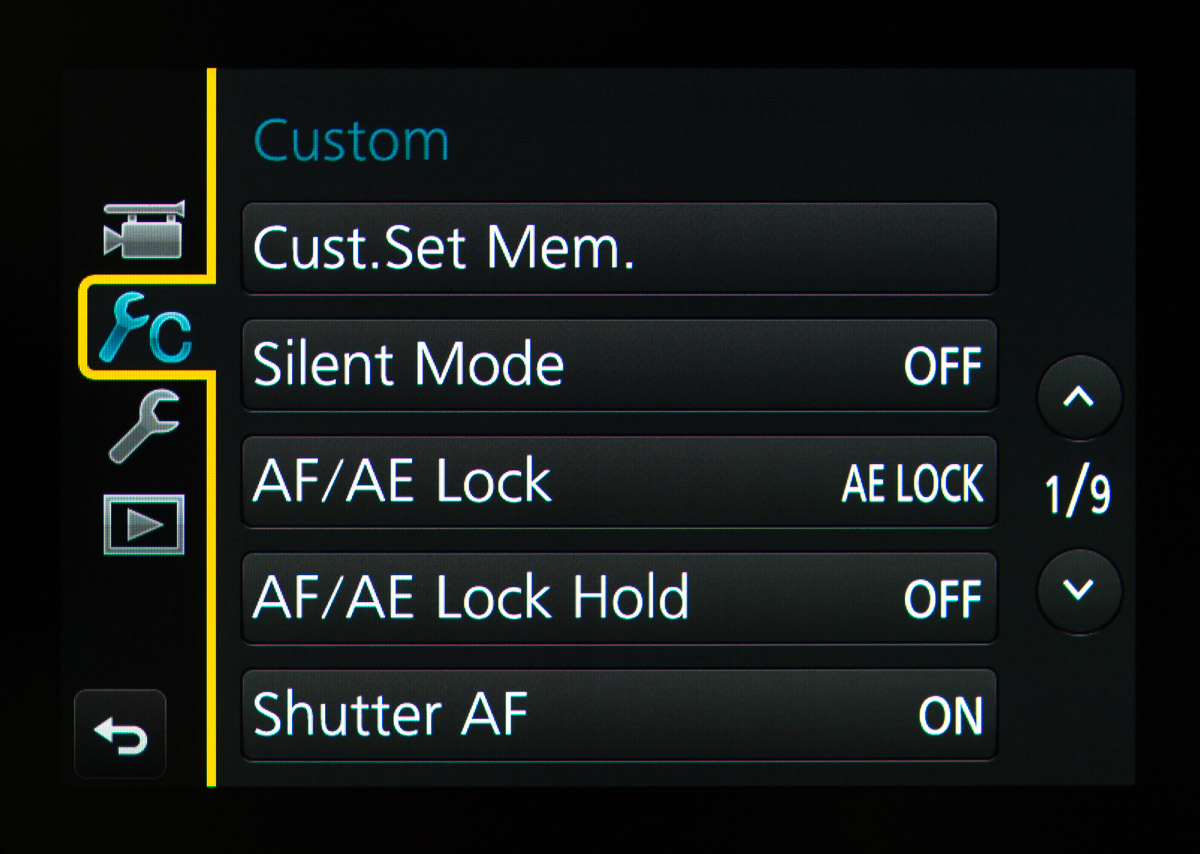
Page 2
- Eye Sensor AF: Off
- AF Assist Lamp: Off
Page 3
- Direct Focus Area: On — allows you to select what part of the frame to use for focus magnification and AF.
- MF Assist: AF Mode Button (option 3) — directly magnify the previously-selected portion of the frame by pressing this hardware button.
Page 4
- Peaking: On
- Set
- Detect level: Low — lowers the threshold for displaying peaking information on the screen.
- Display Color: Orange — easiest color to see in most environments.
- Set
- Histogram: On — Use cursor or touchscreen to position histogram in the lower right corner of the screen.
Page 5
- Zebra Pattern: Zebra 2
- Set
- Zebra 1: 70% — target proper exposure for skin tones.
- Zebra 2: 100% — target overexposed/clipping highlights.
- Set
- Constant Preview: On — dynamically update the display when exposure settings (shutter speed, aperture, & ISO) are changed.
- Exposure Meter: Off
Page 6
- Video-Priority Display: On
Page 7
- Dial Set
- Assign Dial: SS/F (option 2) — adjust shutter speed with front dial, adjust aperture with rear dial.
- Exposure Compensation: Rear Dial (option 2)
Page 8
- Eye Sensor
- Sensitivity: Low
- LVF/Monitor Switch: Mon — automatically switch between monitor or EVF when LCD screen is closed
- Touch Settings/Touch AF: Off
Page 9
- Shoot without Lens: On — allows you to shoot with passive lens adapters (does not affect functionality of native lenses).
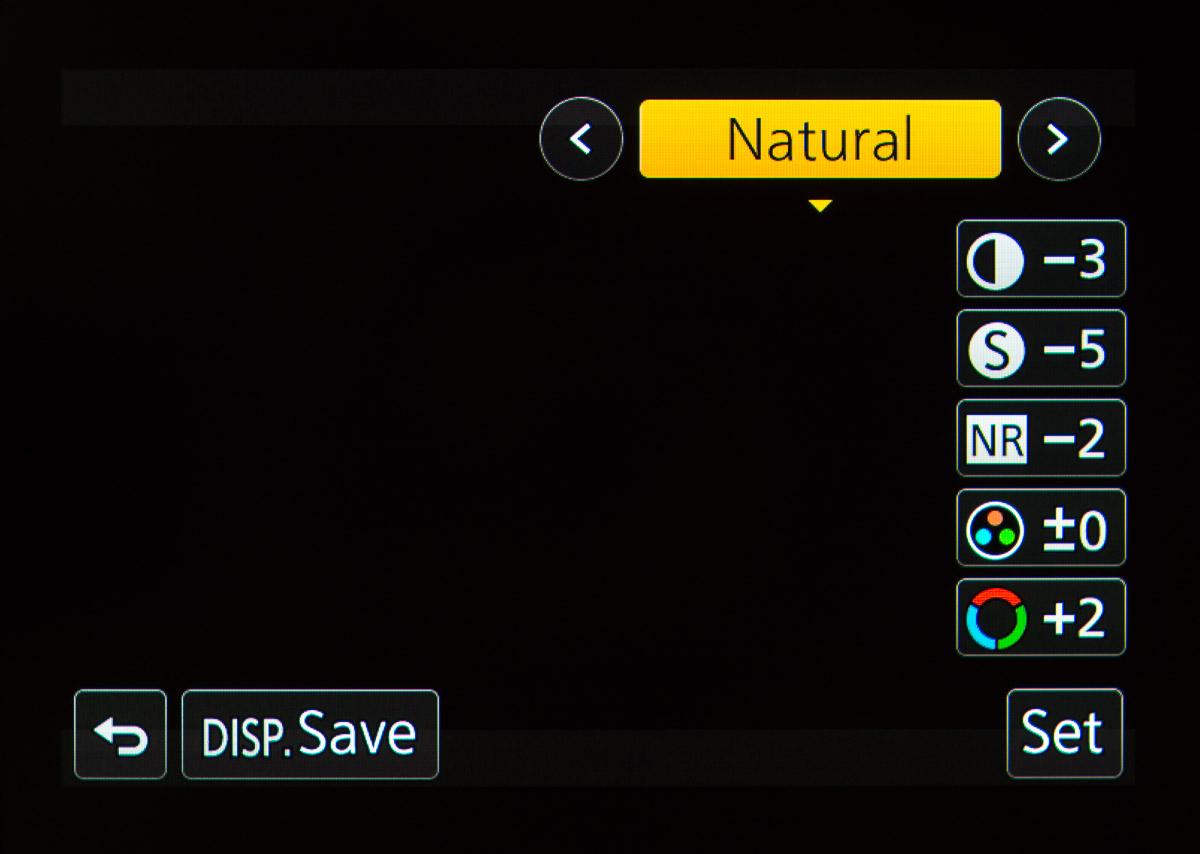
Picture Style
Here are the settings for a balanced picture style for video that delivers a nice image out of the box, while still providing good flexibility for adjustments in post.
- Menu/Motion Picture/Page 1/Photo Style
- Select the Natural profile
- Customize the profile’s parameters:
- Contrast: -3
- Sharpness: -5
- Noise Reduction: -2
- Saturation: 0
- Hue: +2
Set Manual White Balance
Never use automatic white balance when shooting video. AWB can cause shifts in the footage’s color temperature mid-shot, making it difficult to match footage in post-production.
Use the white balance button to select the appropriate white balance setting based on your environment.


- AWB — Do not use.
- Daylight — Natural light (e.g. outdoors).
- Cloudy — Overcast natural light.
- Shade — Shaded natural light.
- Incandescent — Tungsten lighting.
- Custom White Balance (1-4): Save up to 4 custom white balance profiles set using an 18% gray card.
- Manual White Balance: Manually dial in the desired color temperature.
Ready to Shoot
Your GH4 is now ready to shoot video. That was quick. Load up a memory card and get shooting!
Next up: Use Function Buttons for instant access to the settings you need most.
Related
- Panasonic GH4 — A solid video production tool, especially when it’s configured properly.
Configuring the Panasonic GH4 for Video
- Panasonic GH4 Configuration Overview
- 5 Minute Quick-Setup Guide
- Fun with Function Buttons: The Best Settings for Filmmakers
- Shoot Better Video with these Quick Menu Settings for the Panasonic GH4
- 5 Custom Profiles to Supercharge the Panasonic GH4 for Video Production
- Unlock the Panasonic GH4’s Full Range of ISO Options
- Why You Should Shoot at 100Mbps (Not 200Mbps)
- Set Up Your GH4 with These Video Guides
- Panasonic GH4’s Shutter Speed Stuck at 1 Second? Here’s the Fix.
V-Log
More Panasonic GH4 Guides
- Why You Should Be Excited About the Panasonic GH4
- Lenses for the Panasonic GH4 — Awesome glass for an awesome camera.
- Memory Cards for the Panasonic GH4 — Get the right memory cards for HD and 4K.
- Configuring the Panasonic GH4 for Video Production — Set the GH4 up for filmmaking.
- Rigging the Panasonic GH4 — Cages, Rigs, Components, Gear, and Reviews.
- Stabilizing the Panasonic GH4 — Tripods, Monopods, Sliders, 3-Axis Gimbals, etc.
- Maximizing the Panasonic GH4’s Audio Performance — Sound matters.
- Powering the Panasonic GH4 — Keep the GH4 shooting all day.
- Should you buy the YAGH for the Panasonic GH4?
- 6 Reasons Why DSLR Shooters Love the Panasonic GH4