Unlock the Panasonic GH4’s ISO Settings
The GH4’s ISO controls can sometimes feel like you’re trapped in a house with 3 bears– one setting isn’t enough, while the next setting is too much.
All you want is the perfect ISO setting, but instead, you’re stuck in a house with a trio of stubborn bears.
If you find yourself wishing upon a star for more control over the GH4’s ISO settings, here’s a quick tip to triple the number of ISO options, so that you’ll always be able to find an ISO setting that’s just right.
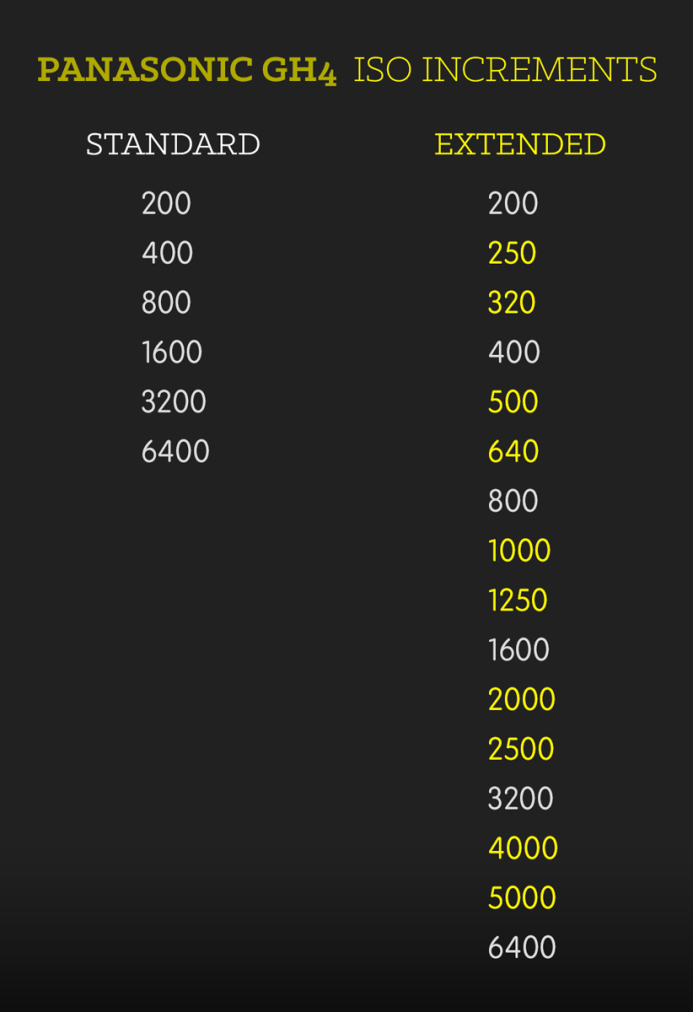
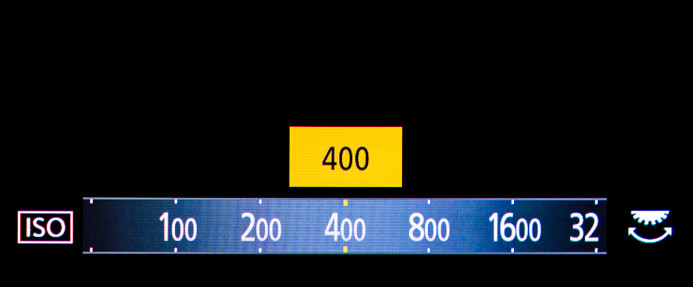
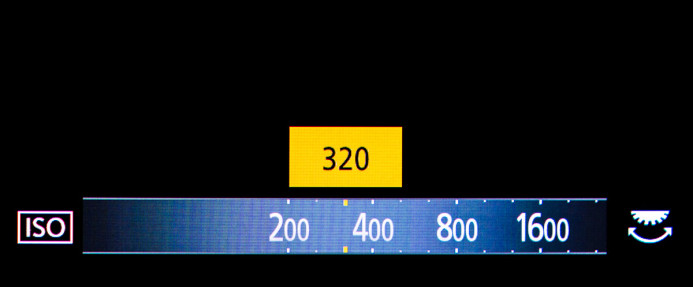
By default, the GH4 adjusts the ISO in 1 stop steps (200, 400, 800, 1600, etc.), but with this simple tweak, you’ll be able to adjust ISO in 1/3 stop increments (200, 250, 320, 400, 500, 640, 800, etc.).
Here’s a comparison of the ISO settings you have access to before and after the tweak:
Why Haven’t I Heard About This Before?
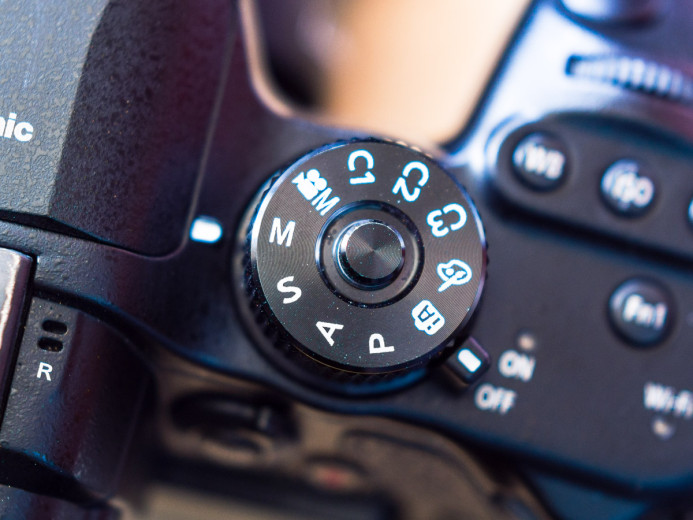
There’s a good reason you haven’t already come across this setting, especially if you use the GH4 primarily for video– the setting is hidden in the Photo menu.
Weird, right? There’s no rhyme or reason to the setting’s placement, especially since it’s fully functional when shooting video as well. Unfortunately, the Photo menu is inaccessible when the camera is set to video mode, so it’s possible that you never would have found this setting if you primarily use the GH4 for video work.
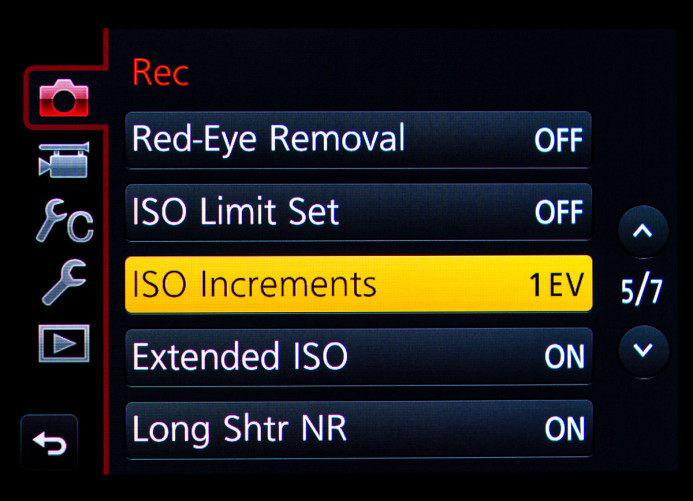
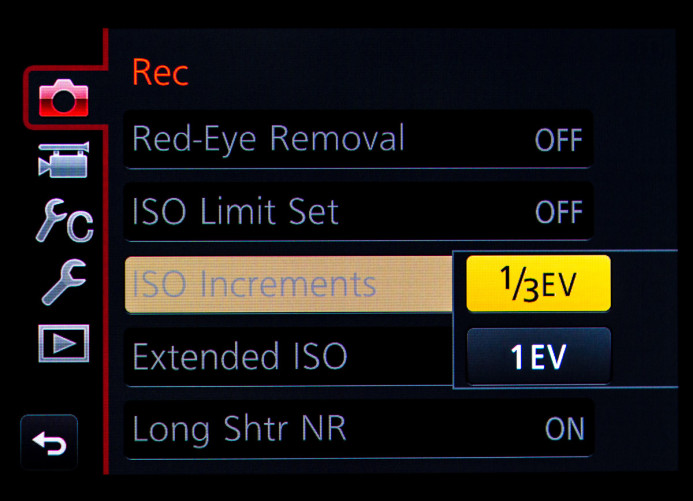
Thankfully, once you know where to look, extending the GH4’s ISO increments is dead simple. Here are the step-by-step instructions:
Instructions
Now when you open the GH4’s ISO settings, you’ll be greeted with a lot more granularity over ISO for setting your exposure.
Standard ISO increments:
Extended ISO increments:
Important: Remember to resave your custom profiles after you’ve unlocked the extended ISO increments so that you’ll have access to the increased range of ISO options when using the custom profiles as well.
More ISO Options FTW?
Does everyone need more ISO increments? No. Many shooters are happy with the standard 1 stop increments. However, if you’ve been wishing for a way to get that perfect ISO, this quick tweak may be what you need.
Now get out of that house– bears can get grumpy, especially around lunch time.
Related
- Panasonic GH4 — This camera is full of secrets, but once you get it set up properly, it’s usually just right for any situation.
- The Story of the Three Bears — Who are these bears you speak of?
Configuring the Panasonic GH4 for Video
- Panasonic GH4 Configuration Overview
- 5 Minute Quick-Setup Guide
- Fun with Function Buttons: The Best Settings for Filmmakers
- Shoot Better Video with these Quick Menu Settings for the Panasonic GH4
- 5 Custom Profiles to Supercharge the Panasonic GH4 for Video Production
- Unlock the Panasonic GH4’s Full Range of ISO Options
- Why You Should Shoot at 100Mbps (Not 200Mbps)
- Set Up Your GH4 with These Video Guides
- Panasonic GH4’s Shutter Speed Stuck at 1 Second? Here’s the Fix.
V-Log
More Panasonic GH4 Guides
- Why You Should Be Excited About the Panasonic GH4
- Lenses for the Panasonic GH4 — Awesome glass for an awesome camera.
- Memory Cards for the Panasonic GH4 — Get the right memory cards for HD and 4K.
- Configuring the Panasonic GH4 for Video Production — Set the GH4 up for filmmaking.
- Rigging the Panasonic GH4 — Cages, Rigs, Components, Gear, and Reviews.
- Stabilizing the Panasonic GH4 — Tripods, Monopods, Sliders, 3-Axis Gimbals, etc.
- Maximizing the Panasonic GH4’s Audio Performance — Sound matters.
- Powering the Panasonic GH4 — Keep the GH4 shooting all day.
- Should you buy the YAGH for the Panasonic GH4?
- 6 Reasons Why DSLR Shooters Love the Panasonic GH4
